This is a Crane Bird Realistic Painting Step-by-Step Tutorial for Beginners. It is quite a fun and creative art and craft activity. It will help you practice basic painting skills.
This is a Crane Bird Realistic Painting Step-by-Step Tutorial for Beginners. It is quite a fun and creative craft activity. It is apt and fitting for kids of ages around five and above. It is a beginner-level craft activity. It involves basic and simple painting. It will help the kids to practice their painting skills and improve. This way it can help the kids to get started with painting at a very young age.
It is not too time-consuming activity so you just need a little time for this. It is a realistic painting and will help the kids to understand more about cranes as well. From the step-by-step tutorial down below, you will be able to make it quite easily. Well, let us get started already.
Beautiful Crane Bird Realistic Painting For Beginners
Must Read: Handprint Crane Painting Tutorial For Beginners
Tools & Supplies
- A White Sheet of Paper
- A Pair of Scissors
- A Pencil and an Eraser
- Paint Brushes
- Black Paint
- White Paint
- Red Paint
- A Toothbrush
- Colored Paints (Blue, Red, Yellow, Green Etc.)
Crane Bird Painting Instructions
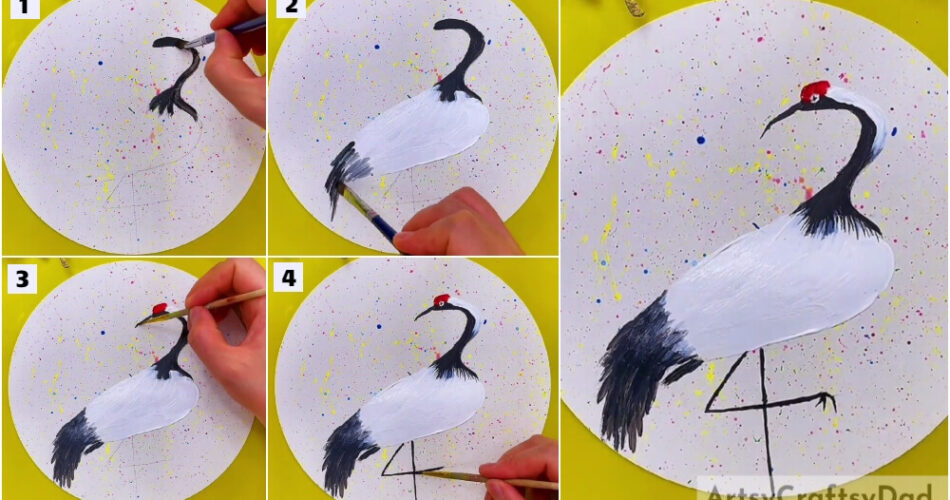
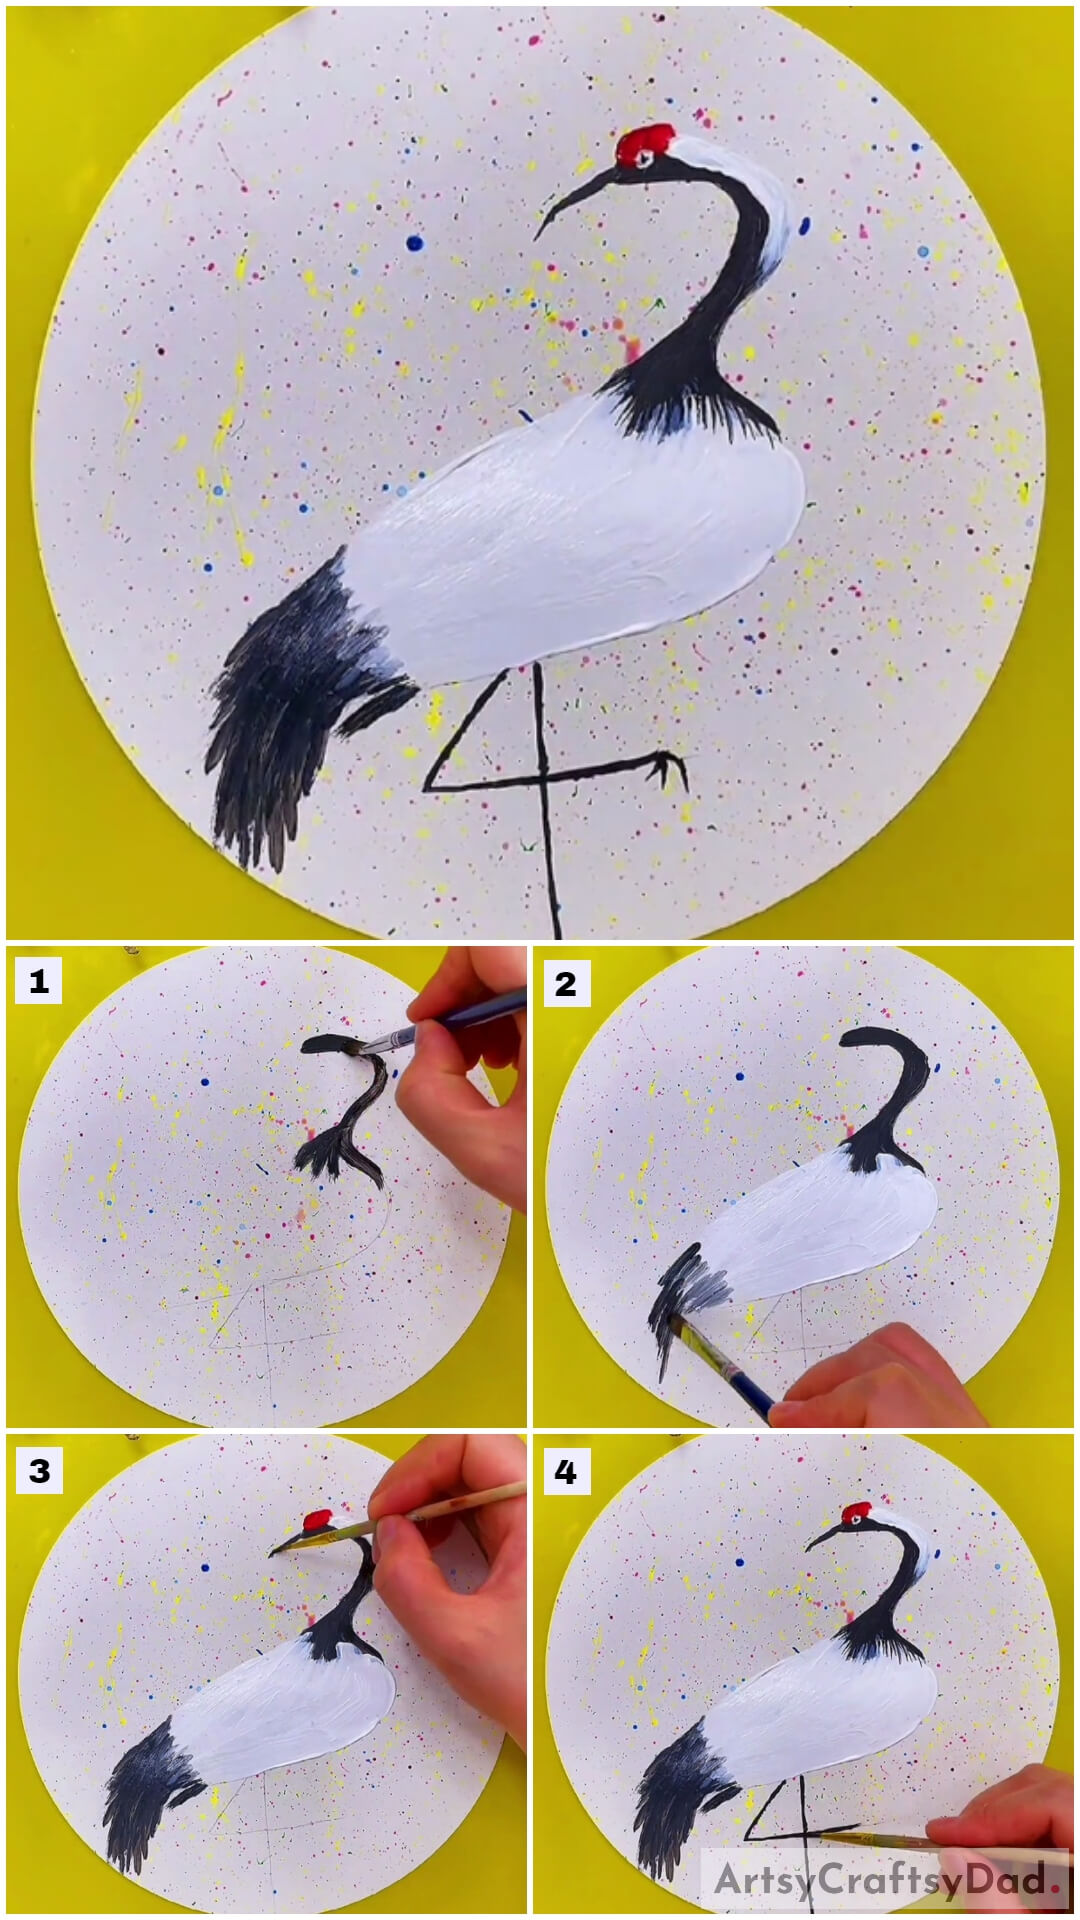
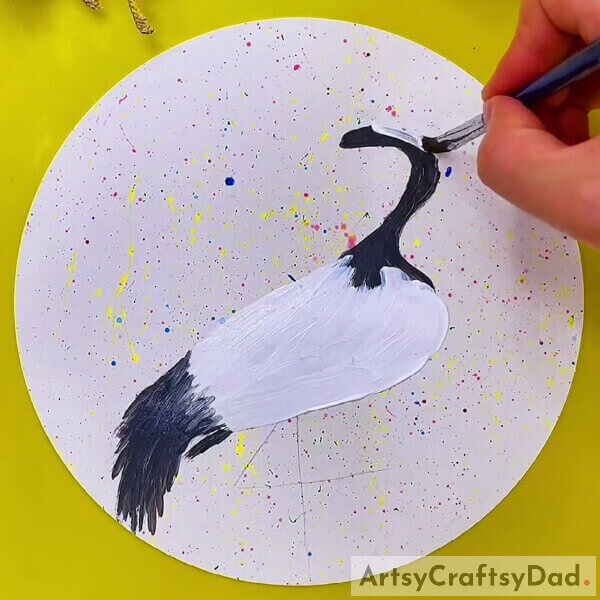
Step #1: Making A Crane And Start To Paint Its Neck And Head
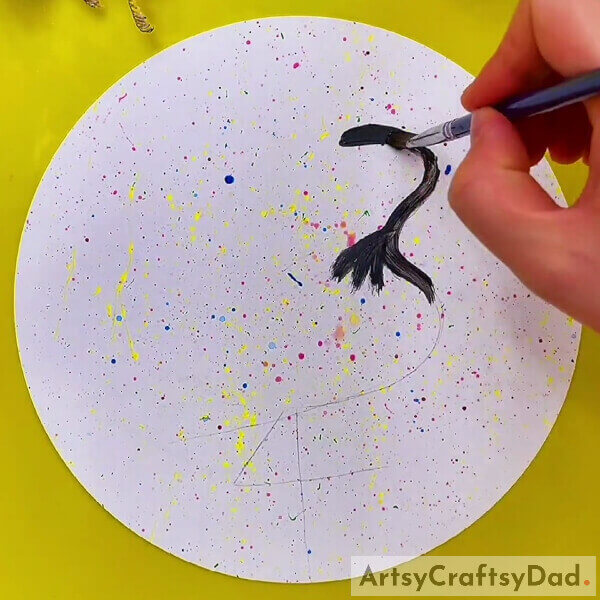
First of all, get a white sheet of paper and cut a circle out of it. Grab a toothbrush, it could also be a used one. Dip the toothbrush in colored paints, like blue, red, yellow, etc. Now, stoke your thumb on the toothbrush towards the paper and you will get the spotted background, as in the image. Do it lightly otherwise there will be too big of spots on the paper. Do it all around the sheet and do not focus on any specific portion.
After the background is done, make the drawing of a crane using a pencil. Get some black paint and a paintbrush. Get a thin paintbrush, not too thick. Start painting the head and the neck of the crane till the upper body. Take the help and assistance of the reference image above.
Step #2: After The Neck, Begin To Paint The Body Of The Crane Using White Paint
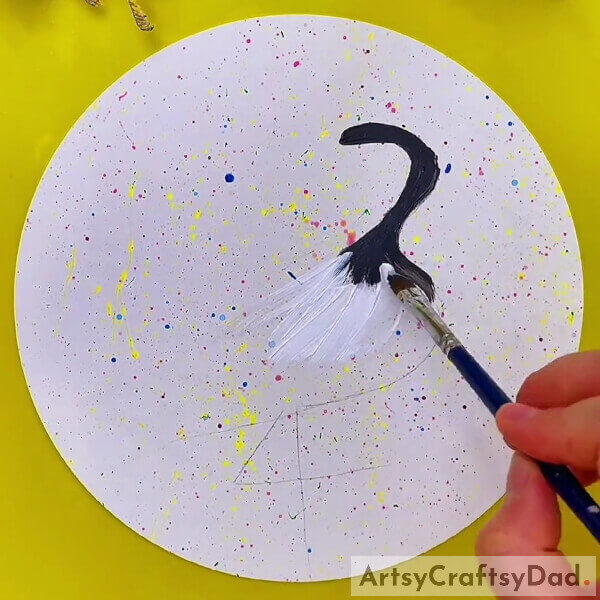
After you are done with the black paint, grab some white paint and a paintbrush. Paint the body of the crane. See that you do not blend in the black and white together and do not keep an unpainted portion either.
Step #3: Painting The Lower Body Of The Crane

Grab the black paint again. Now, make strokes using the paintbrush. The black and white paint will start blending on its own. Do not color, just make the strokes. Let the colors mix up on their own.
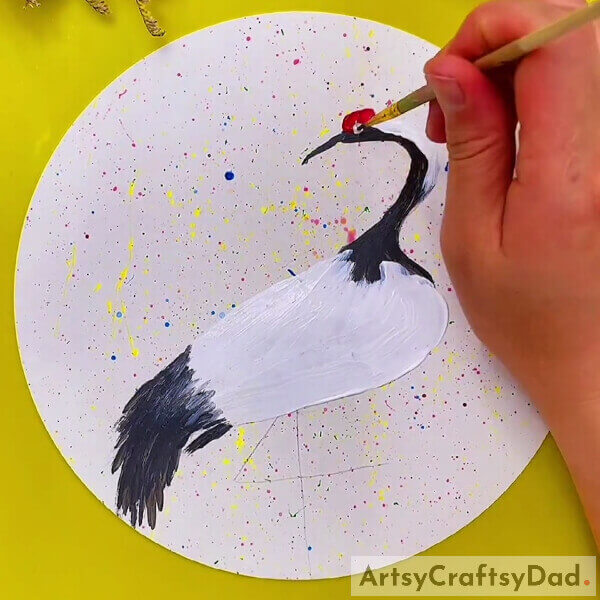
Step #4: Painting The Upper Side Of The Head Of The Crane
Make the feathers using black paint by the method of stroking. It will have a good effect. Take the help of the image above. Using the white paint, paint the upper side of the head of the crane. Keep looking at the image and do accordingly.
Step #5: Painting Some Red Paint Beside The Beak And Above The Black
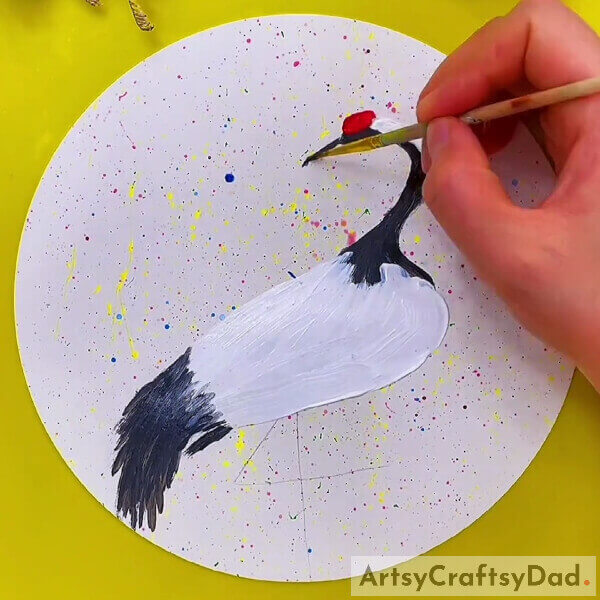
With the help of red paint, paint the right beside the beak of the crane, above the black. It must be half red and half black. Paint the beak of the crane in black. Use a thin round brush for this.
Step #6: Making The Eye In The Center
Take the thinnest round brush that you have. Make the eye of the crane using white-colored paint. Make a circle eye. Paint it right between the red and the black portion. Do not make the eye too big, make it small and make it round.
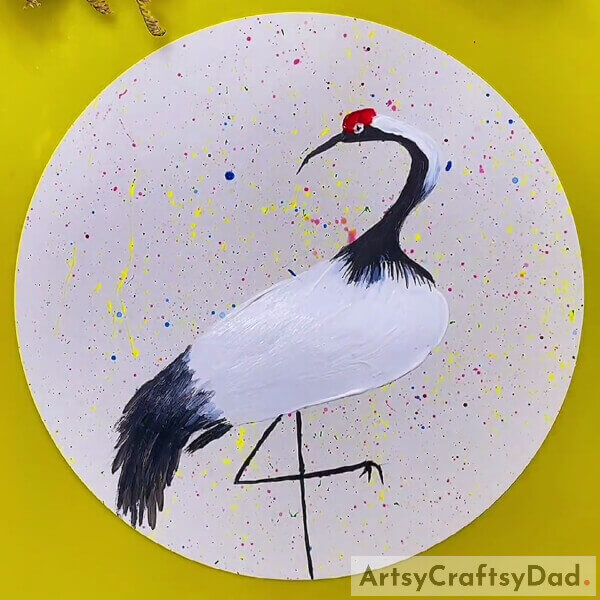
Step #7: Making The Feet And Legs Of The Crane
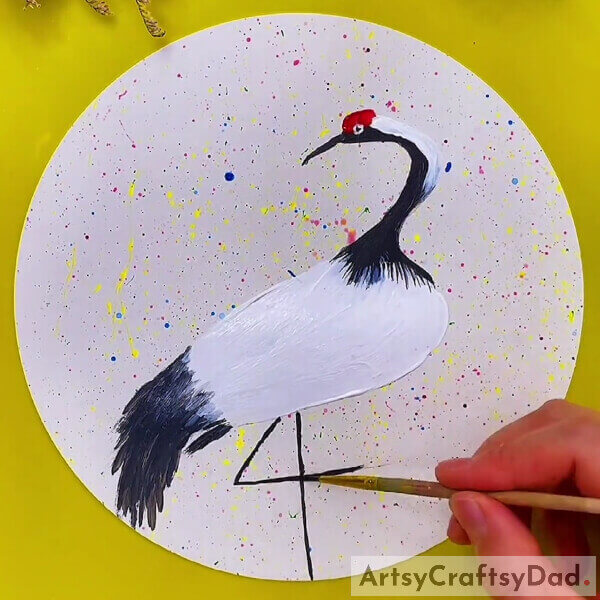
Using that thinnest brush, make the legs of the crane. Together, it looks as if it is the number four. Do not put too much pressure on the brush because you want the line to be thin. And well, this was the last and final step of the painting.
Here It Is! The Final Image Of The Crane!
It was easy, right? Well, you have made it through the basics. You might have learned a little something from this painting. You can make more cranes or some trees or plants or sky well, anything, literally.
For more art and craft articles, tutorials, and ideas, go to the main website and check them out. Also, do mention your ideas suggestions reviews, or anything in the comments section. We hope you like it.
Thank you.
You May Also Like
- Colorful Parrot Painting Tutorial For Beginners
- Hand Impression Cactus Painting Tutorial For Beginners
- Turnip Stamp Painting Tutorial For Beginners
- Circle Stamp Capsicum Painting Tutorial For Beginners
- Ant In Ground Holes – Realistic Craft Tutorial


