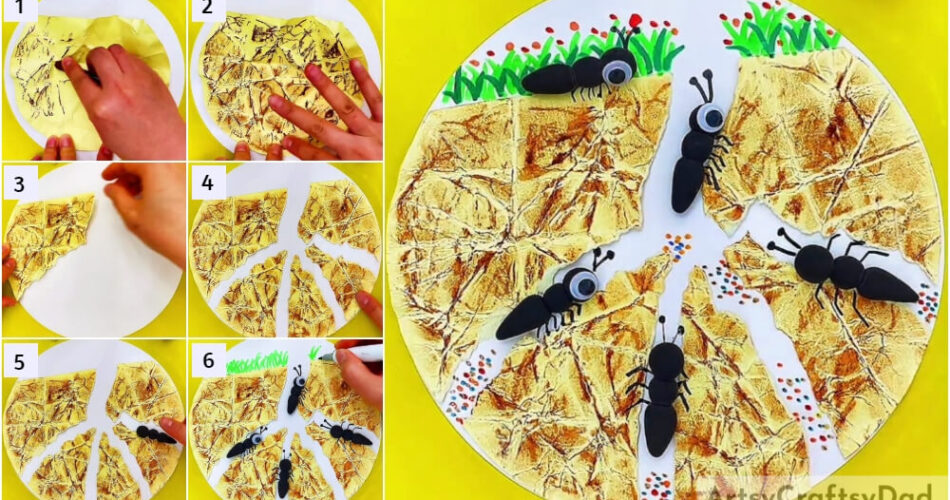
Ants are fascination creatures. Have you ever observed their activities? Well, here is an Ant in Ground Holes Craft – Realistic . Let us present the scene of ants making their way upon the ground.
This is an Ant in Ground Holes Craft – Realistic Craft Tutorial. If, however, you do have watched and observed ants slowly coming out of their burrows and tunnels towards the ground, you will love doing this activity and if in case not, then also you will anyways love doing this; it will give you a reason to do it the next time you see some ants. It is a very fun and interesting craft activity. It is realistic in nature. It will help you to learn to observe your surroundings more closely and pay attention to minute things and details in nature. It is quite apt for kids of ages around three and above and also for adult. The fun and learning sync well and that is a definite guarantee. Let us get started now.
by Pragati Jain
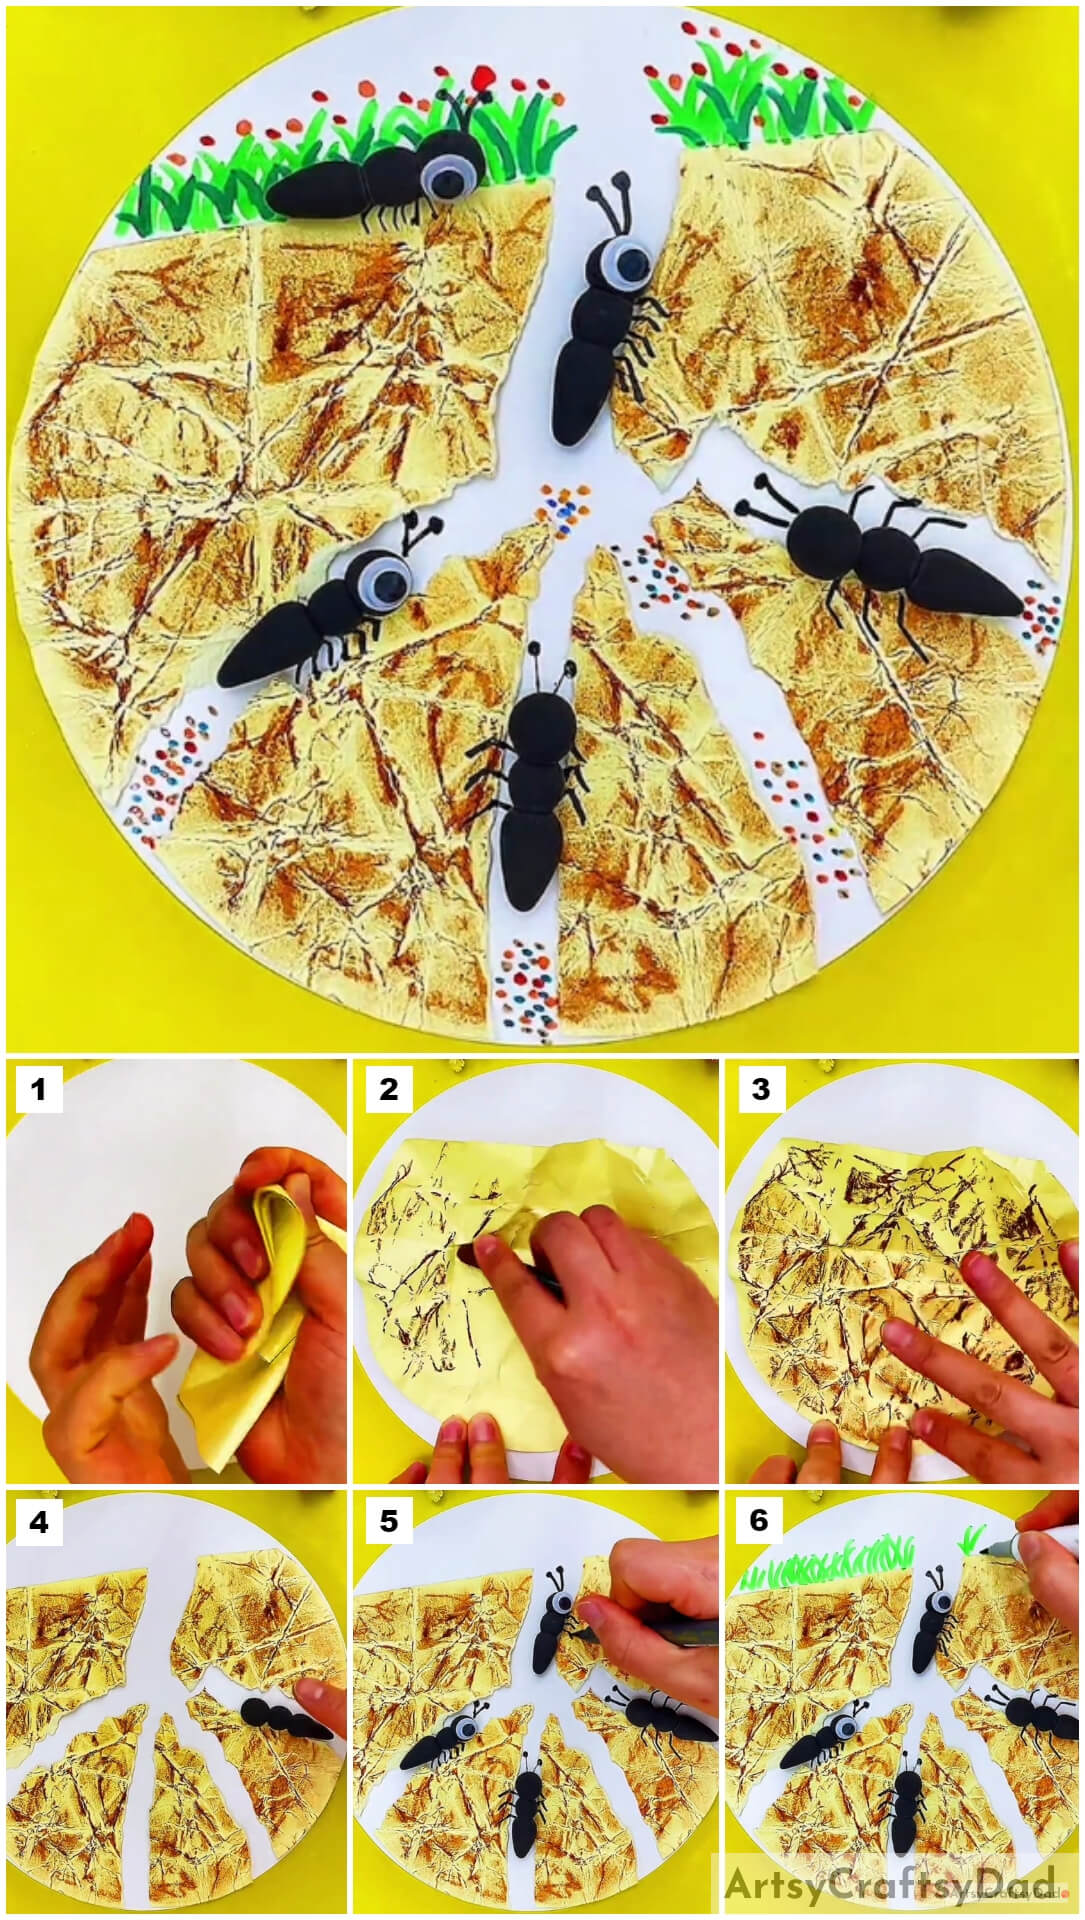
Realistic Ant Holes Craft Tutorial for Kids
Must Read: Peacock Stamp Painting With Hacks Tutorial
Supplies & Tools
- A white sheet of paper
- A yellow sheet of paper
- A pair of Scissors
- A Glue
- A Black Sketch Pen or marker
- Some black clay
- A brown wax crayon.
- A pair of googly eyes
- A red colored sketch pen
- An orange – colored sketch pen
- A light green colored sketch pen
- A dark green colored sketch pen
- A dark blue colored sketch pen
Ant Holes Instructions
Step #1: Taking A Yellow Sheet Paper

Pick a plain, yellow sheet of paper and a pair of scissors along with it. Cut the sheet into a circle. After you have the circle, cut a little segment out of it as shown in the image presented right above.
Step #2: Taking The Bigger Segment And Crumble It

After cutting off a small segment, grab the larger segment. Fold it into and then crumble it. Do not crumble it the extent that the sheet has lost all its qualities; just crush it enough to get the creases.
Step #3: Tracing The Creases Using Dark Brown Wax Crayon
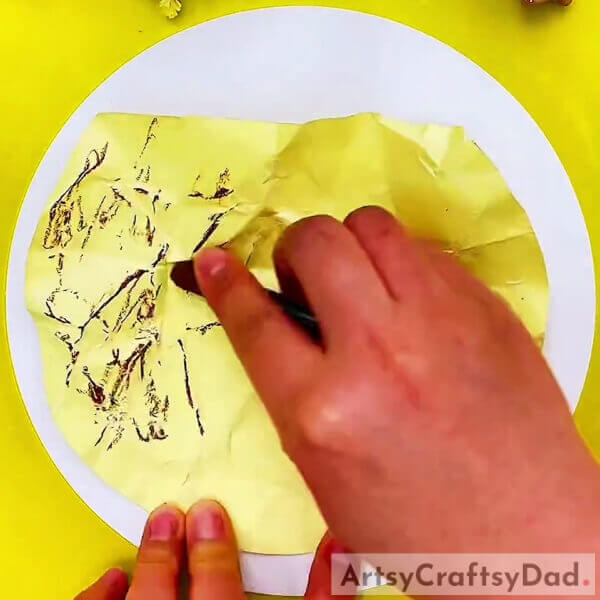
Now that you have the creases which give the absolute cracks in the ground effect, get a dark brown wax crayon. Hold the dark brown wax crayon very light-handedly and very loosely with just enough pressure that it only touches the sheet. Move the crayon, tracing the creases and a bit around.
Step #4: Highlighted The Cracks, Using Your Finger

The next step after the Brow wax crayon is to slowly smudge it. Make sure you do not smudge it to the extent where the paper literally has a crack and tears off. Use your other hand to support the paper. Keep the pressure light while smudging; you do not need to make haste.
Step #5: Tearing Of A Part Of The Sheet

In this step, you need to tear off a piece of sheet. Take the help of the image. Tear it off slowly so you do not end up tearing off the entire sheet into halves.
Step #6: Pasting The Torn Segment
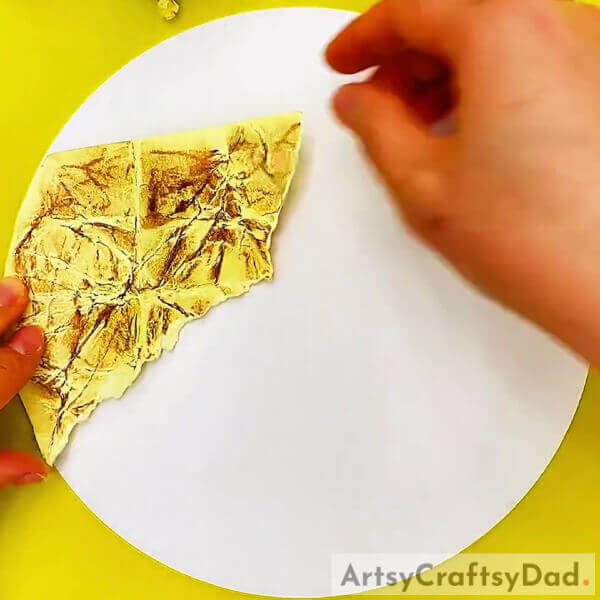
Take a white sheet now and paste that torn segment on this white sheet. Paste it along the circumference.
Step #7: Do The Same Till You End Up With Five Segments
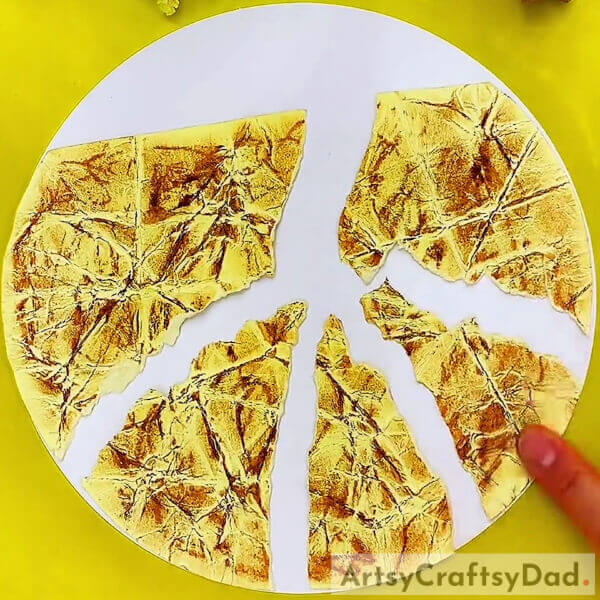
Using the same technique, continue to do the same until you get five segments in total. Take the assistance of the reference image above.
Step #8: Making Ant Using Black Clay
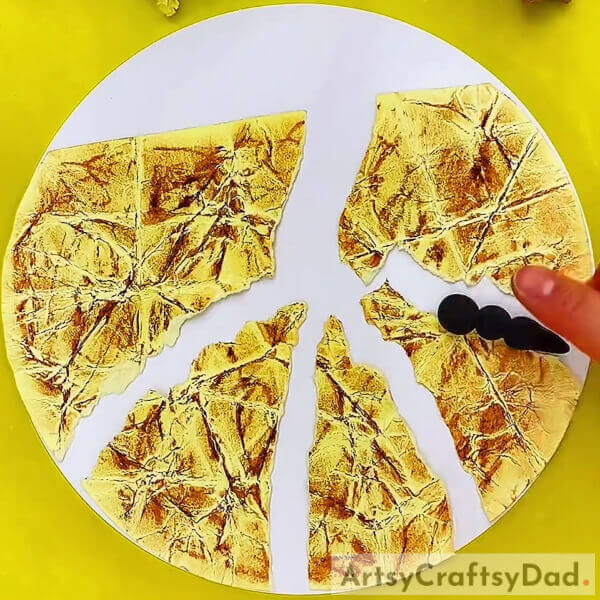
Take some black clay. Make an ant out of it but molding three circles and a curved triangle.
Step #9: Making Three More Ants And Add The Eyes
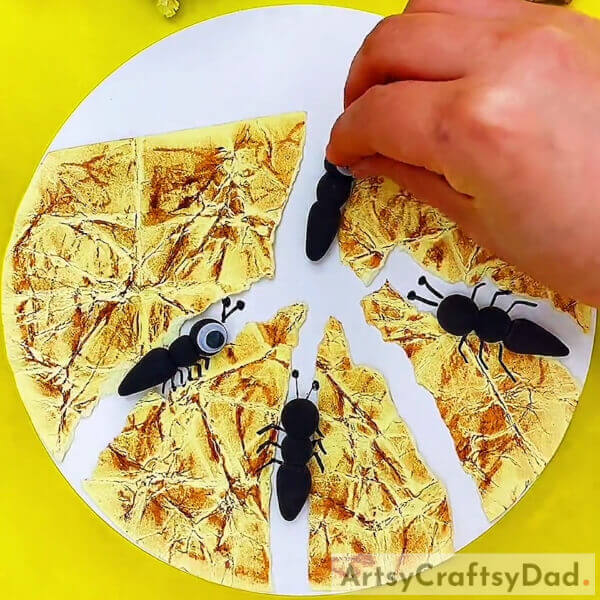
Mold four ants in total using the same technique. Stick a googly eye on two of the ants’ face. Use the above image as the reference.
Step #10: Making The Feet
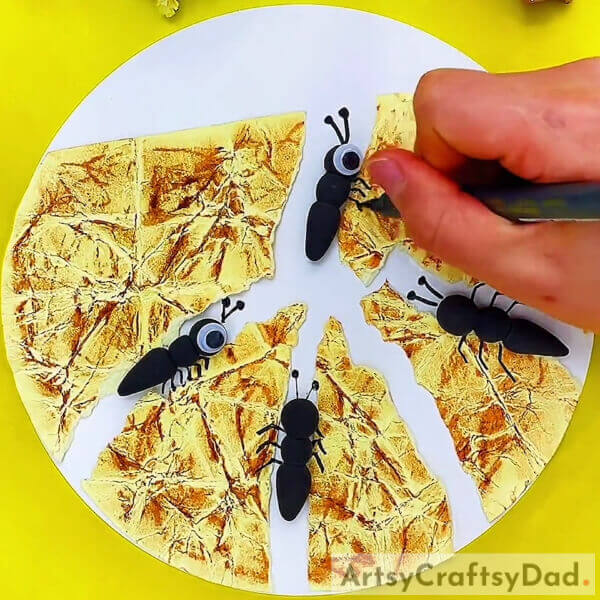
Make the feet of the ants using a black sketch pen.
Step #11: Making Some Grass
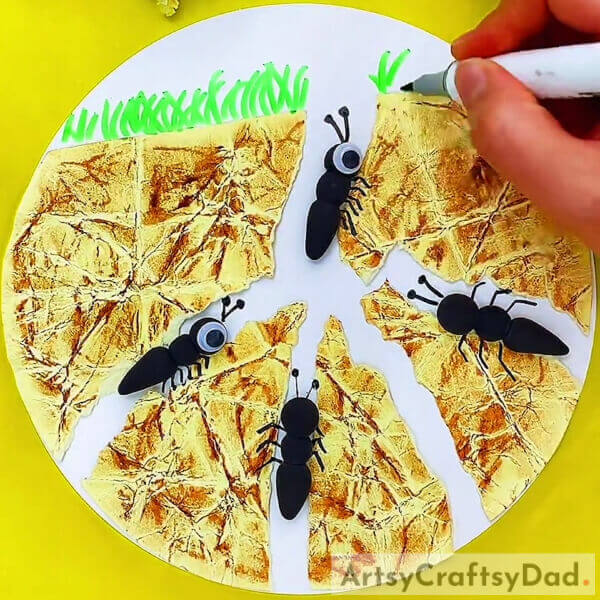
Take a light green colored sketch pen and make the grass upon the ground. Make strokes to get the same effect as in the image above.
Step #12: Continue, Making The Grass Using Green Sketch Pen

Continue to make the grass but this time using a dark green colored sketch pen. Use the same stroking technique.
Step #13: Making Some Flowers Using Colored Sketch Pen
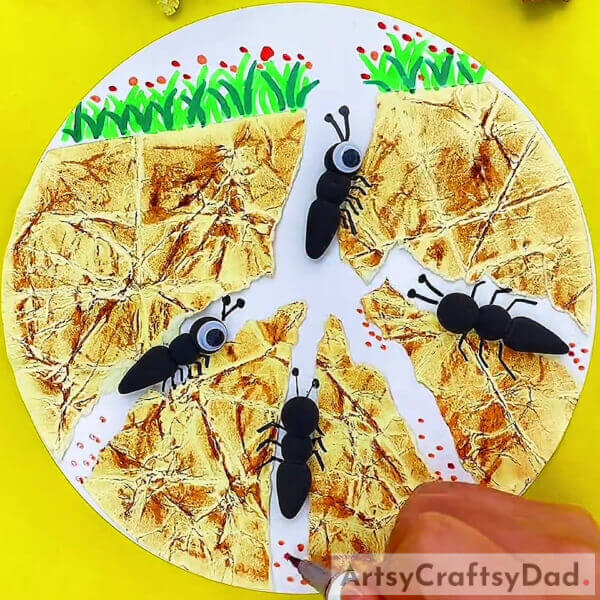
Grab a red and an orange sketch pen and make dots above the grass to give a floral effect and in the cracks of the ground as well, as in the reference image presented above. Make the dots in the cracks from a dark blue colored sketch pen as well.
Voila! Ant In Ground Holes Craft – Realistic Craft

This is the realistic view of ants walking out of the holes, to upon the ground.
We hope you enjoyed making this and have learned something in the process as well. Now that you have made this using the tutorial, you can go out and observe the surroundings and perhaps try something different on your own. Or maybe you can use this idea and technique and represent some other ant activity. Well, the options are endless. And for more ideas, articles, tutorials, or anything with respect to art and craft, make sure to check out the main website. There are abundant resources there that can assist or inspire you. There are a lot of varieties too, so you will definitely find something that will catch your eye.
Also, do leave your opinions, experiences of making this, suggestions, or anything, else in the comments section. We would be thrilled to hear from you. Thank you so much for your time and for visiting our website.
Have a nice and pleasant day.
You May Also Like
- Clay Snails On Leaves Craft Tutorial For Kids
- Simple Paper Tearing Flowers Craft Tutorial
- Clay-Paper Sunflower Garden Craft Tutorial
- Clay Heart Leaf Tree Craft Tutorial For Kids
- Clay Chicks In Garden Craft Tutorial


