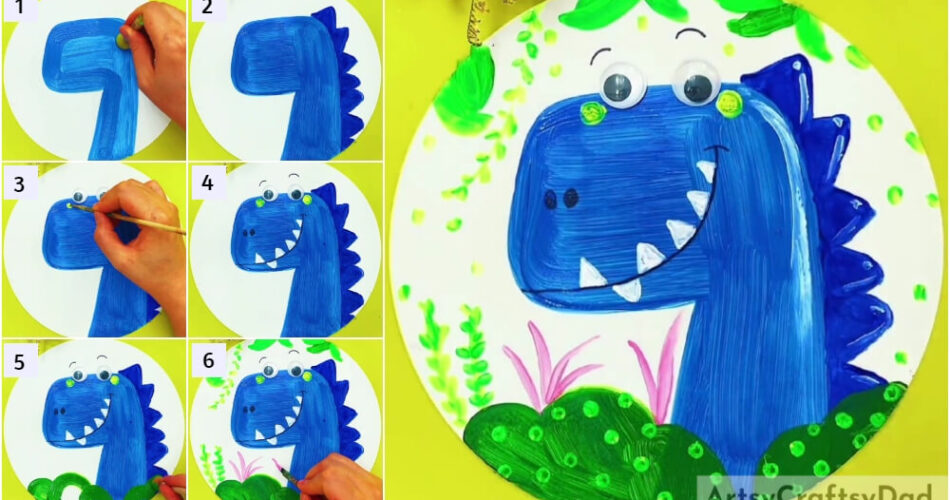
Dinosaurs are said to be dangerous and ferocious animals, but we will change this belief! This tutorial has a cute one in a painting!
Hey little artist! You might have seen in movies how big and dangerous dinosaurs are. But, ever imagined, what if they are cute? Well, sticking to this idea, we made a painting on it! We would like to teach you too through this step-by-step tutorial! We will show you how to make a dinosaur painting easily which will turn out adorable! You will definitely love the results and will have fun in this art-making! So, grab the listed materials, and let’s begin!
Simple Dinosaur Stamp Painting For Kids
Must Read: Cabbage Stamp Roses Painting Tutorial
Supplies & Tools
- White Circular Paper Sheet
- Paintbrushes (Flat And Rounded)
- Paint Colors (Light And Dark Blue And Green, Yellow, White And Pink)
- Cotton Earbud
- Circle Stamp
- Googly Eyes
- Glue
- Black Marker
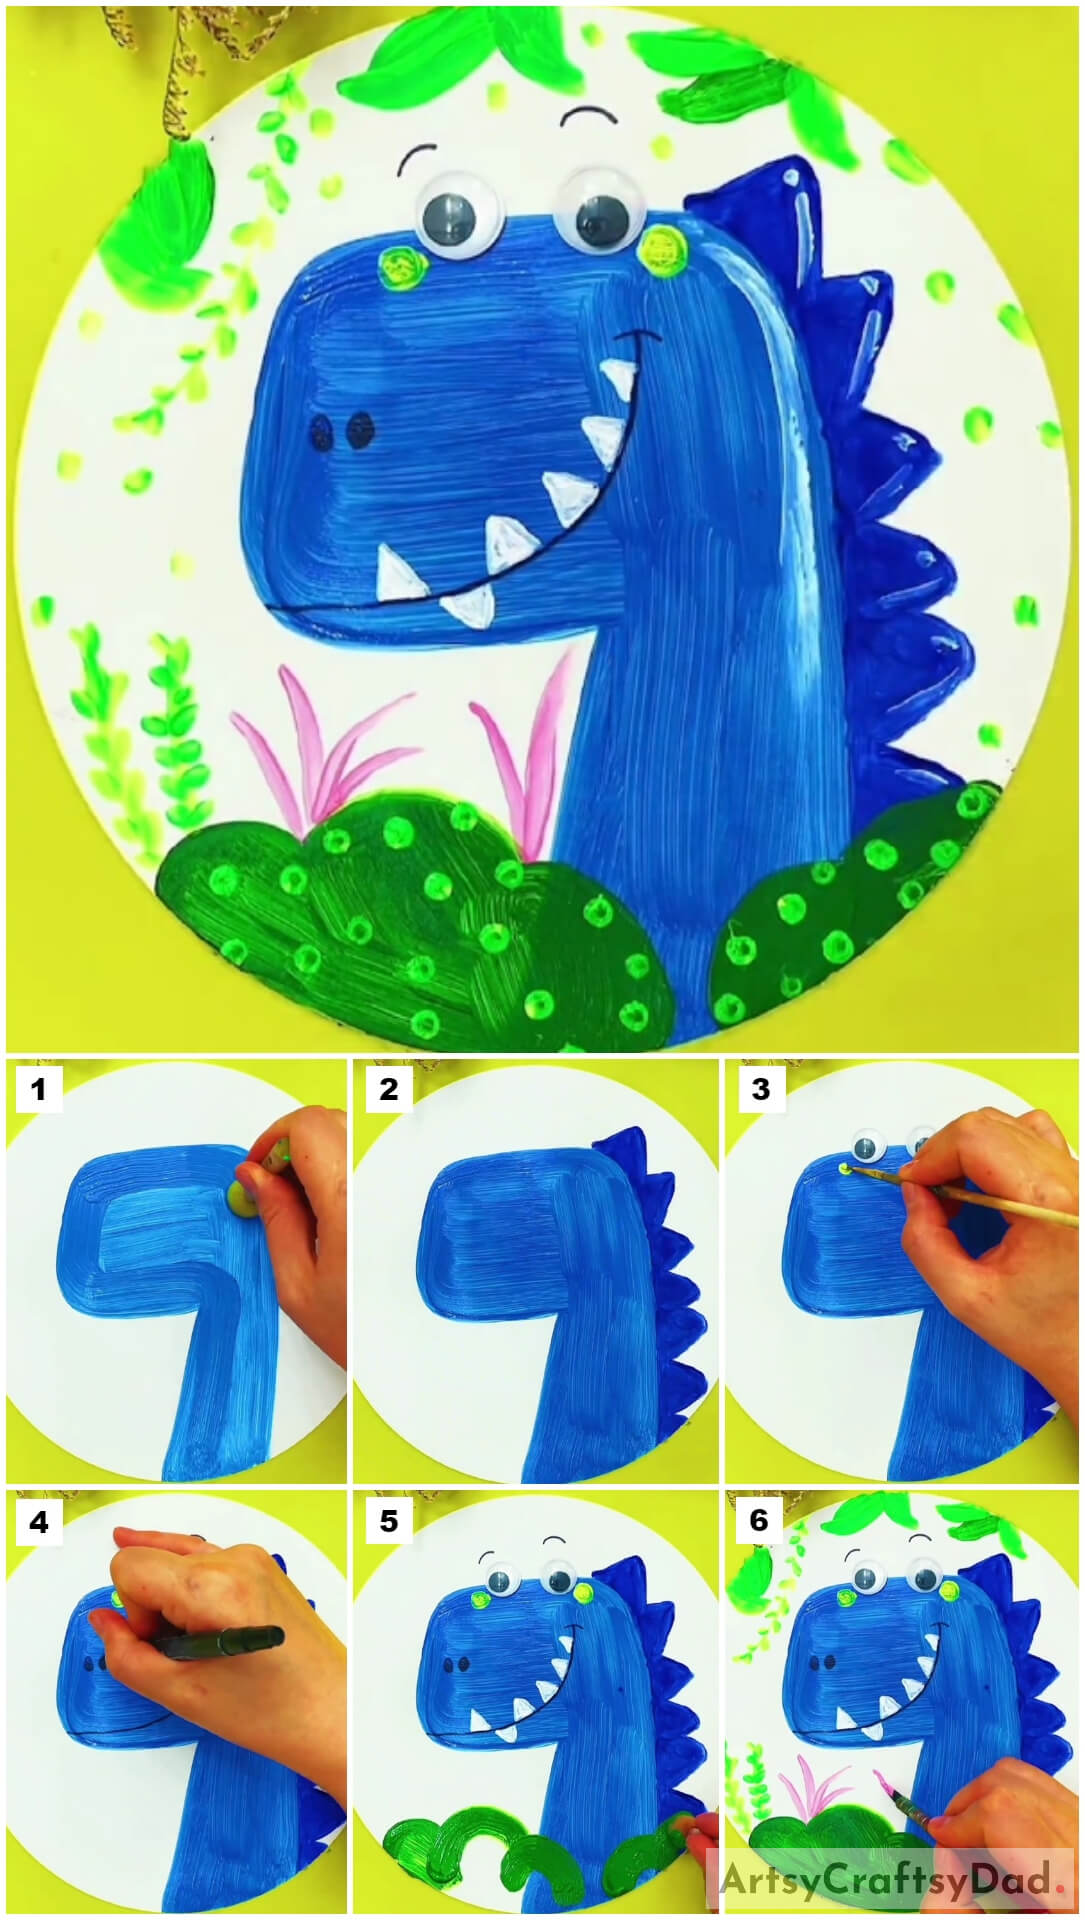
Dinosaur Craft Instructions
Step #1: Making The Face And Neck Of Dinosaur
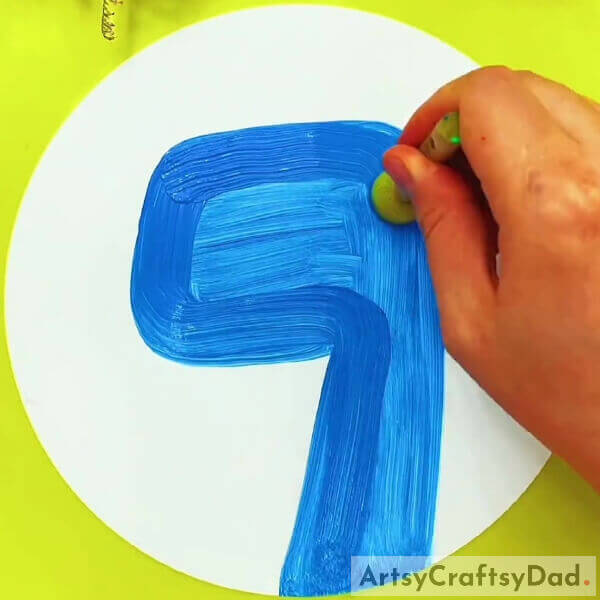
Begin this painting by taking a white circular paper sheet as the base for this artwork and a circle stamp. Dip the circle stamp into the blue paint and make the dinosaur face and neck in the shape of a ‘7’ on the base. Make sure to keep the neck relatively thinner than the rectangular face of the dinosaur. See the image for reference.
Step #2: Making The Plates Of The Dinosaur
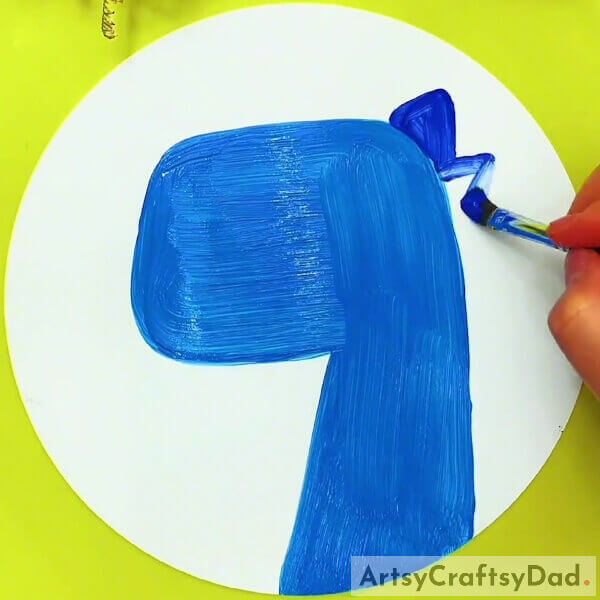
Dip a flat brush into dark blue paint and make triangular plates of the dinosaur from the back of the head to the neck of the dinosaur.
Step #3: Completing Making The Plates
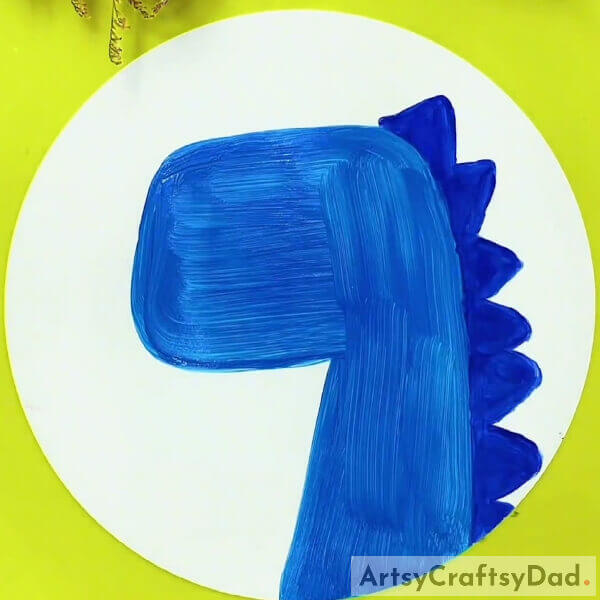
Completely make the triangular plates of the dinosaur to the end of the neck of it on the right side of it. See the image for reference.
Step #4: Sticking Googly Eyes

Stick 2 big googly eyes on the top boundary of the face of the dinosaur using glue. Make sure to stick the eyes side by side half outside the face and half inside the face of the dinosaur.
Step #5: Making Blush On The Cheeks Of The Dinosaur
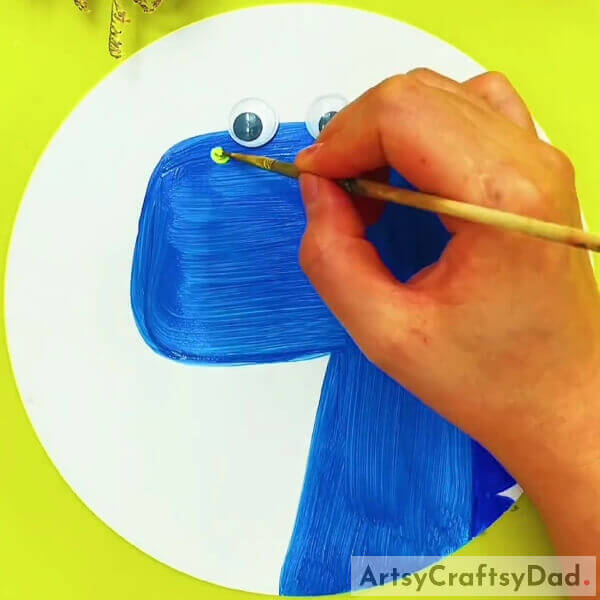
Dip a rounded paintbrush into yellow paint and make the tiny circular blush on the face of the dinosaur, below the eyes, left to left eye, and right to right eye.
Step #6: Making Nostrils And Smile Of The Dinosaur
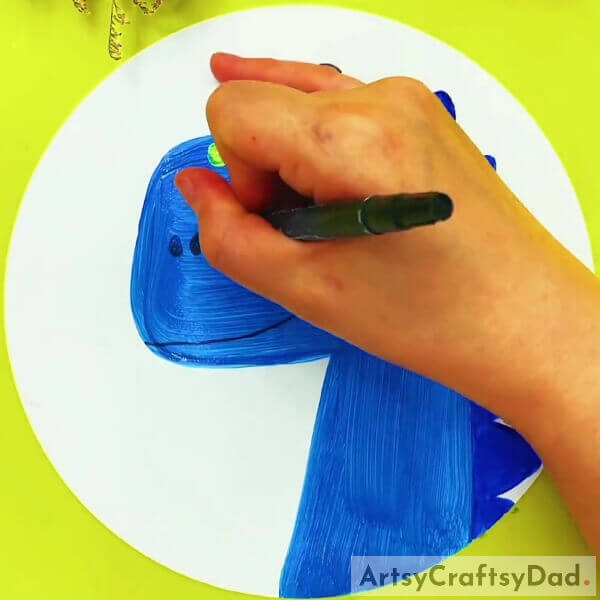
Grab a black marker and using it, make the oval nostrils of the dinosaur on the left side of the face of the dinosaur below the eyes and color them wholely. Also, make a curvy smile of the dinosaur at the bottom of the face from the left boundary to the right side. Make sure to make the smile go in the upward direction from left to right. Also, make the curvy lines above the eyes to make the eyelids of the dinosaur.
Step #7: Making Spiky Teeth Of The Dinosaur
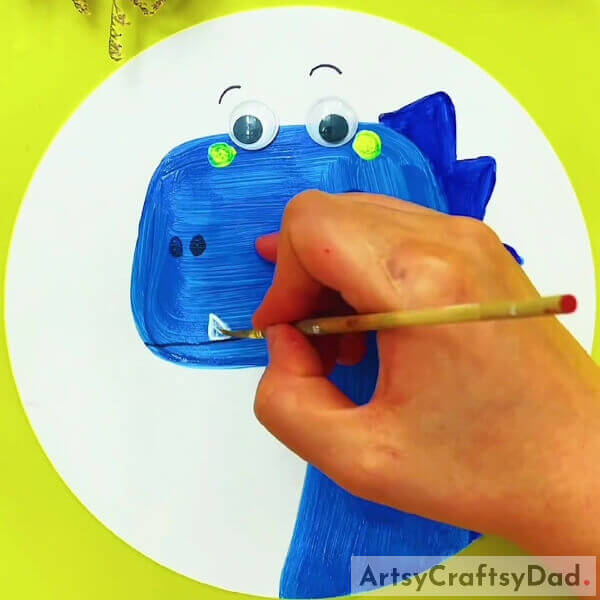
Dip the rounded paintbrush into white paint and make the triangular spiky teeth of the dinosaur above the smile from the left side after leaving some gaps.
Step #8: Completing Making Teeth Of The Dinosaur
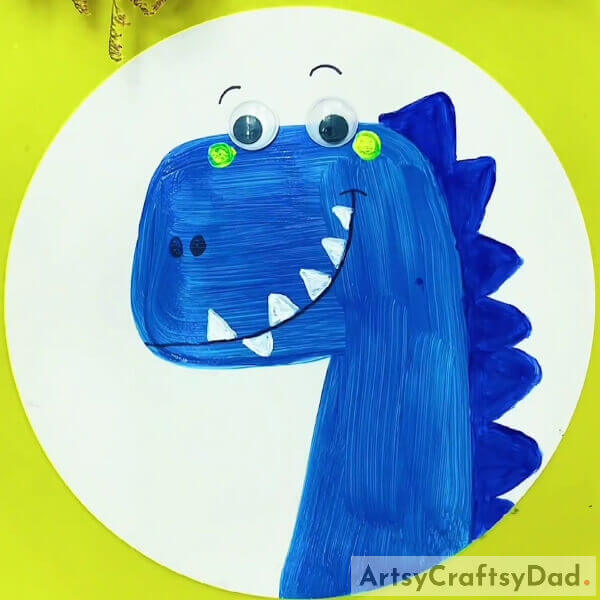
As you made previously, compete to make all the teeth of the dinosaur above the smile of it but leave the second tooth below the smile.
Step #9: Making The Bushes
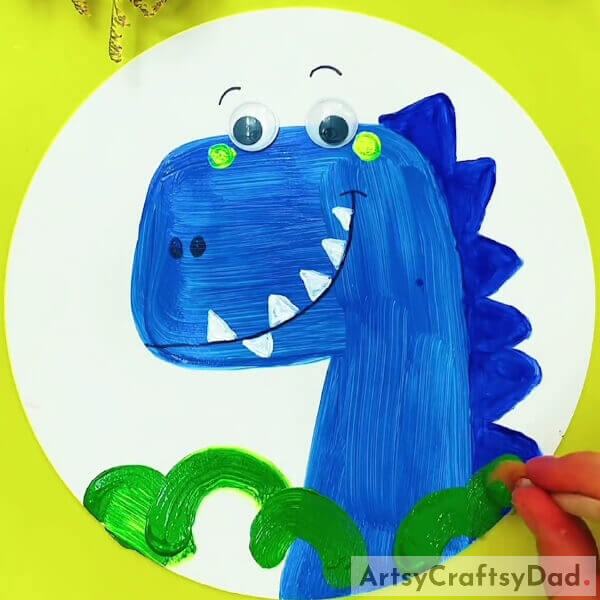
Dip the circle stamp into green paint and make the bumpy-lined bushes at the bottom of the base and even over the dinosaur and color them out. See the image for reference.
Step #10: Making Leaves And Wavy Stems
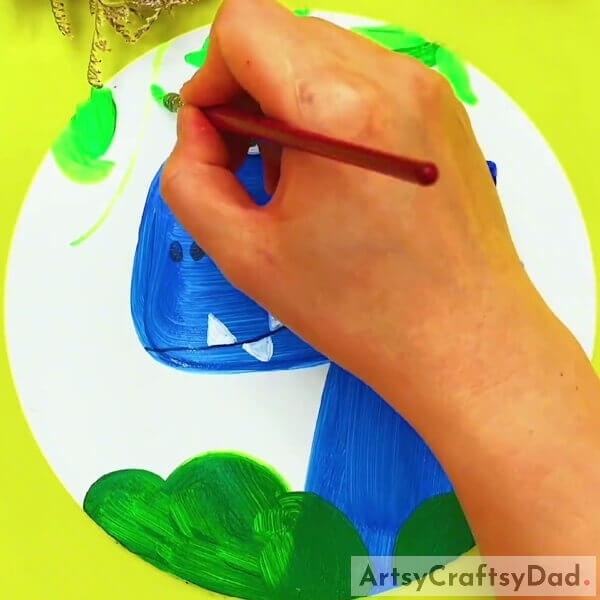
Dip the flat paintbrush into light green paint and make the leaves on the top of the base. Also, make some wavy stems with small leaves one falling from the top of the base and 2 standing above the bushes. See the image for reference.
Step #11: Making Pink Plants
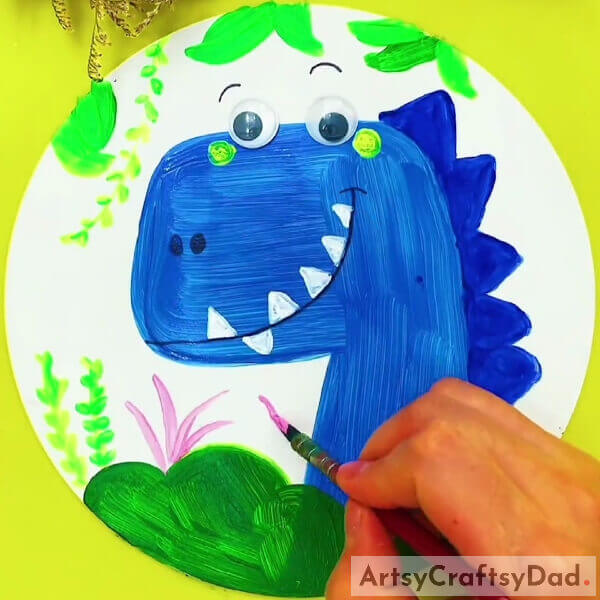
Dip the rounded paintbrush into pink paint and make 2-4 collective curvy strokes above the bushes to make the pink color plants in your artwork. See the image for reference.
Step #12: Making Dots Over The Painting
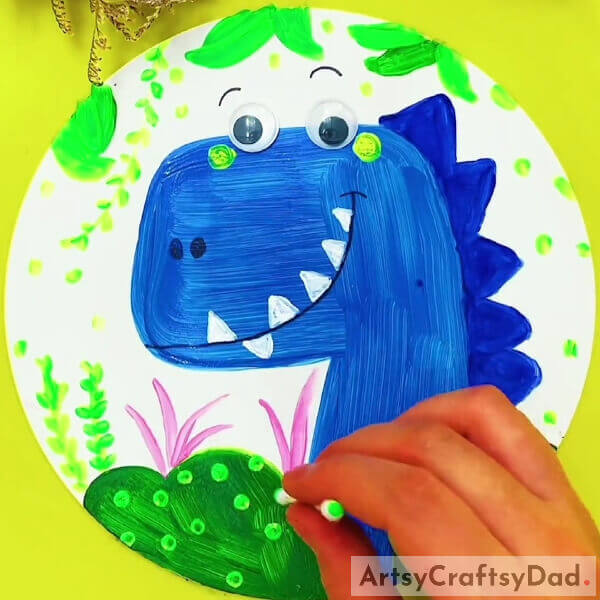
Dip a cotton earbud into light green paint and dab it randomly over the white base and also on the green bushes of your painting.
This Is The Final Look Of Your Dinosaur Face Painting!
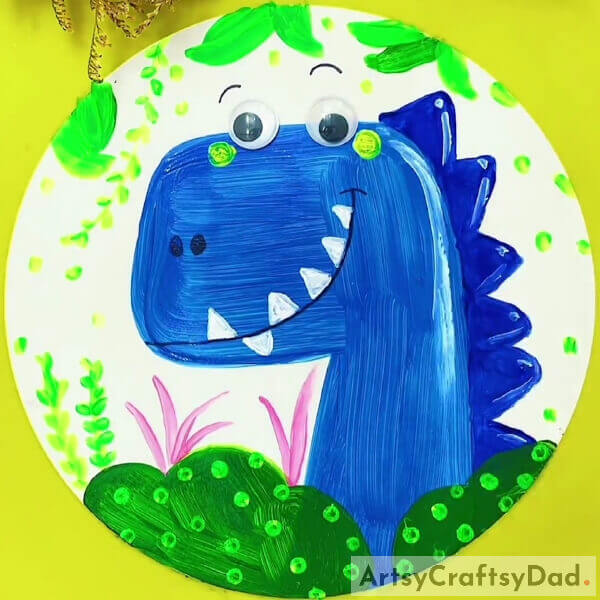
For the last step, dip the rounded paintbrush into white paint and make a stroke beside the right boundary of the dinosaur to make it look shiny. Also, make the dots and strokes beside the boundary of the triangular plates of the dinosaur.
Woohoo! Look at it! You have successfully made your adorable dinosaur in no time!
You can now decorate your artwork in your room to show it off to everyone who passes by! If you are a dinosaur fan, then you can flaunt your artwork and show that you are a fan! This dinosaur will definitely be loved by everyone and everyone will admire your creation! You can also customize your dinosaur in any way you like, change its color, change the shape of its face, add textures or shade to it, anything! Your imagination and creativity are the limit!
Hope you liked the article! Share it with your buddies as much as you can to keep us motivated to keep bringing such crafts for you! Also, leave your feedback in the comments section below!
You May Also Like
- Rose Bouquet: Stamp Painting Tutorial For Kids
- Red Vector Flowers Stamp Painting Art Tutorial For Kids
- Peacock Stamp Painting With Hacks Tutorial
- Bubble Wrap Snowman Painting Craft Tutorial For Kids
- Hand Outline Dinosaur Face Drawing Tutorial


