We all know how pretty golden mimosa looks! So we brought an artwork inspired by them which will be guided in this easy tutorial!
Hello and welcome to the wonderful world of art and craft! Today, we brought you a painting to make, inspired by the pretty golden mimosa flower! This painting will be an easy yet astonishing one! You will love to get yourself lost deep into the imagination and thoughts of the peaceful surroundings including a golden mimosa tree and a lot of butterflies around it! Beautiful, right?! We will guide you on every step of this painting, so grab the materials, and let’s begin!
Pretty Golden Mimosa Flower Painting Tutorial
Must Read: Red Vector Flowers Stamp Painting Art Tutorial For Kids
Supplies & Tools
- White Circular Paper Sheet
- Paint Colors
- Circle Stamp
- Paintbrush
- Cotton Earbud
- Black Marker
Flower Craft Instructions
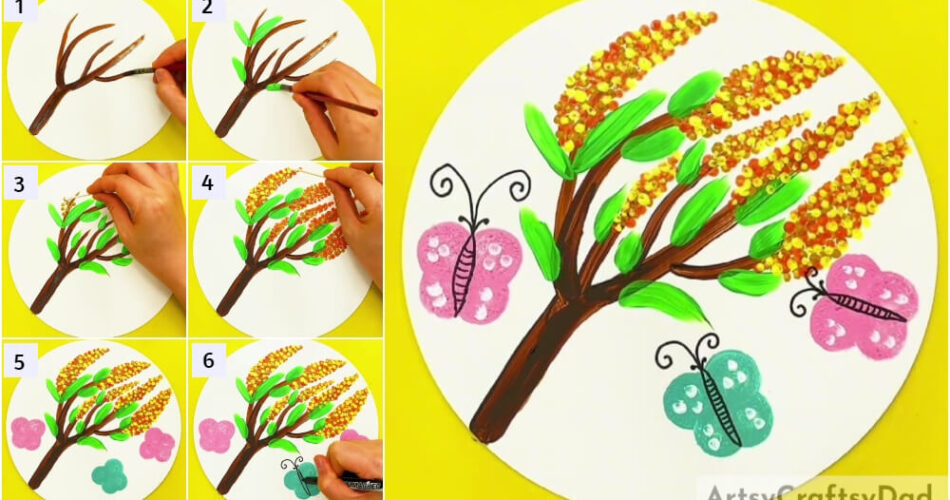
Step #1: Painting A Tree Branch
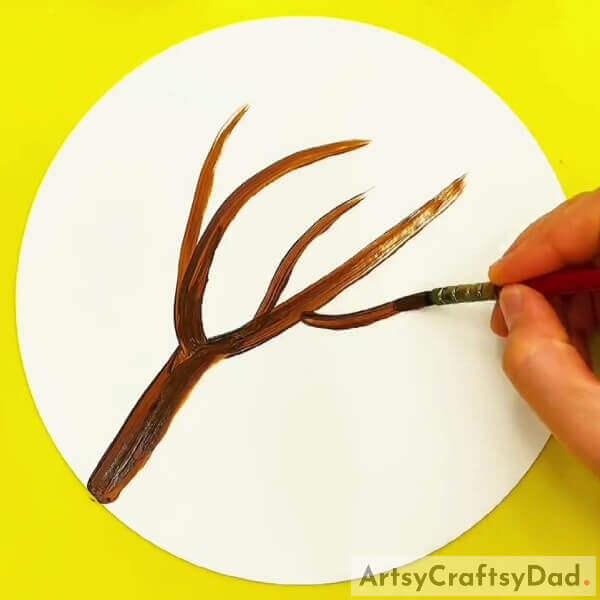
Begin this painting by taking a white circular paper sheet as the base for this artwork and a paintbrush. Dip the paintbrush into brown paint and make a tree branch coming from the left bottom side of the base to the middle of the base. Make the tree branch thick from the start and gradually thin to the end. See the image for reference.
Step #2: Making Leaves To The Branches
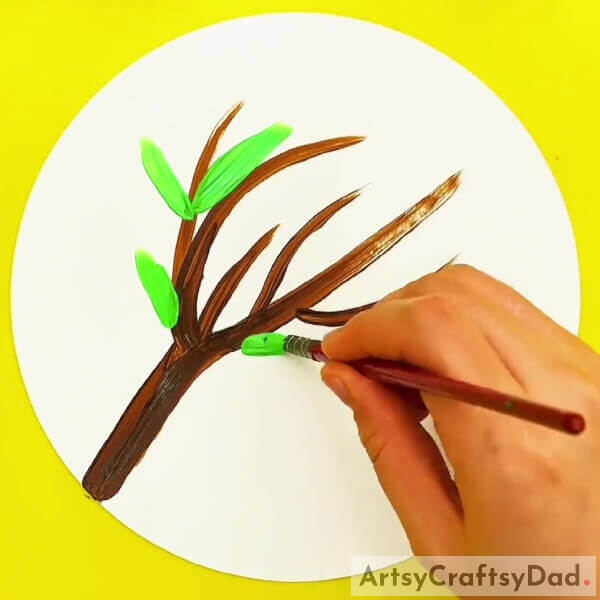
Dip the paintbrush into green paint to make thin and long leaves to the branches and cover them from both sides.
Step #3: Making Flowers
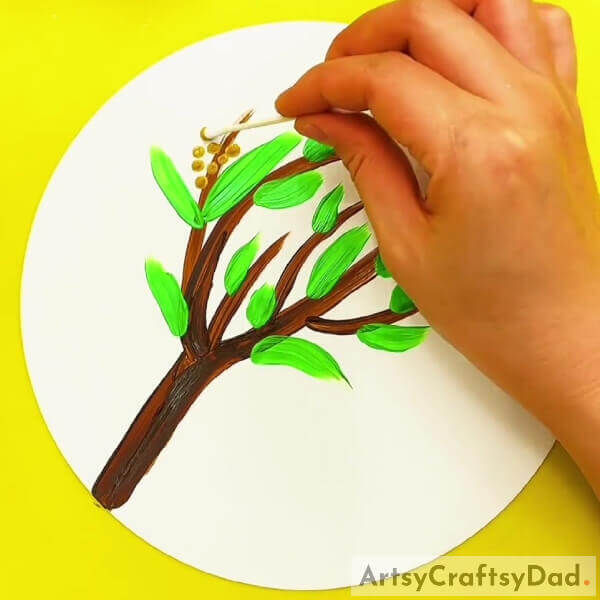
Dip a cotton earbud into golden paint and dab it over the end of the branches to the base, making dotted small flowers over it.
Step #4: Making Orange Dotted Flowers

Similarly, make orange-dotted flowers among the golden-dotted ones and make a bunch of them.
Step #5: Making Yellow Dotted Flowers

Lastly, dip your cotton earbud into yellow paint and dab it over the flowers randomly to add yellow flowers it them sand complete your mimosa flowers.
Step #6: Stamping Blue Butterfly

Dip a circle stamp into blue paint and dab it over the base, below the flower, making 2 circles side by side slightly over the other and 2 more circles below them and a little inside than the previously made ones and in the same way, one slightly over the other. You will see a blue butterfly shape.
Step #7: Making Pink Butterflies

As you make the blue butterfly, make 2 pink butterflies on the sides of the base below and beside the flower. See the image for reference.
Step #8: Detailing The Butterflies
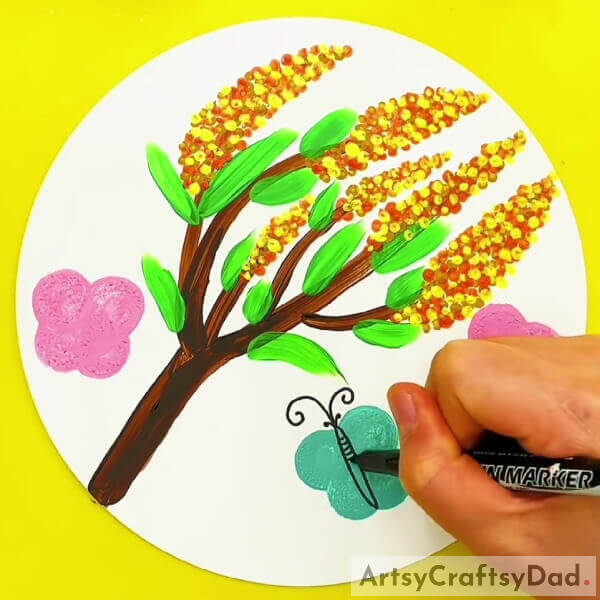
Using a black marker, make the curved body of the butterflies between the wings and make the curvy antennas with small lines inside the body. See the image for reference.
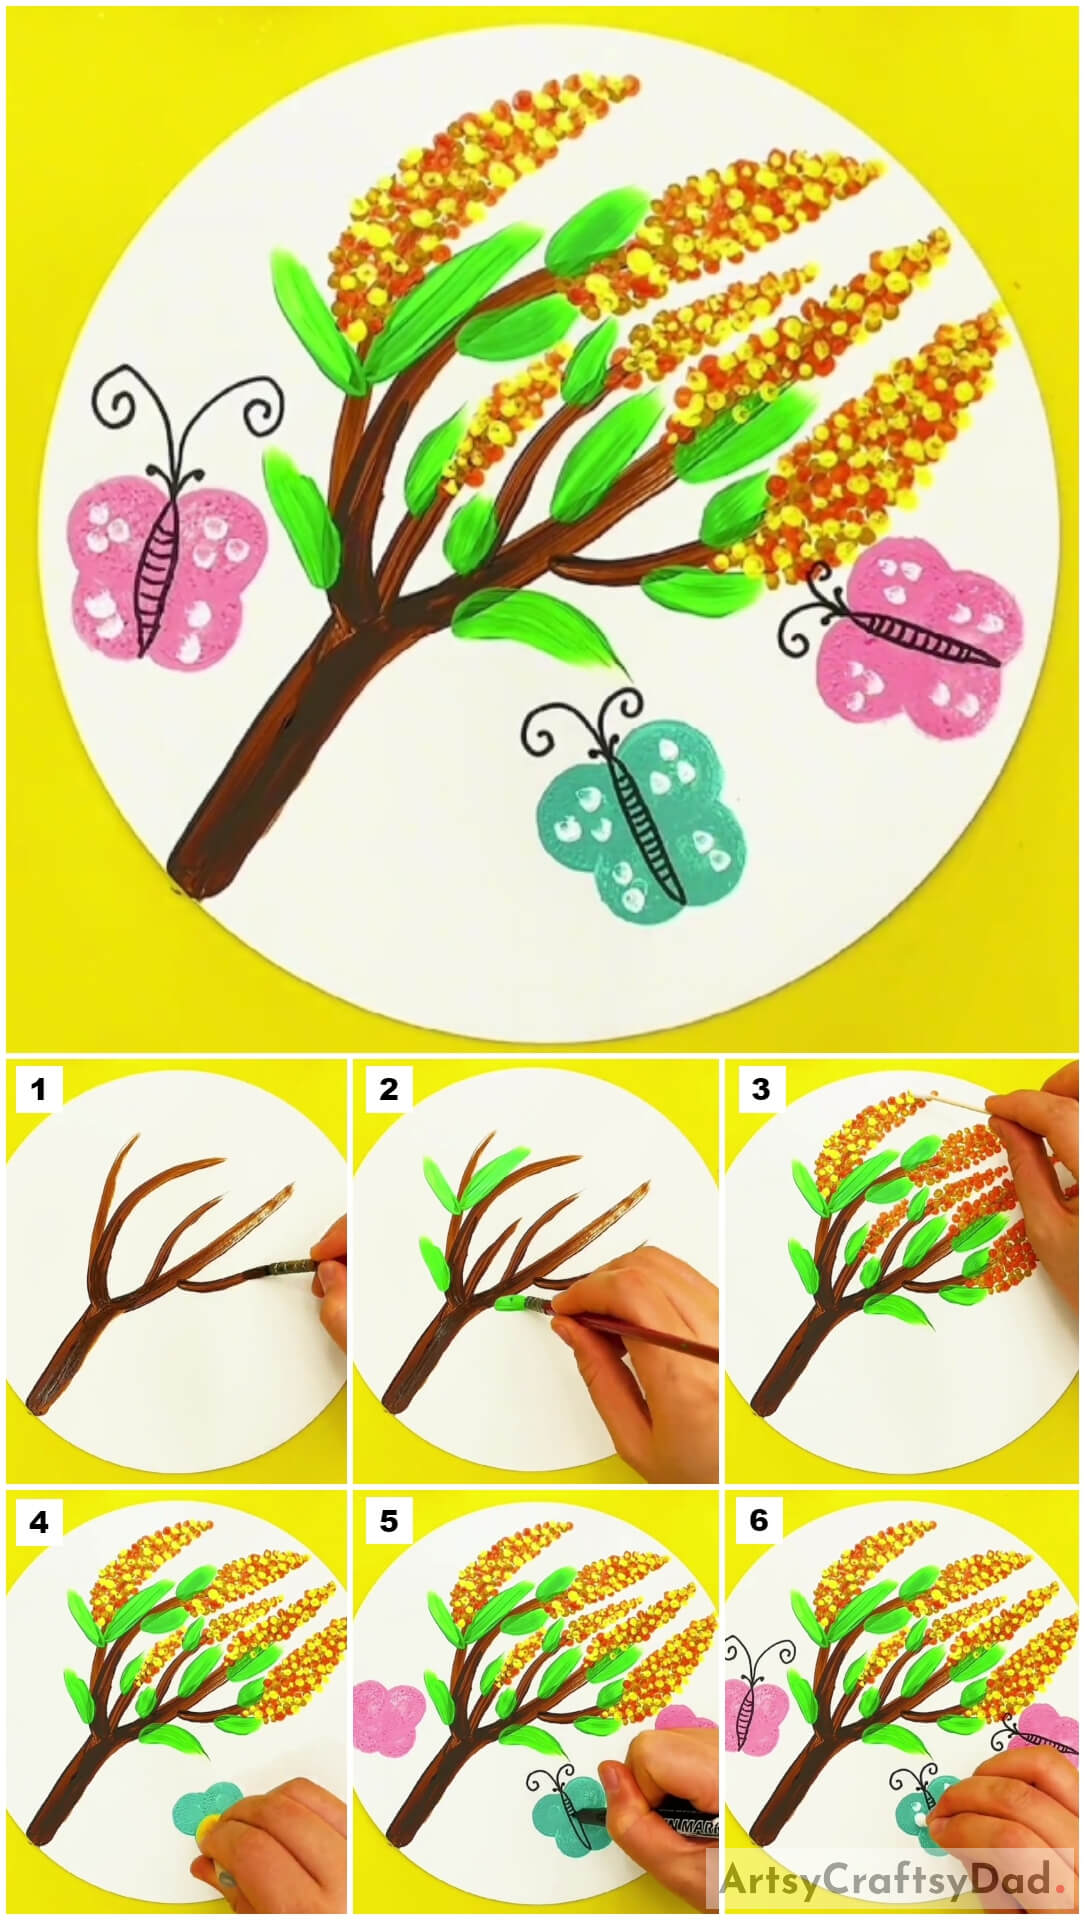
This Is The Final Look Of Your Golden Mimiosa Flower Painting!
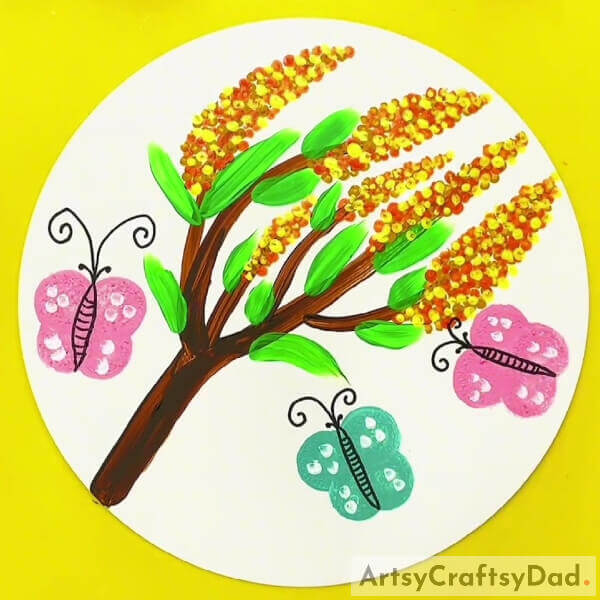
For the last step, dip your cotton earbud into white paint and dab 2 dots on the upper side of the wings of the butterfly and 2 on the lower side of the wings of the butterfly as shown in the image.
Whoa! Your mimosa flower is completed and the butterflies want to get its nectar!
You can now decorate this painting in your room to get the vibes of a peaceful garden you are in! Nature is the biggest artist and getting inspired by it to make something is the best you can do! You can also, customize your artwork with your imagination, like, making the garden background in it, and detailing the butterflies by adding textures or shade them! Do as you please and make it as unique as you are, your imagination and creativity are the limit!
Hope you had fun making this painting! Share it with your friends as well to have fun together! Also, drop your feedback in the comments section below!
You May Also Like
- Bubble Wrap Snowman Painting Craft Tutorial For Kids
- Rose Bouquet: Stamp Painting Tutorial For Kids
- Polythene Impression Flowers Painting Tutorial For Beginners
- Beautiful Rose Vase: Easy Hacks Painting Tutorial
- Wistera Finger Painting Artwork Tutorial For Kids


