Learn how to create stunning swan clay crafts with this step-by-step tutorial for beginners. From molding the clay to adding intricate details, this tutorial covers everything you need to know to create your own beautiful swan clay crafts. Perfect for beginners looking to try their hand at clay crafting.
Are you a beginner in the world of clay crafts and looking for a step-by-step tutorial? In this article, we will guide you through the process of creating a beautiful swan clay craft. Whether you have never worked with clay before or have some experience, this tutorial is designed to help you master the art of clay sculpting. So, grab your clay, and let’s dive into the wonderful world of swan clay craft!
Easy Swan Clay Craft For Kids
Must Read: Fruit Foam Net Corn Craft Tutorial For Beginners
Supplies & Tools
- Brown Construction Paper
- Colored Clay(White, Green, Orange)
- Marker(Black, Green, White)
- Scissors
- Glue
Swan Clay Instructions
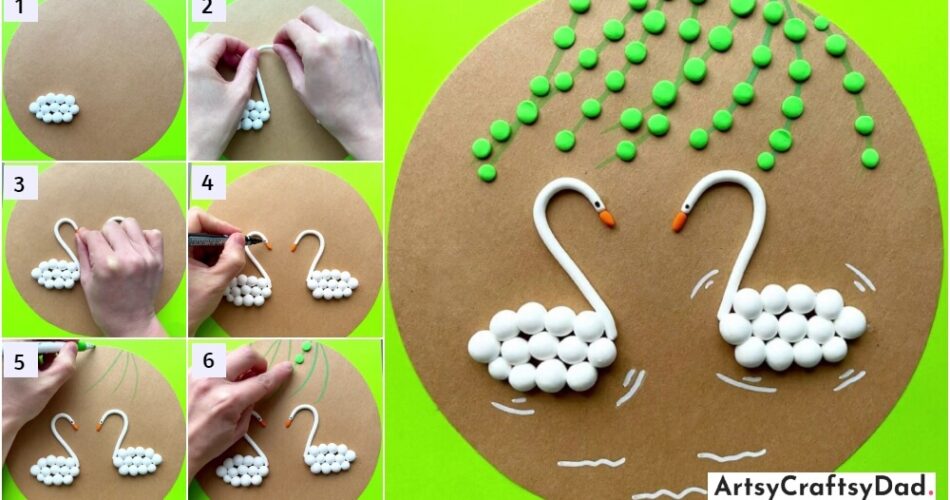
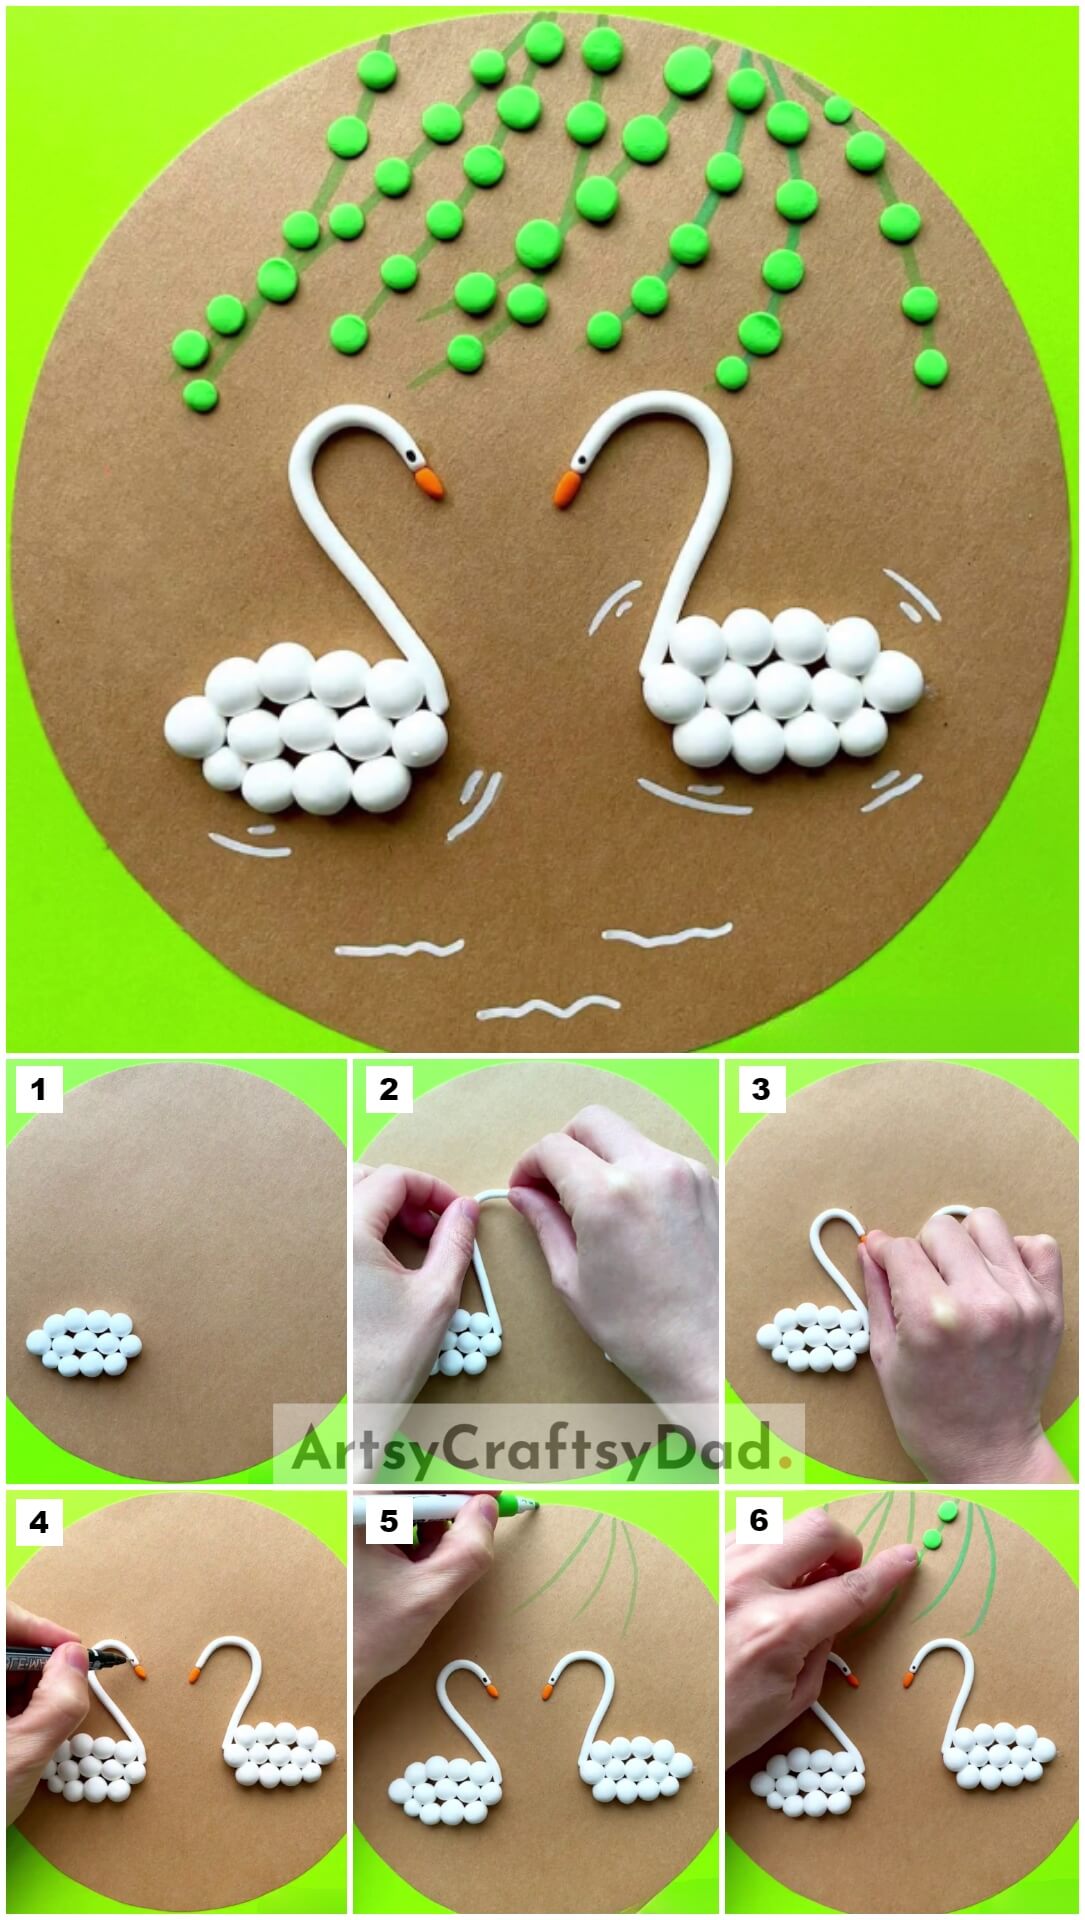
Step #1: Making Swan’s Body
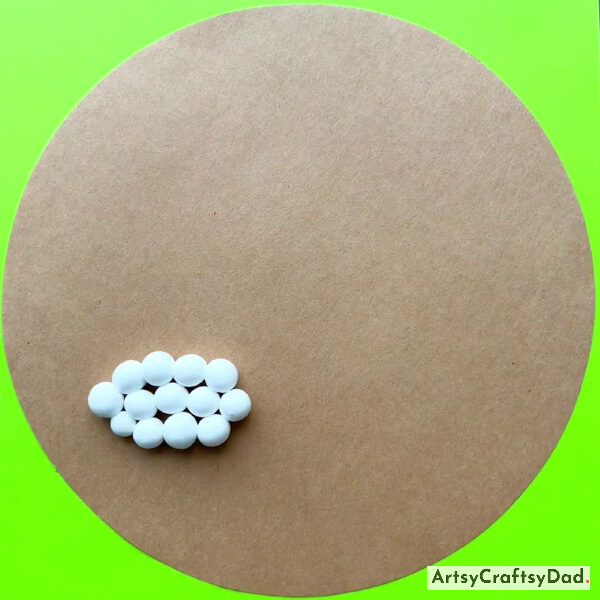
Begin by selecting a brown drawing sheet and cutting out a circle shape to serve as the base for your project. Take white clay & make some balls then paste them on the craft base on the left lower side in a circular arrangement.
Step #2: Making Neck
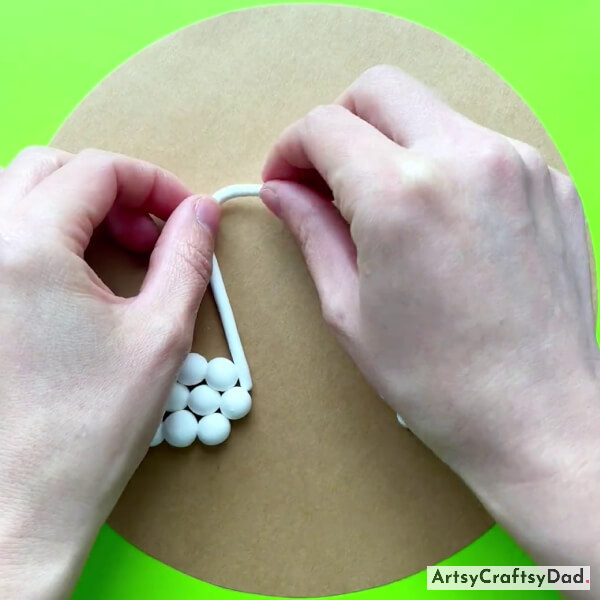
After fixing them, take a small amount of white clay give it the shape of a thin pipe, and paste it on the swan’s body as the swan’s neck.
Step #3: Creating Beak
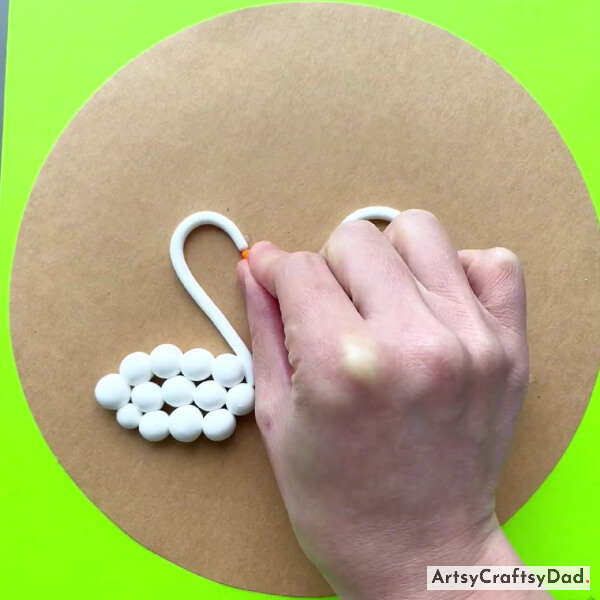
After pasting the neck, take orange clay and make a swan’s beak.
Step #4: Drawing Eyes
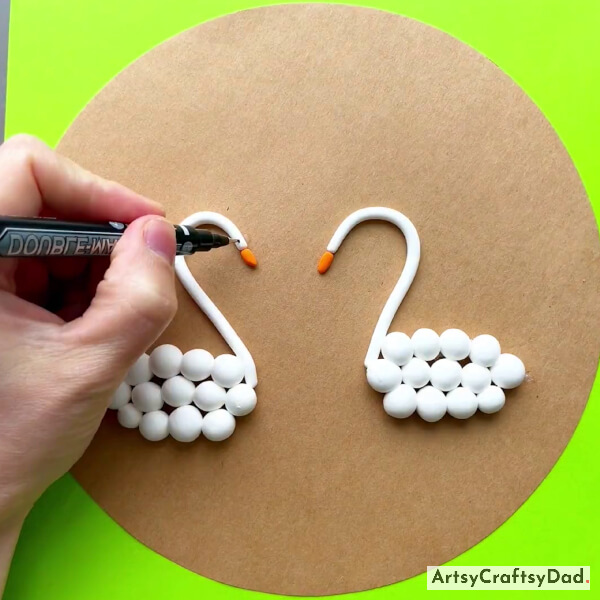
Make another swan by the same process in front of the first one. Now, draw a swan’s eye using a black marker.
Step #5: Drawing Tree Branches
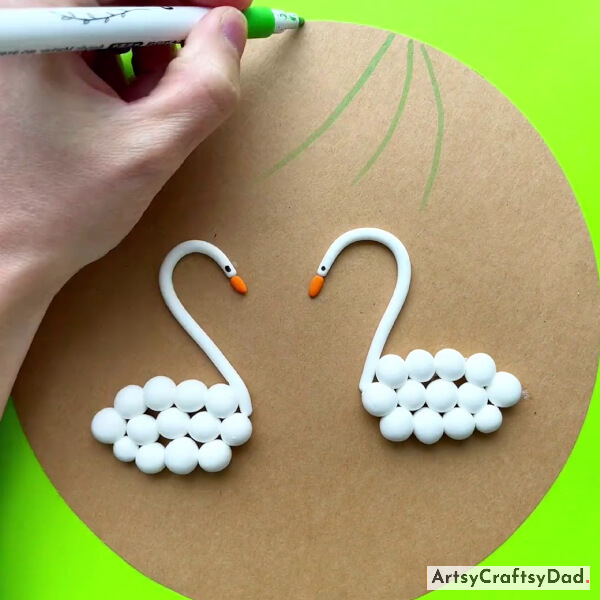
Draw the eye for the other swan. After that, with a green marker, draw tree branches on the top side of the craft base over the swans.
Step #6: Making Leaves
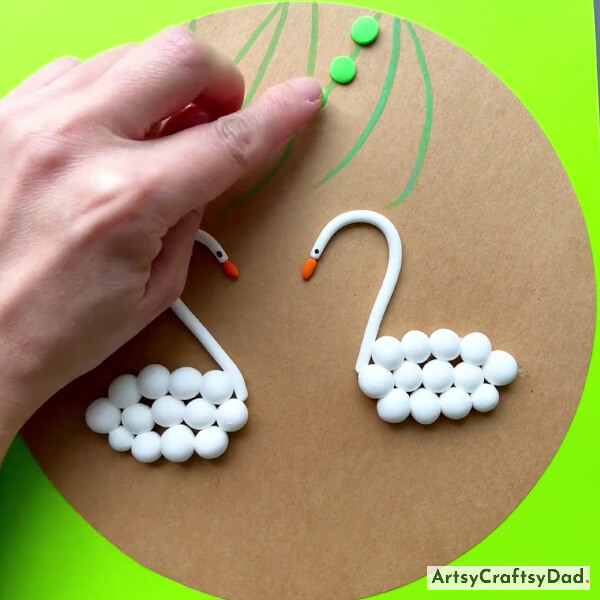
Afterward, take green clay & make some balls & paste them on the branches as tree leaves.
Step #7: Creating Water Splash
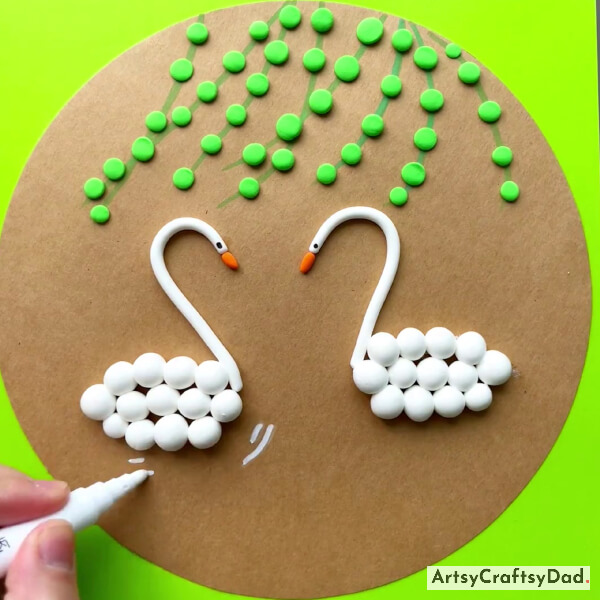
Paste some more green clay leaves on all the branches, and after that pick a white marker and create water splashes around the swans.
Final Look Of Our Swan Clay Craft!
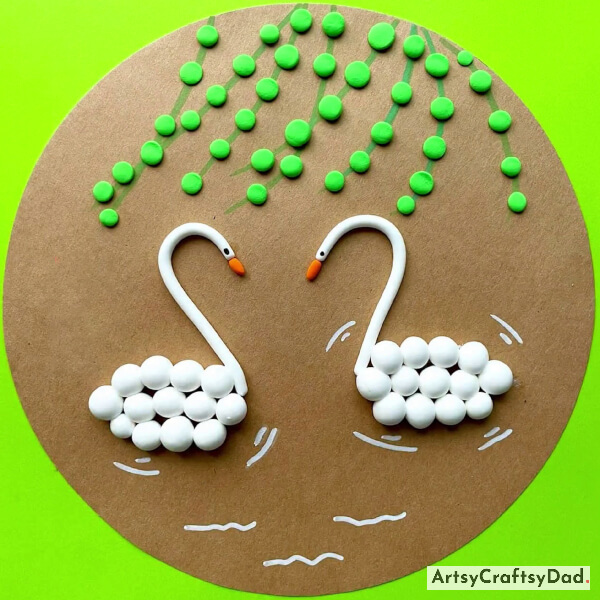
Create water splashes around both the swans and our final craft is ready.
Our beautiful craft is ended here. I hope you have created this beautiful swan craft. You could decorate your home with this masterpiece. All the guests that will come to your house will appreciate you for your hard work & creativity. From shaping the body to adding intricate details, this tutorial breaks down each step clearly and concisely, making it accessible for beginners. Please share your opinion about this craft in the comment section & also what you want next in the future craft we will try to make crafts according to your interest.
Thank you for visiting us! Have a nice day!
You Might Also Like
- Beautiful Clay Flower Garden Craft Tutorial For Beginners
- Beautiful Clay Flower Vase Craft Tutorial For Beginners
- Paper Cup And Clay Crowns Craft Tutorial For Beginners
- Paper And Clay Tree Craft Tutorial For Beginners
- Clay Tomato Step-By-Step Craft Tutorial For Kids


