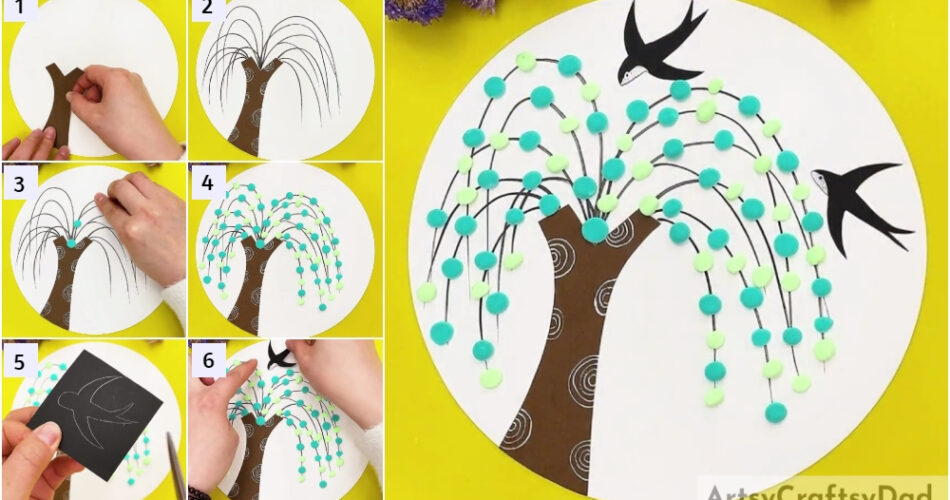
Make a craft to tribute the trees! This step-by-step tutorial will guide you to make an easy & beautiful tree with the basic craft supplies!
Trees are the basic things in nature that play an important role in human lives! So, you should make a craft as a tribute to trees! This step-by-step tutorial will guide you on each and every step of making this easy yet fascinating tree craft using paper and clay! You won’t need to spend a single penny on it as all the required materials you will already find at home! This craft is also a hands-on sensory and learning activity for kiddos while engaging their interest! Let’s make it!
Tree Craft Tutorial Out Of Paper And Clay For Beginners
Must Read: Polymer Clay Mushroom Tutorial For Kids
Supplies & Tools:
- Colored Paper Sheets (White, Brown, And Black)
- Colored Clay (Blue And Green)
- Glue
- Scissors
- White Ink Pen
- Black Marker
- Pencil
Clay Tree Instructions
Step #1: Pasting A Tree Trunk Cutout

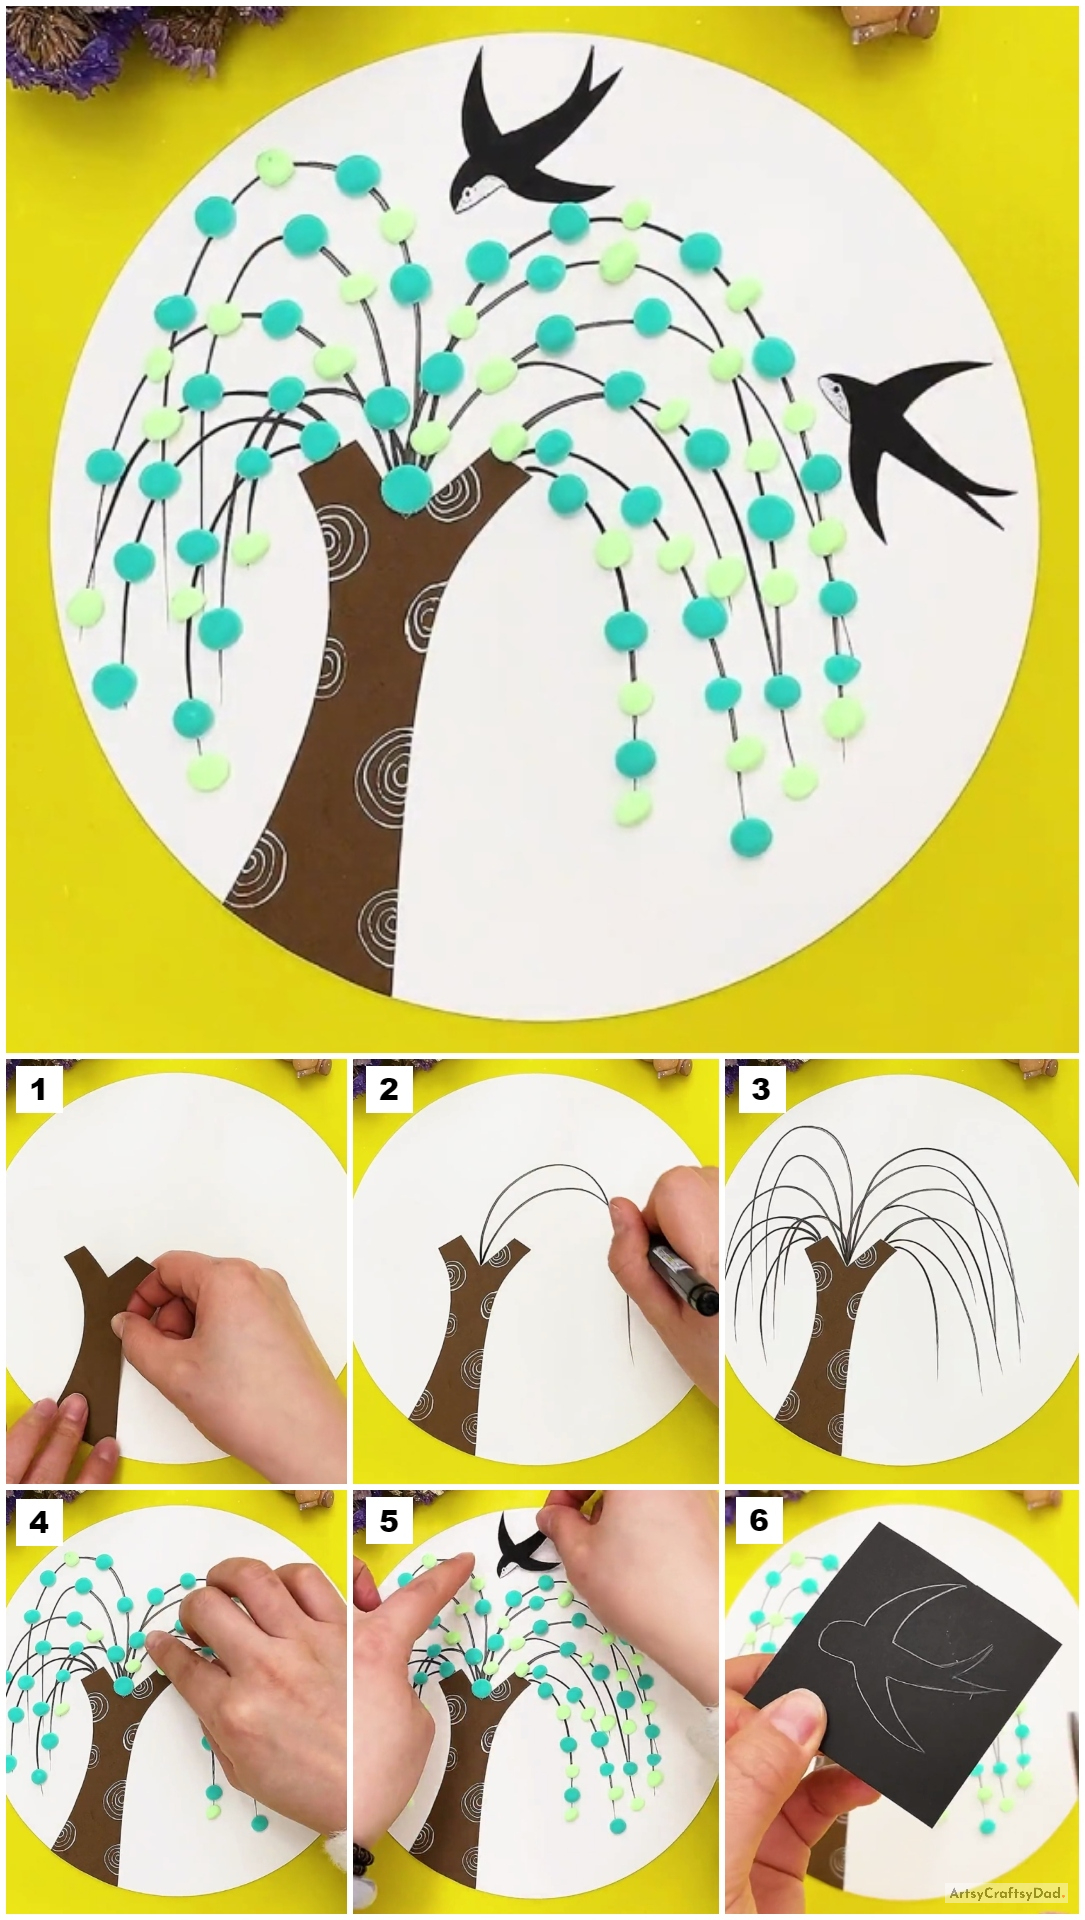
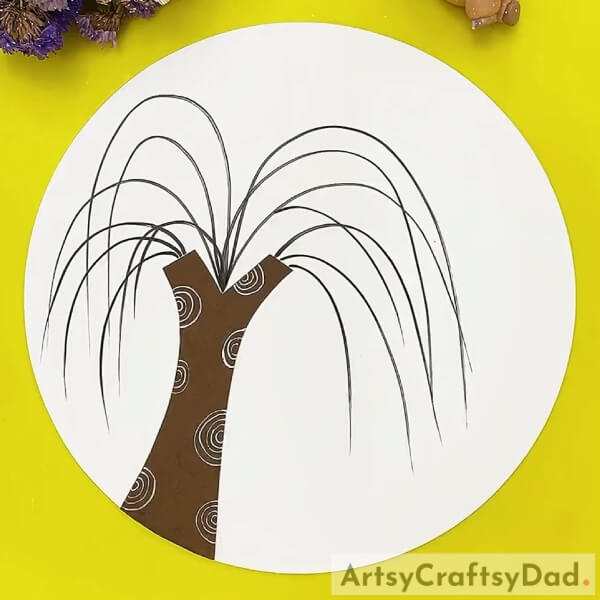
Begin this craft by taking a white paper sheet and a brown paper sheet. Using scissors, cut down the white paper sheet into a circle to make the base for the craft. Now, cut out a tree trunk shape from the brown paper sheet. Paste the tree trunk cutout on the base on the left side and title it to the right.
Step #2: Detailing The Tree Trunk
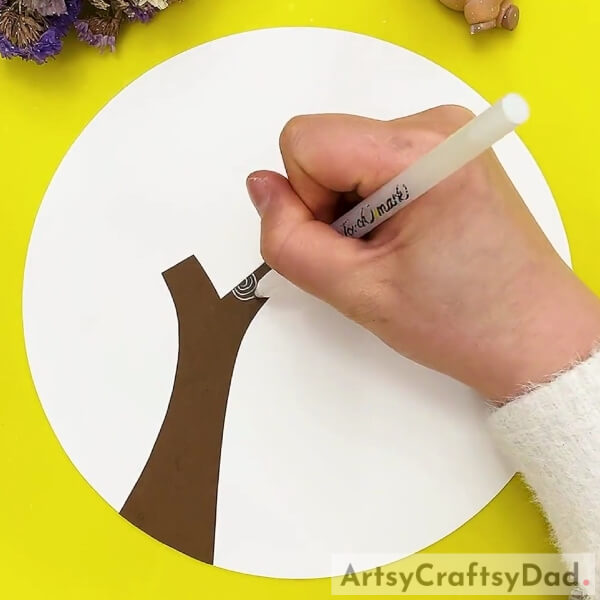
Using a white ink pen, draw half-half circles on the boundary of the tree trunk. Make sure to continuously make the same circles in the half ones to eventually reach the end at a certain distance.
Step #3: Drawing Falling Branches
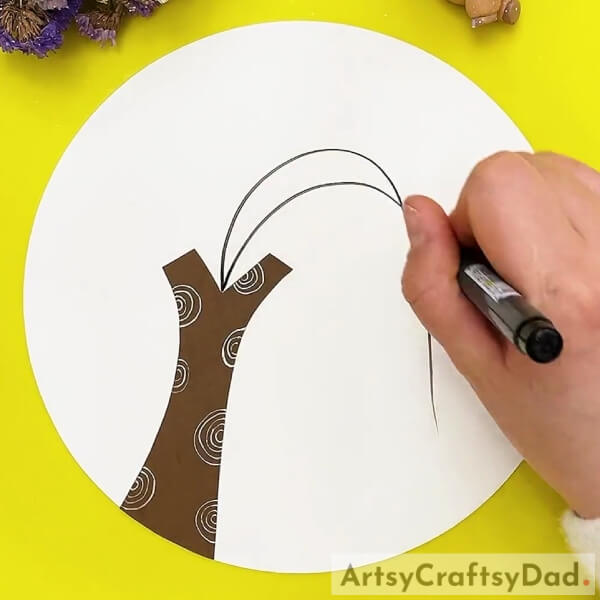
Using a black marker, draw curved falling branches from the top of the tree trunk.
Step #4: Completing Making Falling Branches
Continue to draw falling branches from the tree until it looks bushy just like as shown in the image.
Step #5: Pasting Clay Leaves
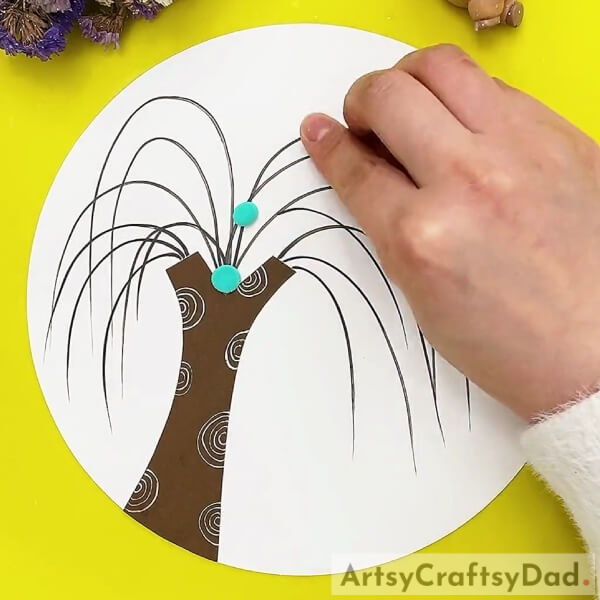
Dough tiny balls from blue-colored clay and stick them over the branches, press to flatten them and make the clay leaves over the tree.
Step #6: Continuing Making The Blue Leaves
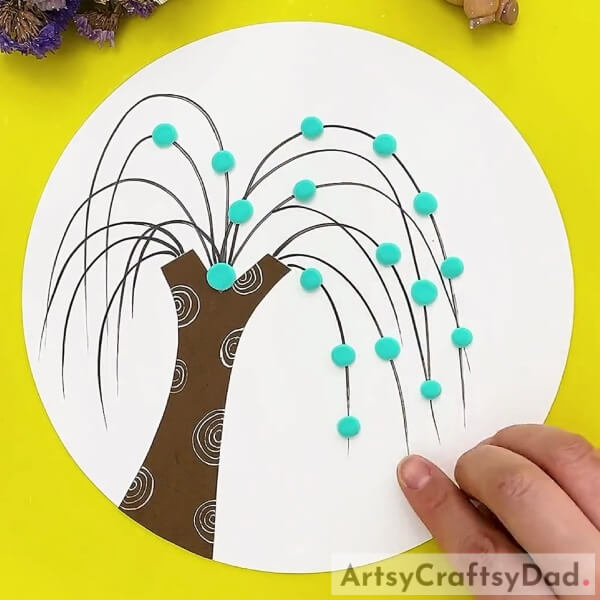
Following the same, make more and more blue clay leaves all over the tree branches.
Step #7: Making Green Leaves
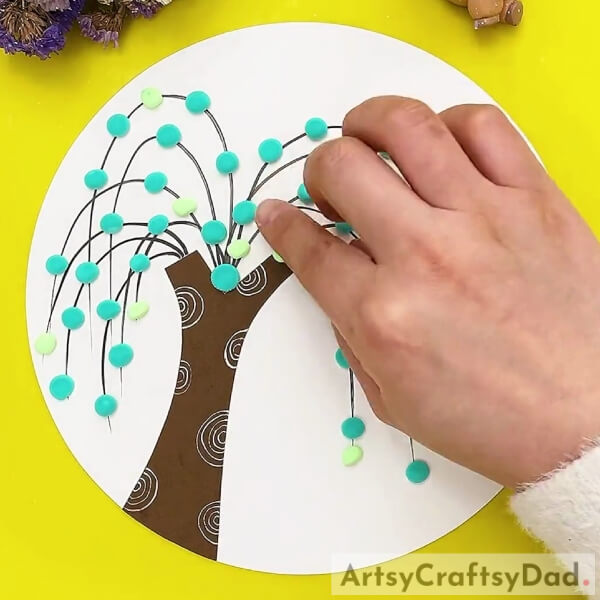
As you make the blue ones, make green clay leaves over the tree branches randomly over the remaining space in the branches.
Step #8: Completing Making The Tree Leaves
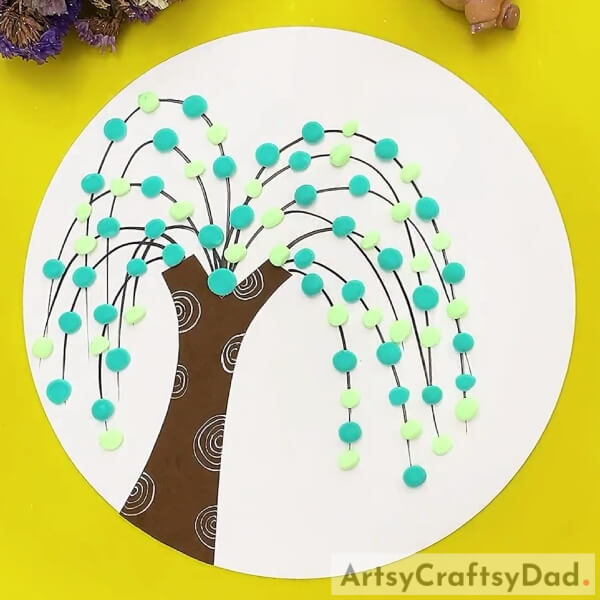
Fill up the falling branches completely from the blue and green clay leaves as shown in the image.
Step #9: Making A Bird Cutout
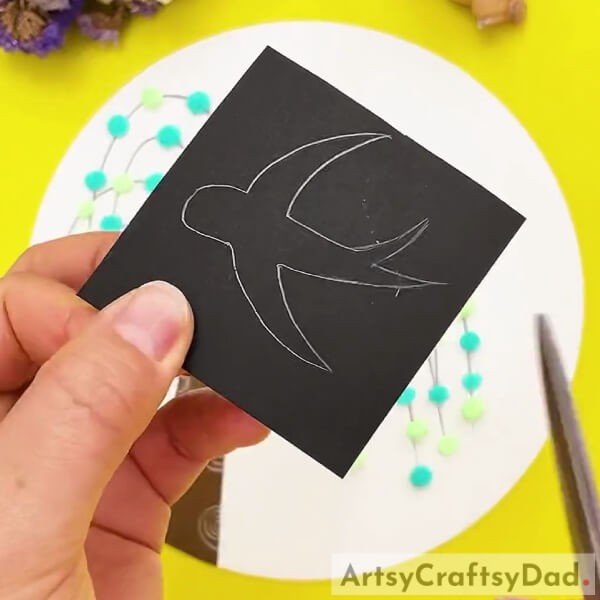
Take a piece of black sheet paper and using a pencil, draw a flying bird over it as shown in the image. Using scissors, cut it out from the paper along the drawn boundary.
Step #10: Pasting The Bird Cutout
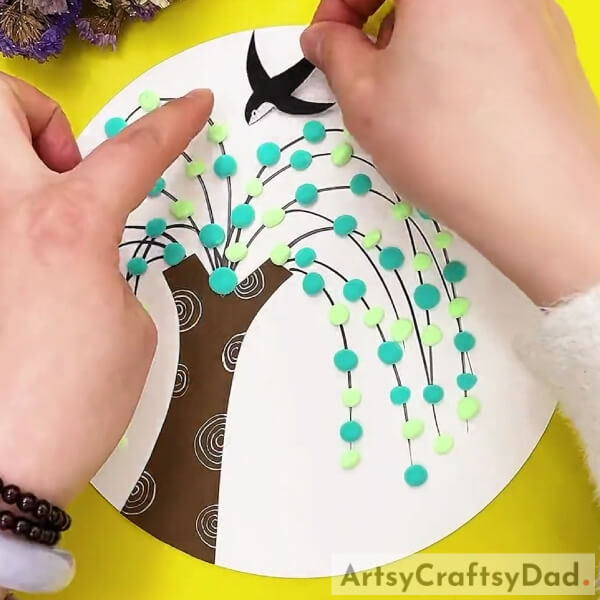
Paste the bird cutout over the base above the tree and a little tilted using glue. Now, using the white ink pen make the details of the bird as shown in the image.
This Is The Final Look Of Your Tree Craft!
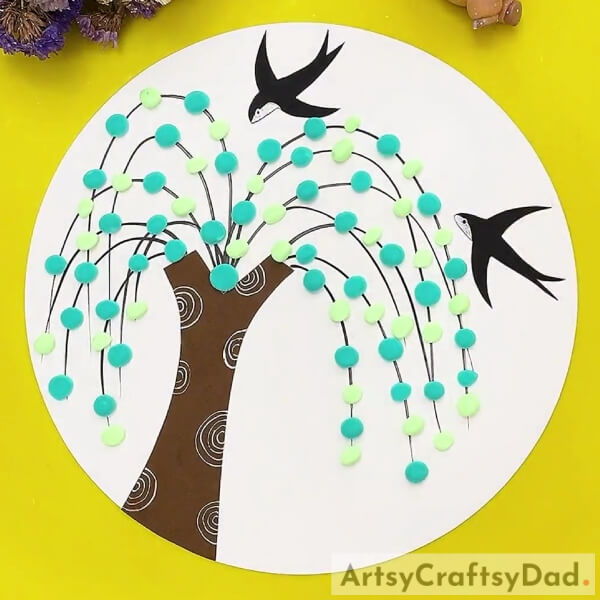
For the last step, paste another same bird on the right side of the base, beside the tree as shown in the image using glue.
Congratulations! You have successfully completed making your fascinating tree!
Display it over your wall to beautify the appearance of your room and show your gratitude towards them! This craft will definitely be a hit addition to your craft collection! You can also customize this craft to your liking, giving a background, making different colored or shaped leaves, or anything! Your imagination is the limit! This craft can also be a perfect school craft project on trees as well!
We are hoping that you liked the article! If so, give it a like and share it as much as you can so that we are encouraged to keep bringing such crafts for you!
Thank you for visiting our website!
You May Also Like:
- Clay Heart Leaf Tree Craft Tutorial For Kids
- Clay Snails On Leaves Craft Tutorial For Kids
- Clay-Paper Sunflower Garden Craft Tutorial
- Clay Chicks In Garden Craft Tutorial
- Easy Town Landscape Drawing Tutorial For Kids


