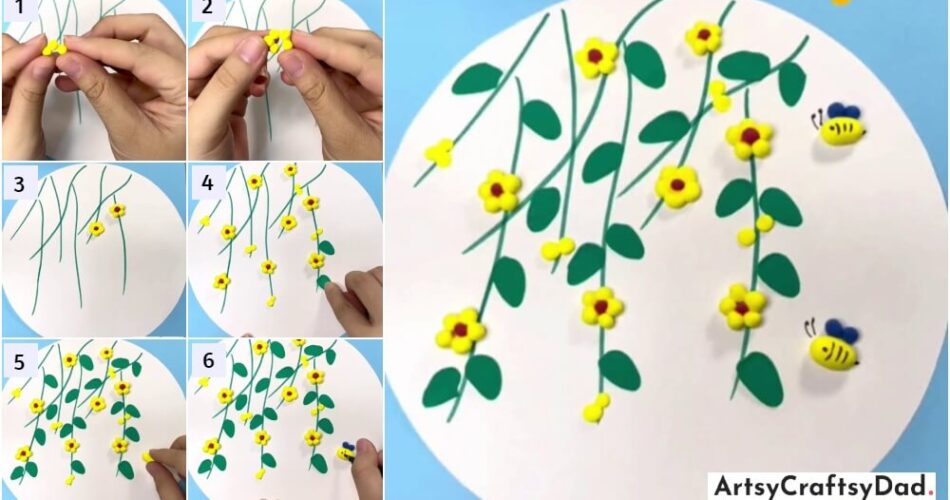
Learn how to create a stunning clay flower with bee artwork step by step. Perfect for beginners, this tutorial will guide you through each stage of the process, from shaping the clay to adding intricate details. Discover the joy of working with clay and unleash your artistic potential.
Creating artwork with clay can be a fulfilling and enjoyable activity for beginners, and one project that can bring beauty and nature into your home is a clay flower with bees. This step-by-step guide will take you through the process of molding and shaping clay to create a vibrant flower, complete with adorable little bees. Whether you are a beginner looking to explore your artistic side or simply want to try your hand at a new craft, this artwork tutorial will provide you with the necessary steps and techniques to bring your clay flower with bees to life. So, let’s dive in and discover the wonders of clay art together!
Flower With Bees Clay Artwork For Kids
Must Read: Beautiful Clay Peacock Paper Artwork Tutorial
Supplies & Tools
- Colored Clay(Yellow, Green, Red, Blue)
- Marker (Green, Black )
- Drawing White Sheet
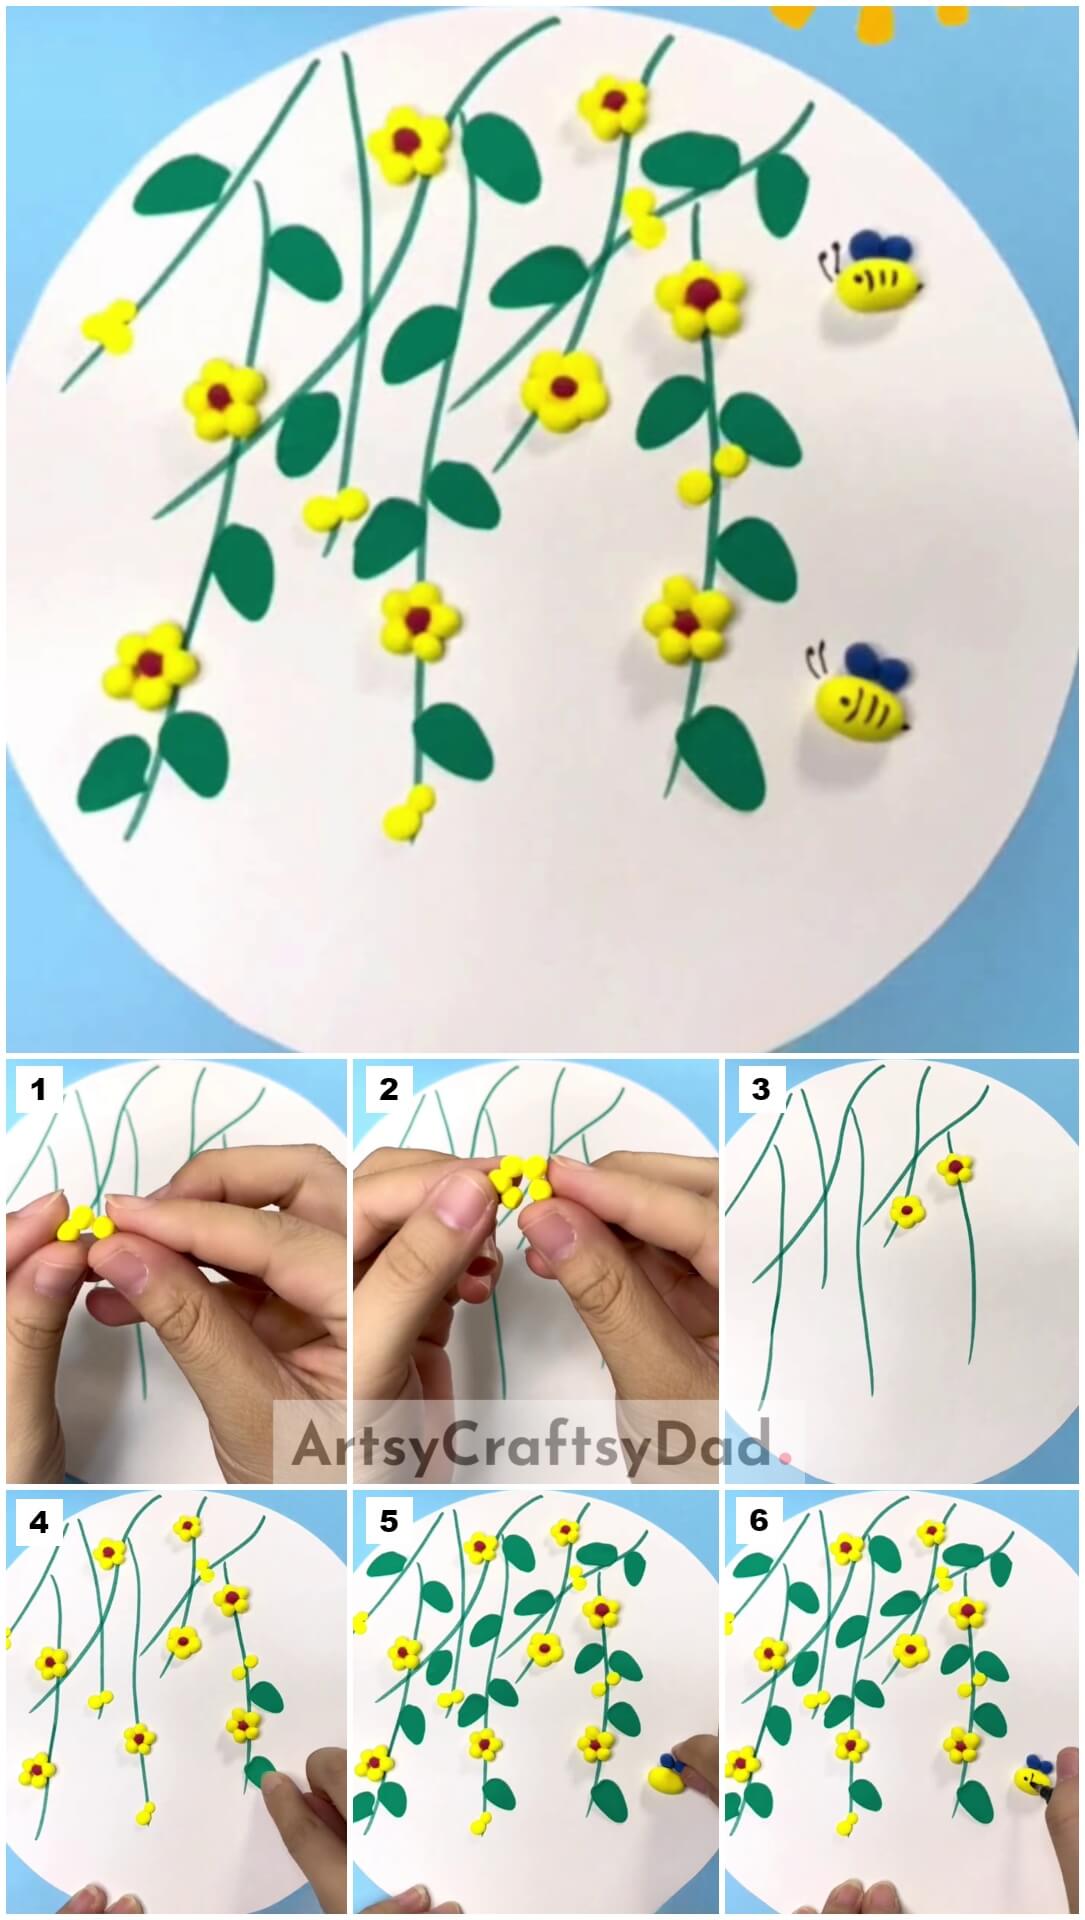
Flower With Bees Instructions
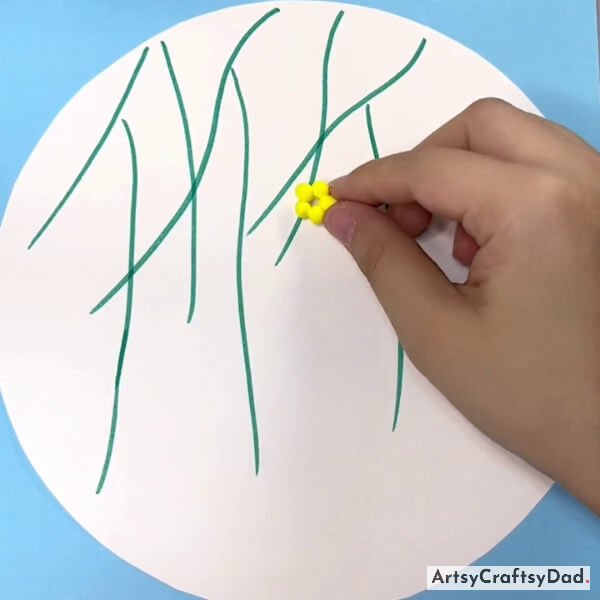
Step #1: Drawing Stems
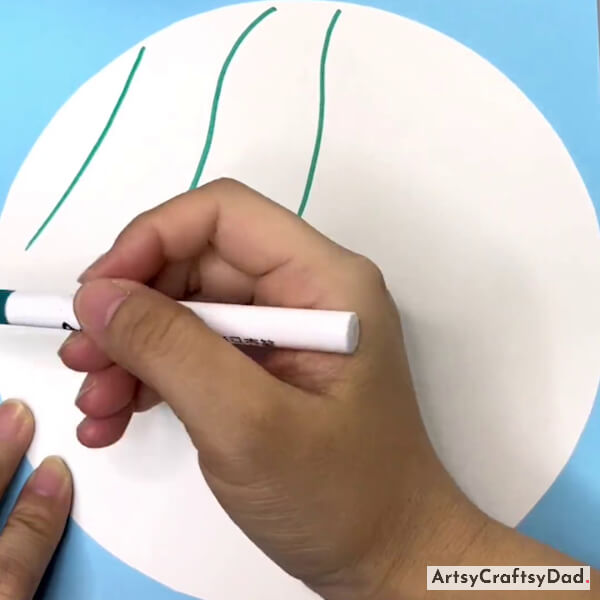
Take a white drawing sheet and cut out a circle from it to serve as the base of our craft. Pick up the green color marker and start drawing wavey stems on the base starting from the top of the white sheet.
Step #2: Working With Clay Balls

After drawing criss-cross stems, now take yellow color clay & start making little yellow balls for flower petals and join them to make a flower.
Step #3: Making Flower
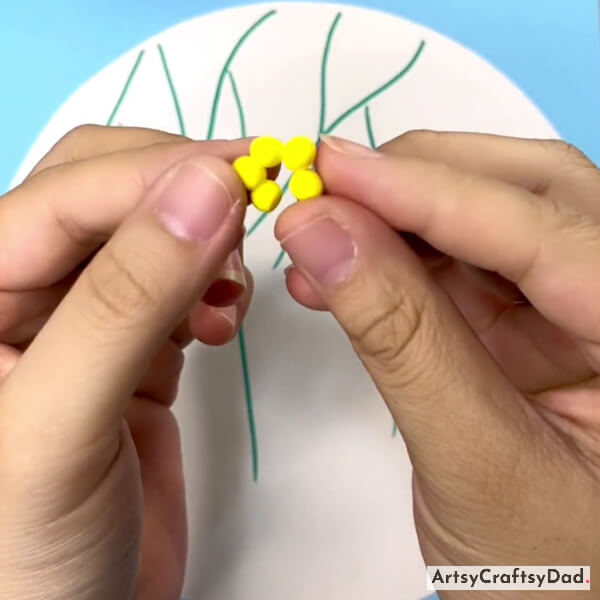
Continue to make the flower with more clay balls.
Step #4: Pasting Flower
Paste the yellow flower on the stem as shown in the above image.
Step #5: Pasting Another Flower
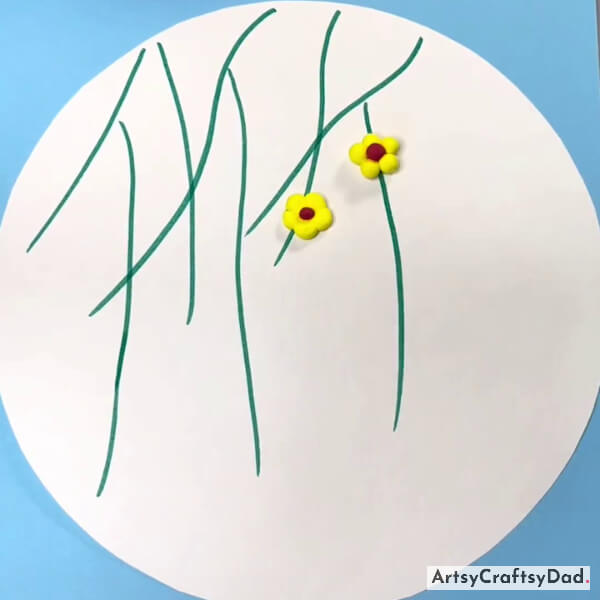
After pasting the flower, make a ball from red clay for the center part of the flower which is called a pistil, and paste it at the center of the flower. Repeat the same process for another flower.
Step #6: Pasting More Flowers
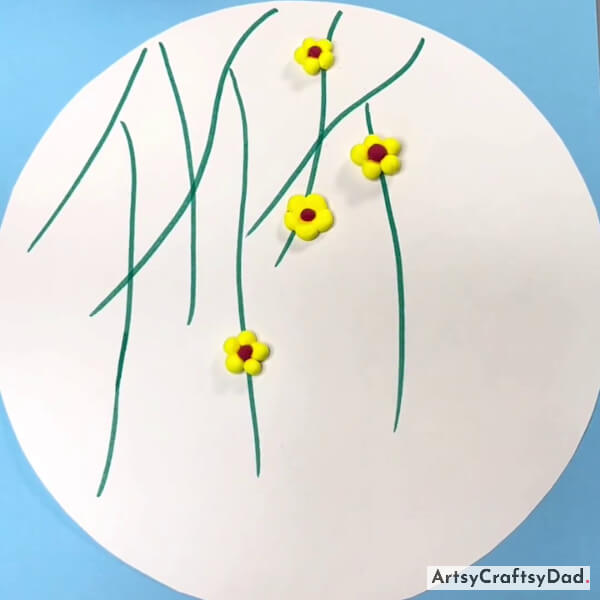
Repeat the same process for the rest of the flowers & paste them on other stems.
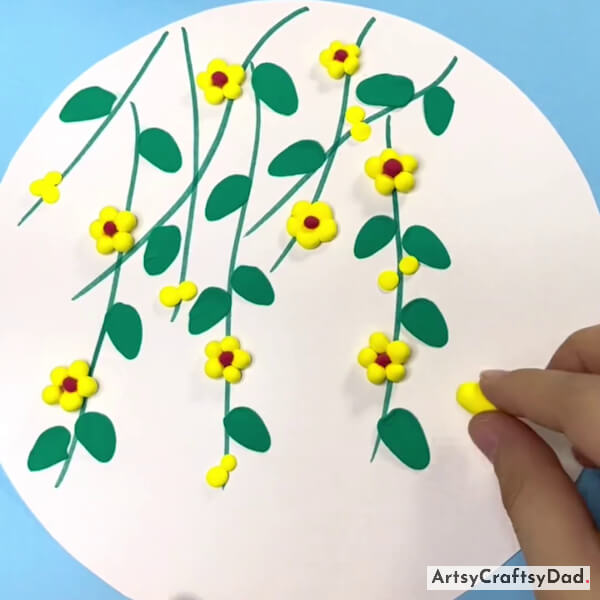
Step #7: Pasting Flowers On Entire Stems
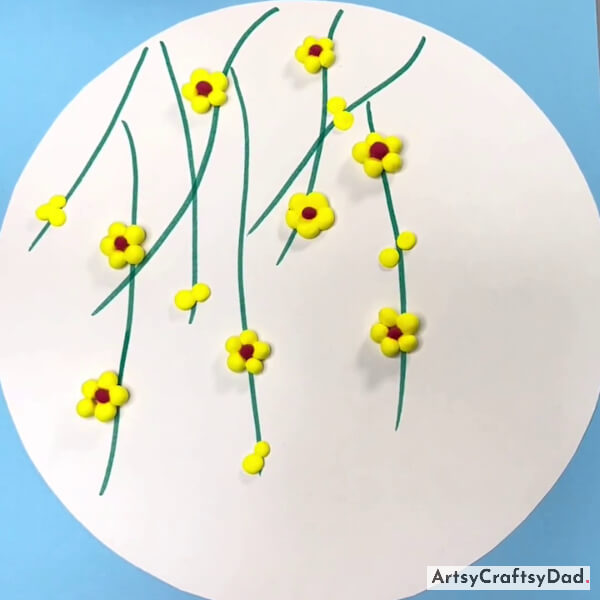
After that make and paste more flowers on the entire stems & make some little balls & paste them on the stems as buds as shown in the above figure.
Step #8: Making Leaves
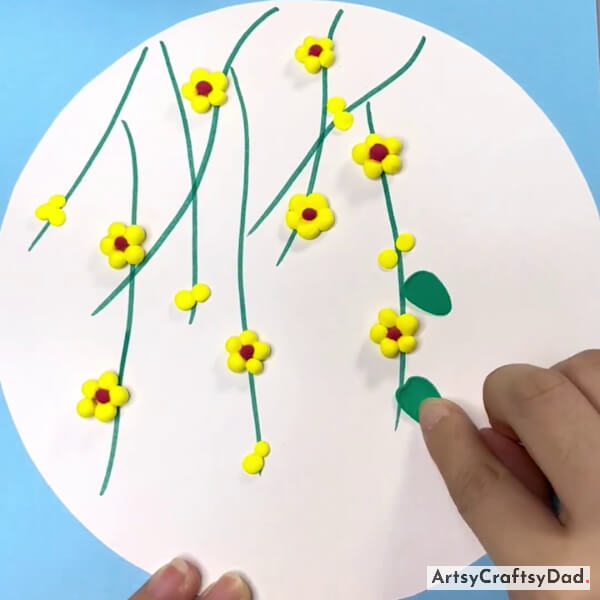
Take a little piece of green clay & make a little ball & put it on the stem & spread it with your index fingertip to make a leaf.
Step #9: Making Leaves On All Stems
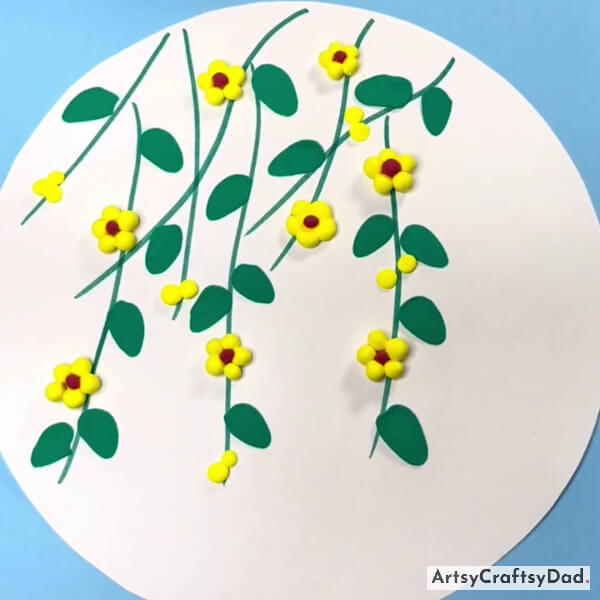
Similarly, make leaves on all stems.
Step #10: Creating Bees
Take a small yellow clay ball give it the shape of a bee body and paste it at the bottom right corner of the craft.
Step #11: Creating Bees Wings
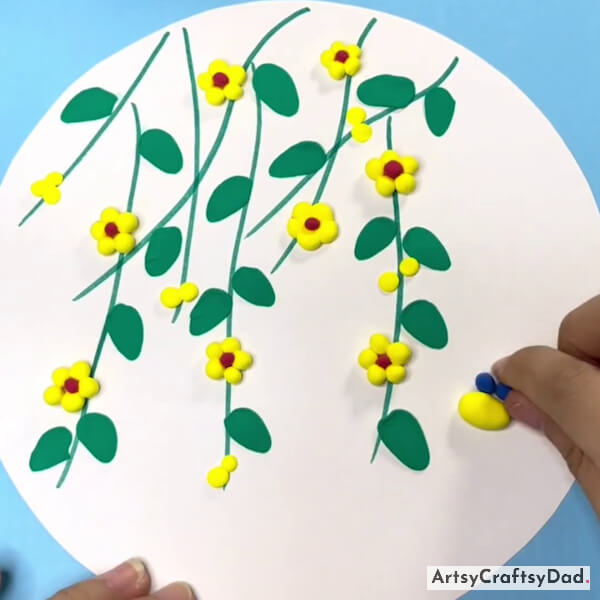
After making its body, take blue clay and make a bee’s wings.
Step #12: Drawing Eyes
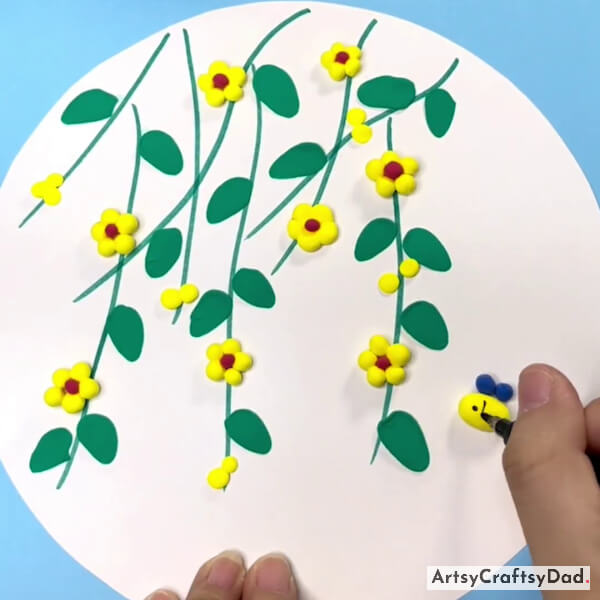
Now, with a black marker draw the eyes of a bee.
Finally, Beautiful Flower With Bees Clay Craft Is Ready!
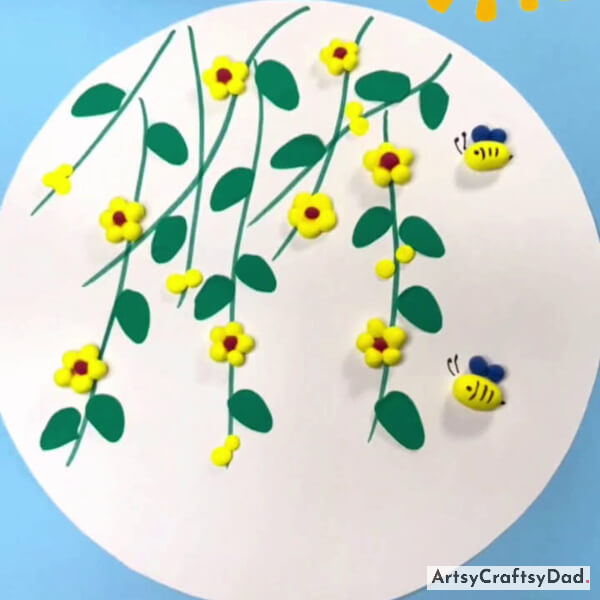
After making one more bee with eyes and antenna, our clay flower with bees craft is ready for spring season.
Our clay flower bee craft is ended here. I hope you have enjoyed the process of making this attractive craft without any difficulty by following step-by-step instructions. This project allows beginners to explore their creativity and attention to detail, all while learning new techniques. This craft is good for both if it is for personal enjoyment and as a gift for someone special, this artwork is a fantastic way to express oneself and showcase their artistic abilities. Don’t miss to drop your response in the comment section.
Thanks for choosing us!
You Might Also Like
- Red Flower Garden With Bees Clay Craft Tutorial
- Clay Flower Garden With Bees Craft Tutorial
- Beautiful Clay Flower Garden Craft Tutorial For Beginners
- Beautiful Clay Flower Vase Craft Tutorial For Beginners
- Paper Flower Bouquet Artwork Craft Tutorial For Kids


