Create a pretty Christmas reindeer craft scenery with us! This tutorial will guide you on making this reindeer craft using walnut shells!
Howdy! It’s Christmas time and Santa Claus’s favorite animal at this time is..? Yes, you guessed it right, a reindeer! Do you know? Reindeer symbolizes creativity, resourcefulness, and knowledge! So, inspired by that amazing creature, we have brought a craft for you! This step-by-step tutorial will guide you to make reindeer using the walnut shell! The craft will definitely turn out beautiful and eye-catchy! Grab the listed materials to begin to make it with us! Hurry!
Reindeer Craft Using Walnut Shell Tutorial For Kids
Must Read: Clay Heart Leaf Tree Craft Tutorial For Kids
Supplies & Tools
- White Circular Paper Sheet
- White Clay
- Colorful Markers (Black, Red, Green, Yellow, Blue, And Pink)
- Walnut Shells
Reindeer Craft Instructions
Step #1: Stuffing Walnut Shells
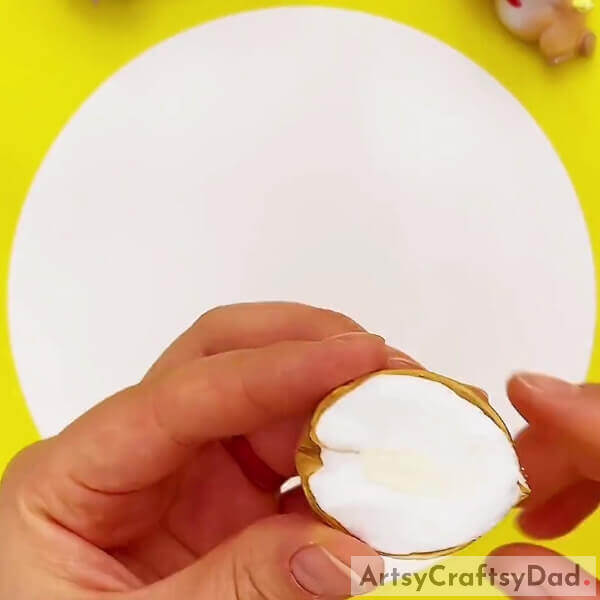
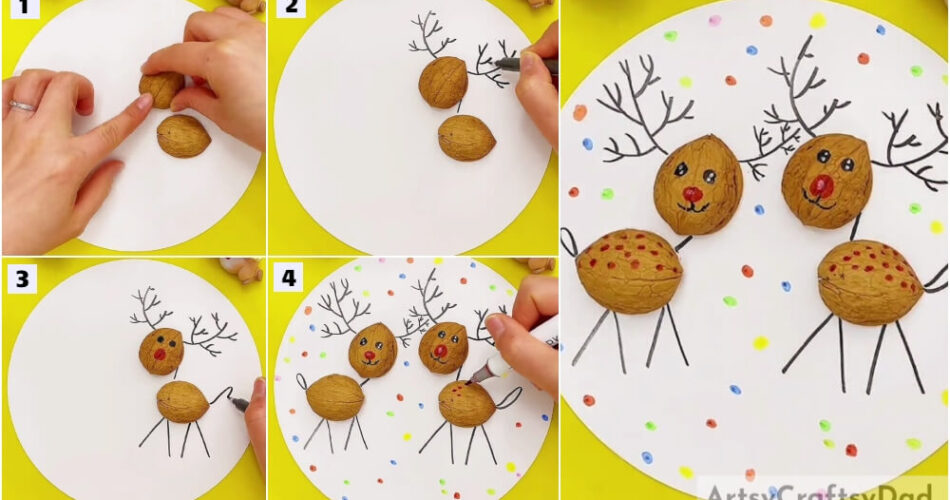
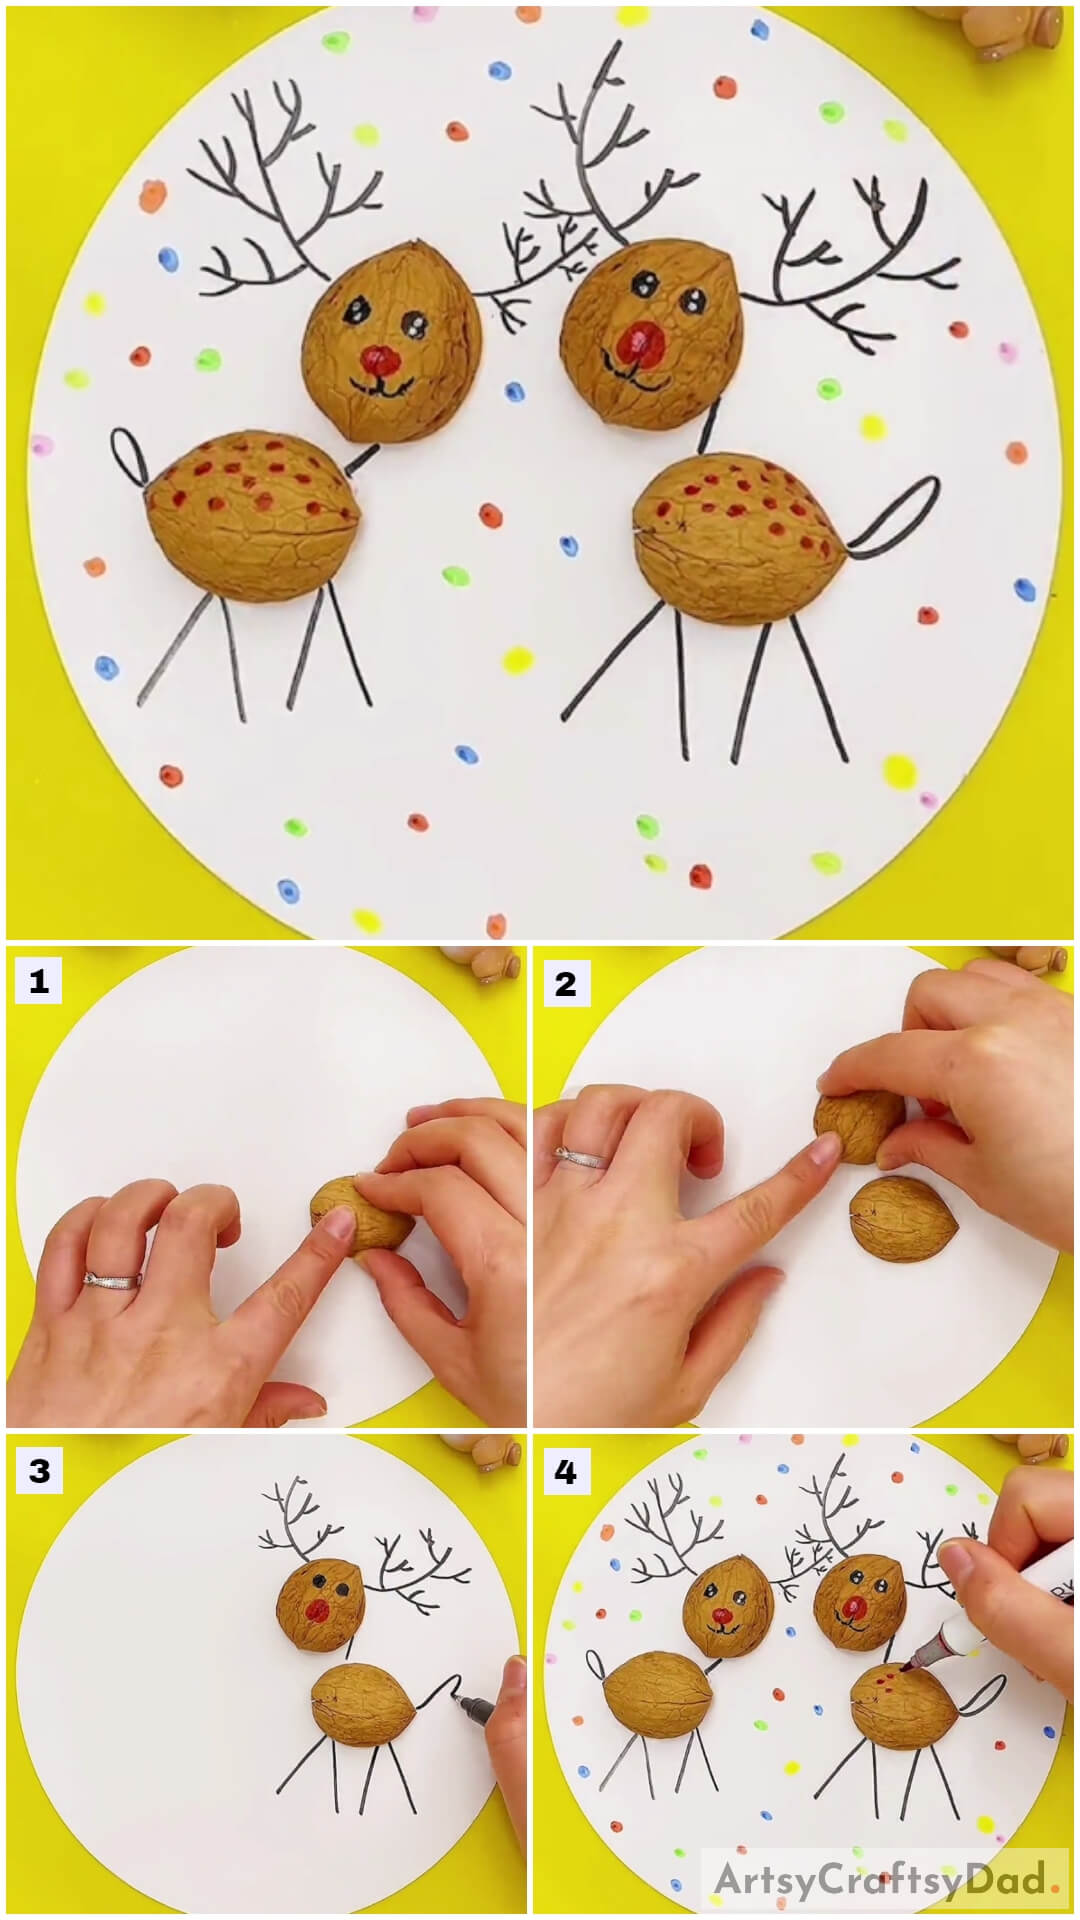
Begin this craft by taking a white circular paper sheet as the base for the craft, white clay, and walnut shells. Stuff the walnut shell with white clay and even the surface of it.
Step #2: Sticking The Walnut Shell On Base
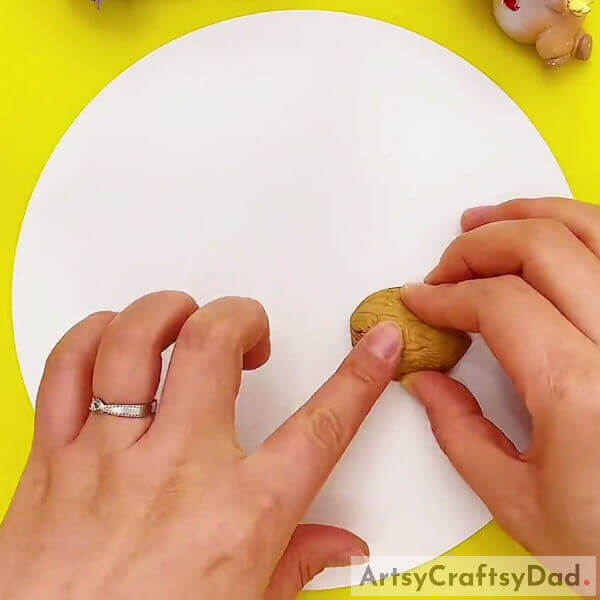
Stick the walnut shell on the circular base on the right side horizontally. This walnut shell will be the body of the reindeer.
Step #3: Making The Face Of Reindeer

Stick another stuffed walnut shell on the base, a little above the already stuck one, and on its left. Stick this walnut shell vertically tilted over the base. This will be the face of the reindeer.
Step #4: Making Horns Of Reindeer
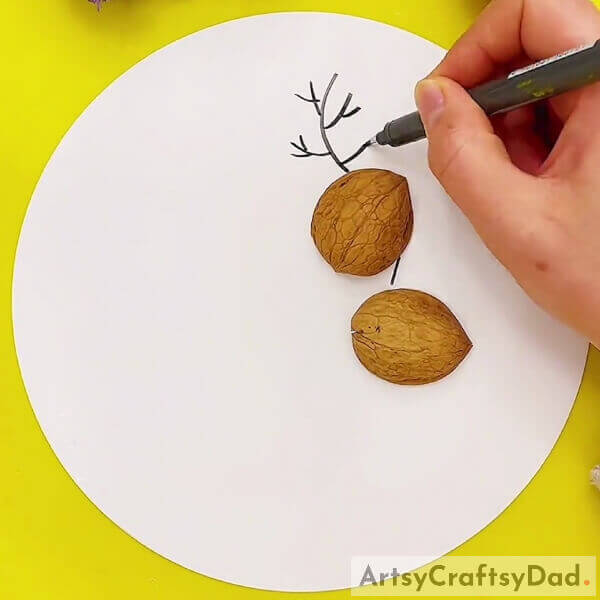
Grab a black marker and using it, draw the irregular tree branch-like horns of the reindeer above its face on the base. Also, make a line between the face and the body of the reindeer.
Step #5: Completing Making Horns Of The Reindeer
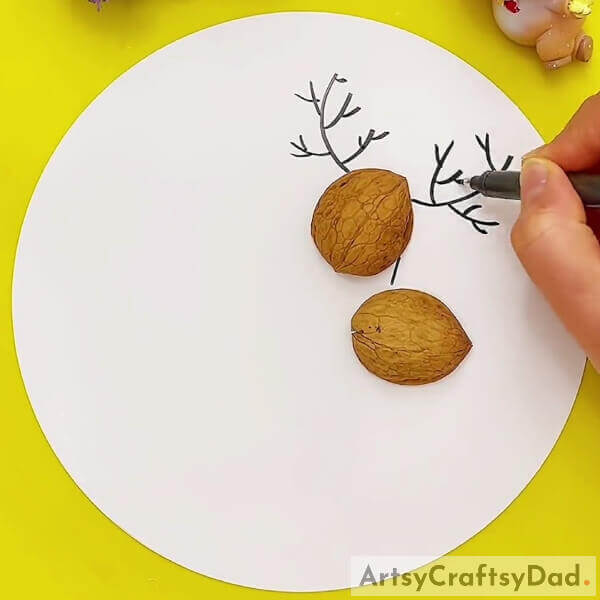
Completely make the big horns of the reindeer above its head along with small branch-like horns spread over. See the image for reference.
Step #6: Making Eyes Of the Reindeer
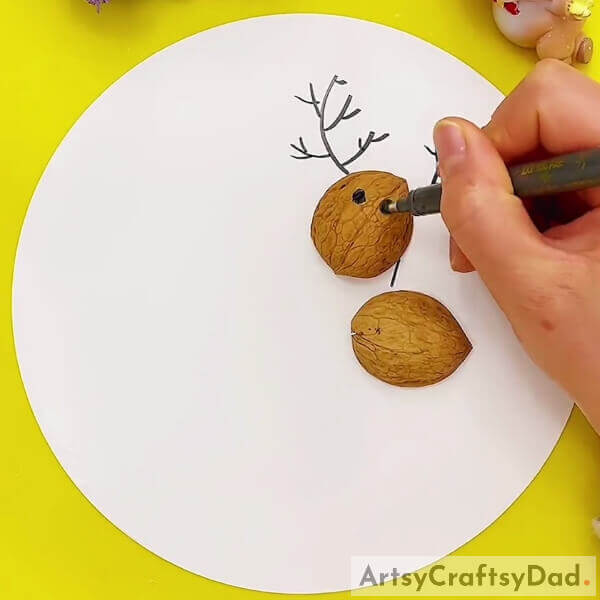
Using the marker, make the circular eyes of the reindeer over the walnut shell face.
Step #7: Making Nose, Tail, And Legs Of the Reindeer
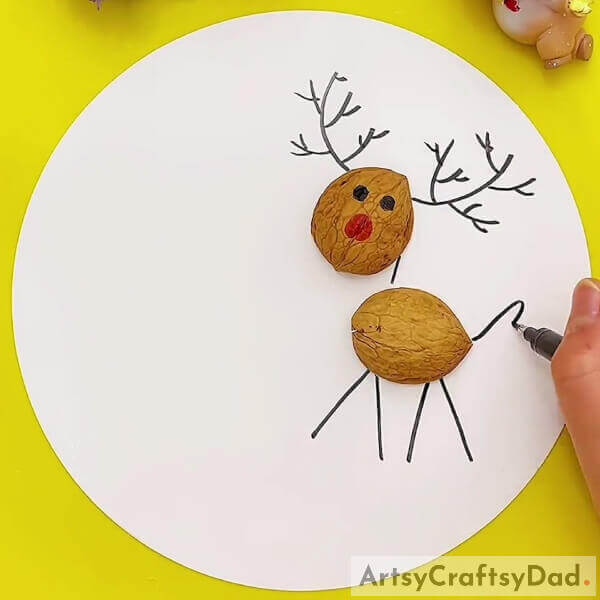
Grab a red marker and draw a round nose over the face, below and between the eyes of the reindeer. Also, using the black marker, draw the thin oval-like curved tail of the reindeer behind the body of it on the base, opposite to the face. Make the straight line legs of the reindeer beneath its body. See the image for reference.
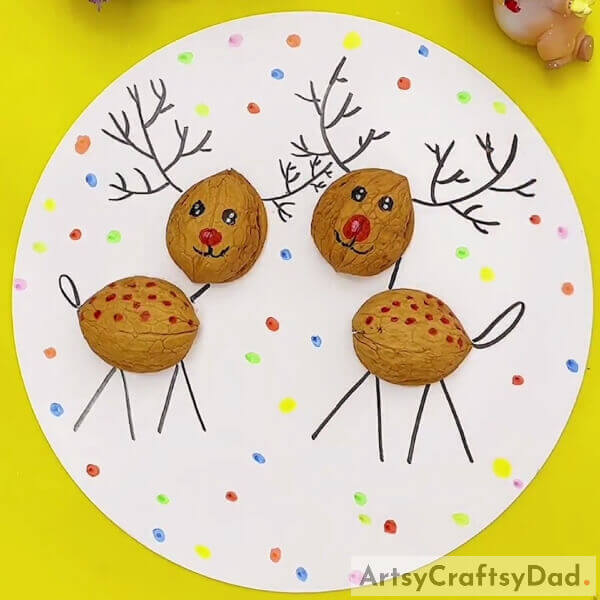
Step #8: Making Another Reindeer And Texturing Them
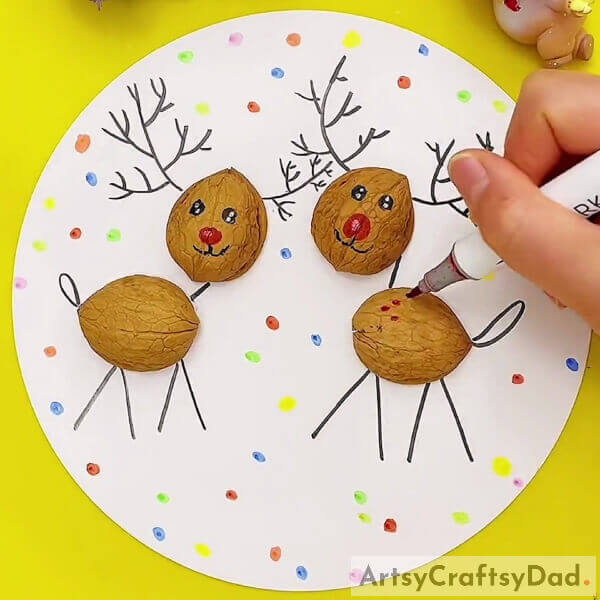
Make another reindeer in the same way you made the previous one, on the left side of the base. Make sure to invert all the features of this reindeer opposite to the previous one, for example, make its face to the right of the body and the tail to the left. Now, using the red marker, make the spots over the upper half of the bodies of these reindeer.
Decorate the background of this craft by making colorful dots using green, yellow, red, blue, and pink-colored markers randomly. See the image for reference.
This Is The Final Look Of Your Walnut Shell Reindeer Craft!
Woohoo! You have finally made your pretty reindeer craft like a pro!
You can now take a minute to admire your creation! Decorate it in your room to get the wholesome Christmas vibes! This craft can also be customized in any way you like and imagine, make a snowy background, make the horns and tail colorful and realistic using markers and pens, anything! This craft can also be used as a school craft project for the Christmas holidays! This will be a fun and budget-friendly craft that will be admired by everyone!
Hope you liked the article and the craft idea! Share it as much as you can to keep us encouraged to keep bringing such craft for you! Also, tell us your feedback to us in the comments section below! We would love to hear from you!
You May Also Like
- Clay Snails On Leaves Craft Tutorial For Kids
- Simple Reindeer Craft Projects for Kids to Celebrate Holidays
- How to make coconut shell showpiece
- How to make pista shell bird for wall decoration
- How to do coconut shell craft


