This detailed tutorial will help you to create simple plants with roots in the soil using clay and peanut shells, This craft is a perfect pastime activity.
Welcome to this step-by-step plants with roots in the soil craft tutorial! In this tutorial, we are going to teach you how to create plants with roots in the soil craft using peanut shells and clay. This interesting craft is suitable for kids, beginners, and adults. Using very few craft materials, you can create this craft in less than 10 minutes. Let’s start!
Tree Craft Tutorial Using Clay & Peanut Shell
Must Read: How to make coconut shell showpiece
Supplies & Tools
- Clay (brown color)
- Craft paper
- Scissors
- Acrylic paint (dark green, light green, and red)
- Peanut shells
- Painting brush
Tree Plant Craft Instructions
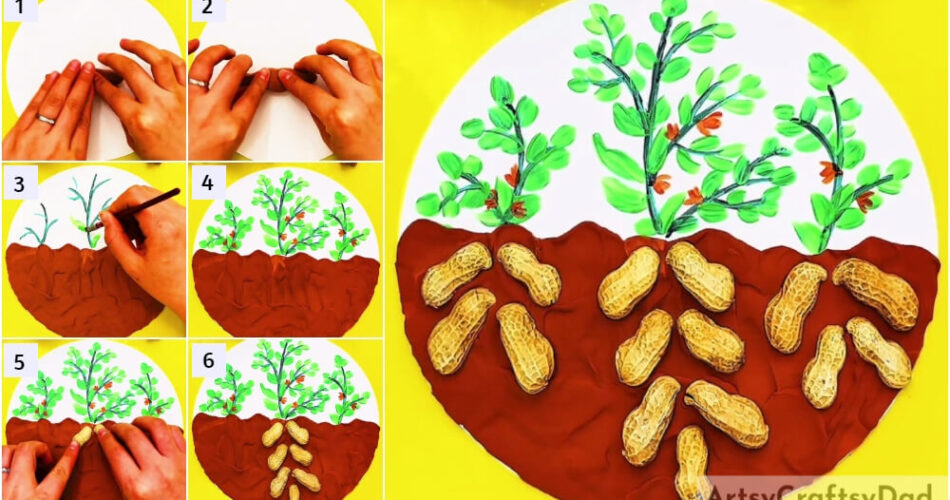
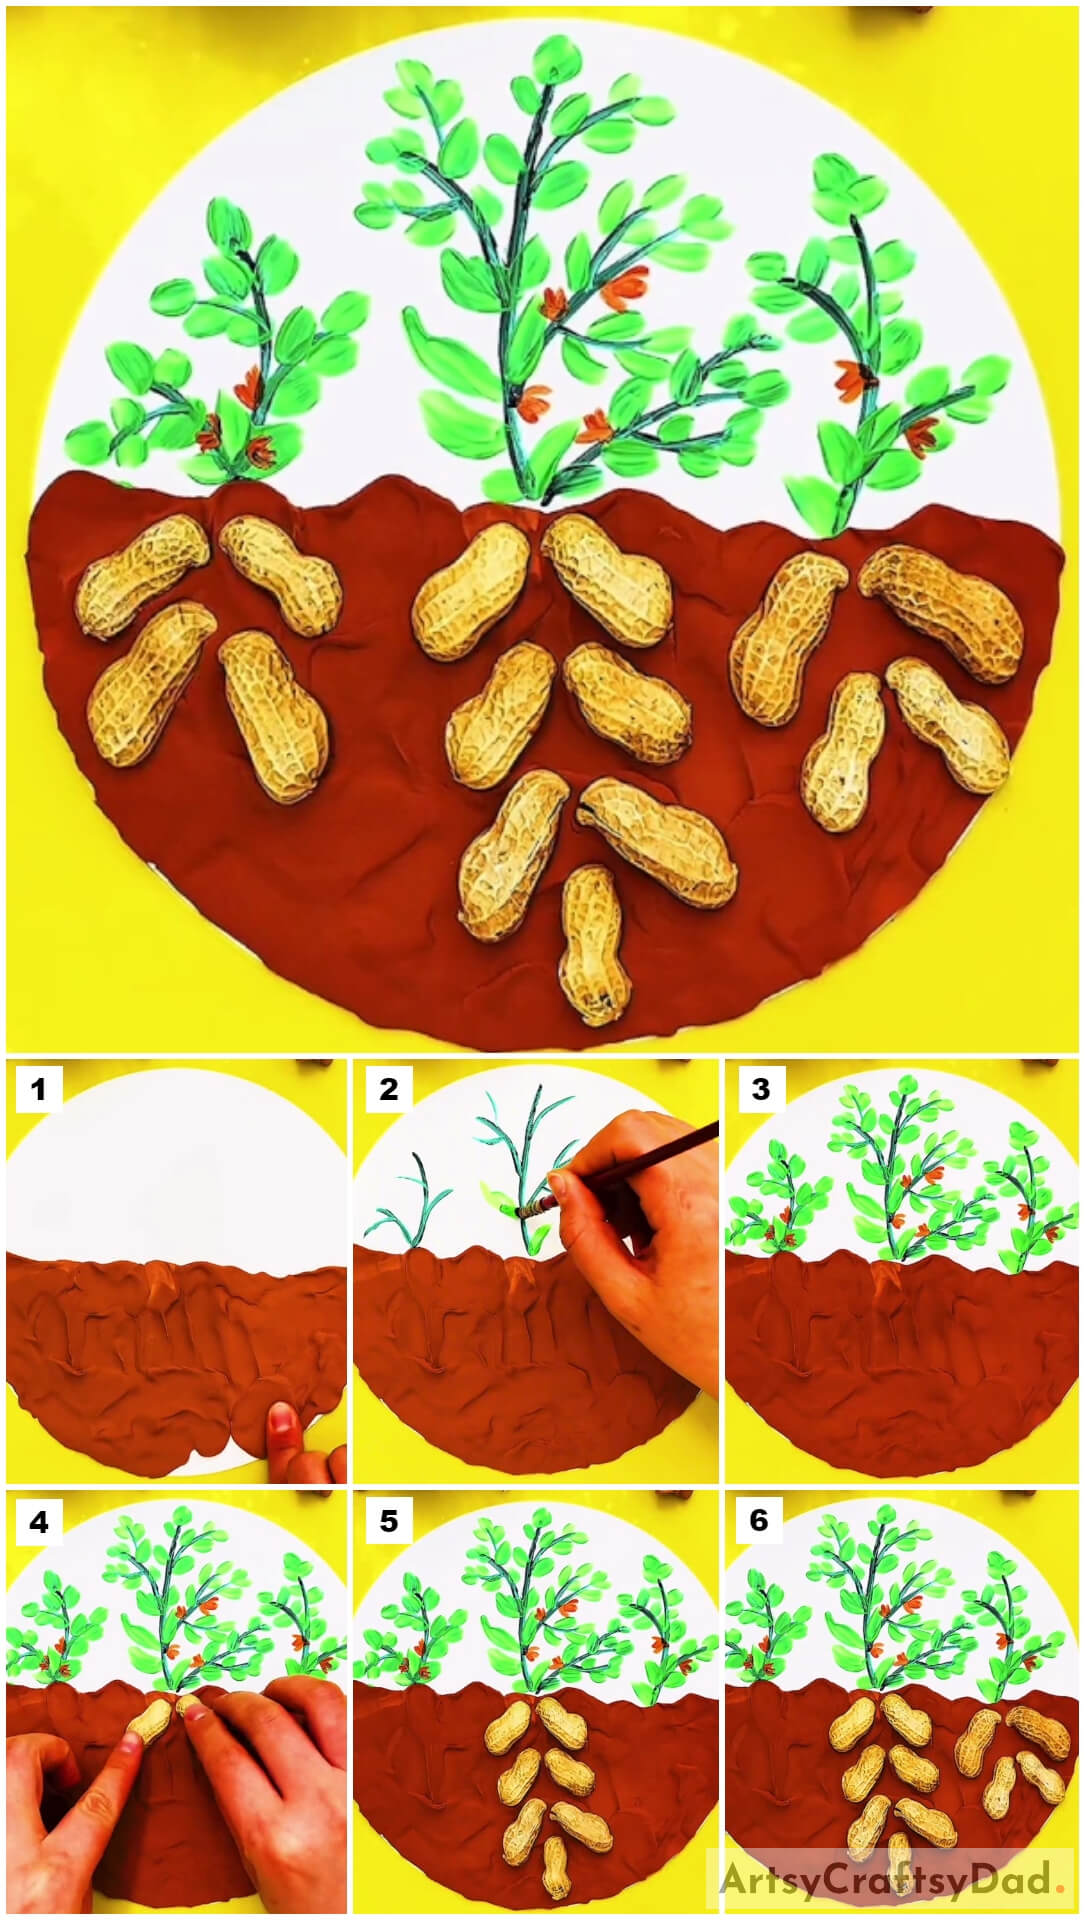
Step #1: Cutting A Piece Of Brown Color Clay
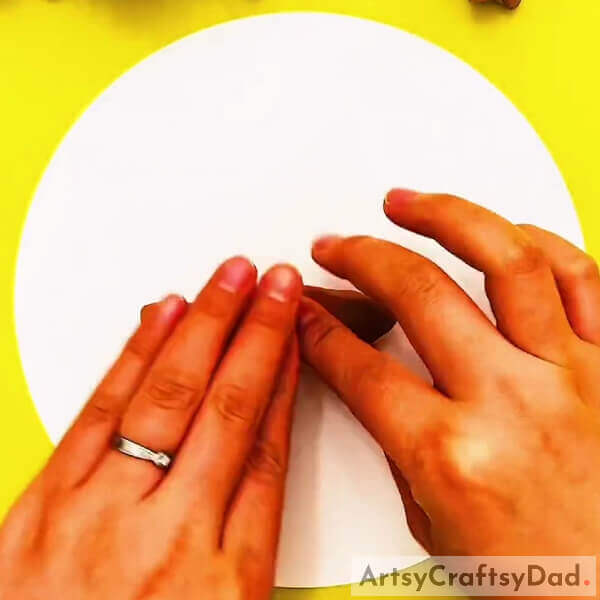
Cut your craft paper into a circle shape, then take a small amount of brown clay and roll it as shown in the image.
Step #2: Pasting Brown Color Clay On White Craft Paper
After roll your brown clay, place your brown clay in the middle of the white craft paper and press it on craft paper with your fingers.
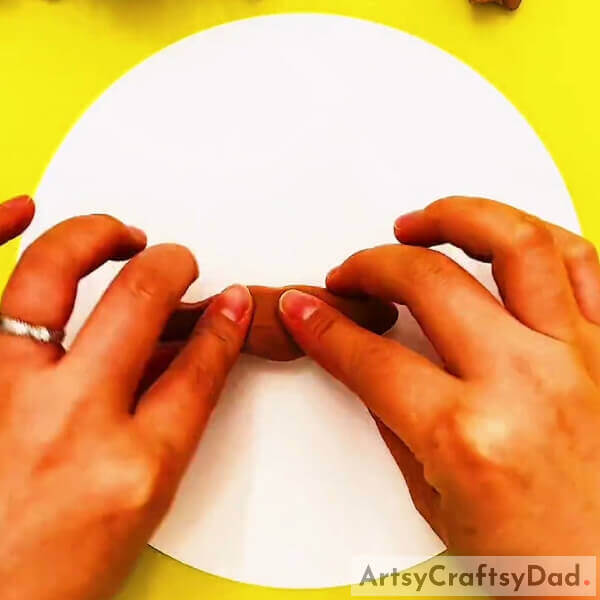
Step #3: Pasting More Amount Of Brown Clay On White Craft Paper
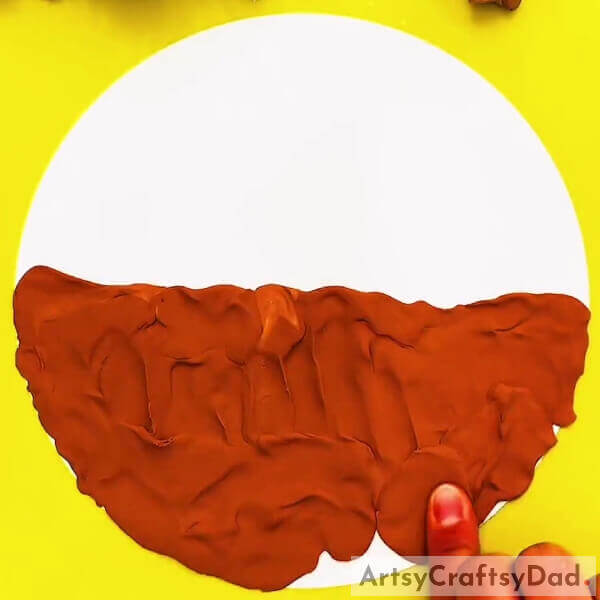
Now, take a few more pieces of brown clay and as before, place them on the bottom of the craft paper and press them with craft paper as shown in the image.
Step #4: Drawing Plant Stems Using Dark Green Acrylic Paint

Grab your painting brush and dip it in dark green color acrylic paint, then draw a curvy line above brown clay for the stem and also draw some small lines at the left and right side of that line for branches. Also, draw small plants on both sides of that big plant.
Step #5: Drawing Leaves For Each Plants Using Green Paint
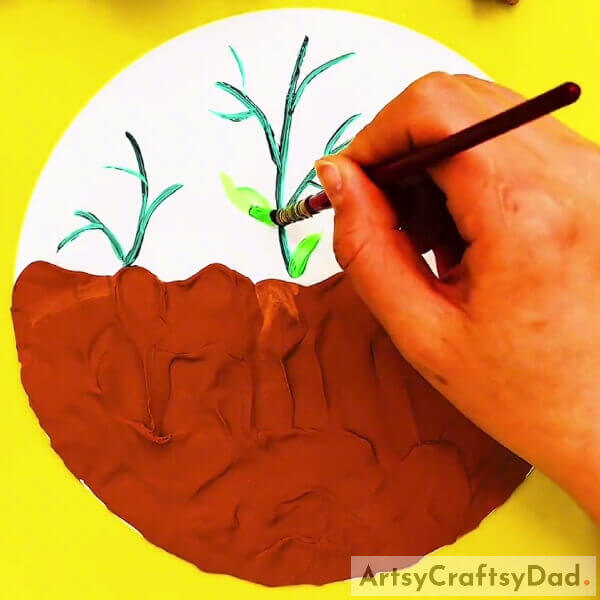
Now, wash your painting brush and dip it in green-colored acrylic paint. Then, draw leaves on stems as shown in the image, and draw leaves on each plant using green paint.
Step #6: Drawing Red Color Flowers
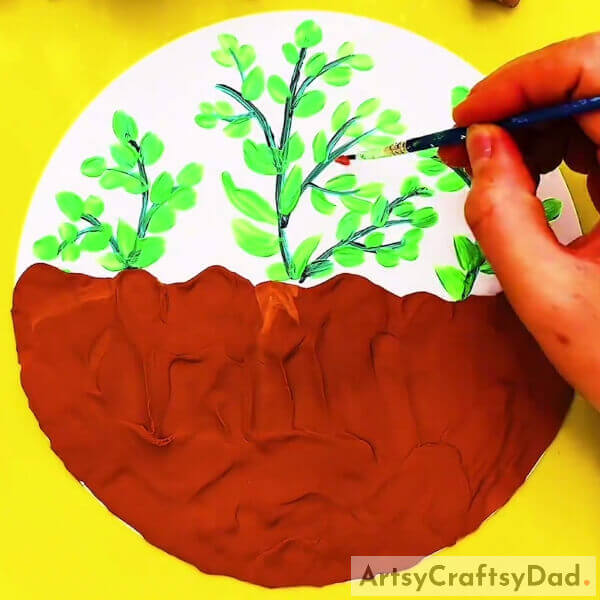
Now, take red color paint on your painting brush and then, closely draw 3 red lines on stem as shown to create flower. Draw 2 to 4 flowers for each plant.
Step #7: Completing Flower Drawing
After painting flowers, your painting should look like this.
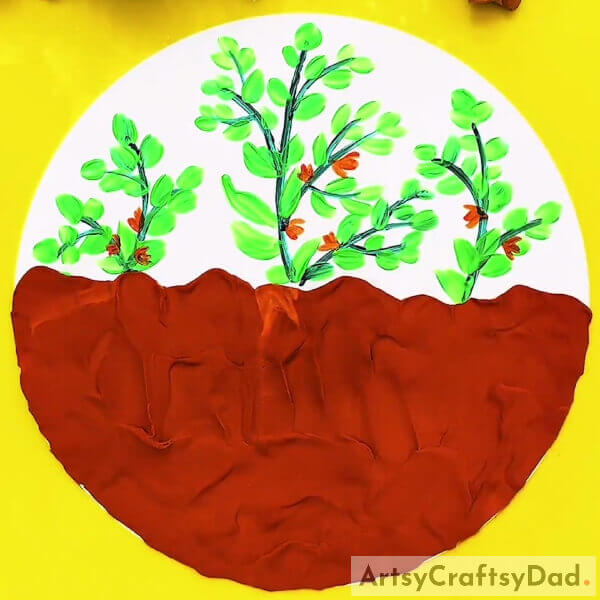
Step #8: Pasting Peanut Shells On Brown Clay

Grab some peanut shells and then under the big plant, paste one piece on left and one right side as shown. Continue to paste two more shells under that first two shells and again two shells.
Step #9: Pasting One Peanut Shell In The Middle
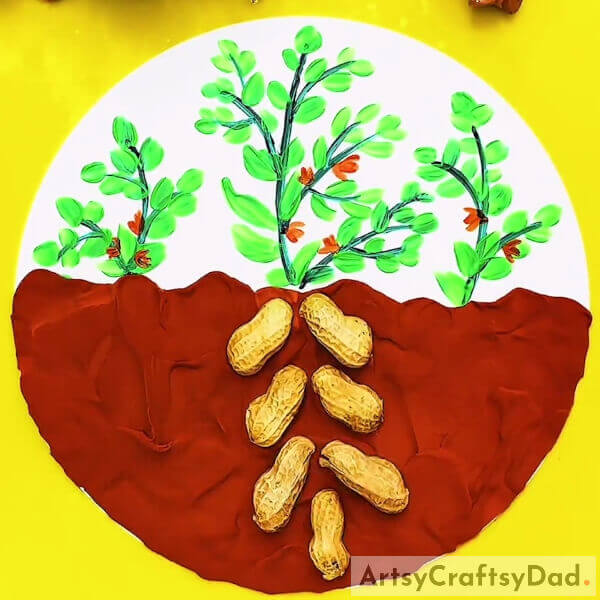
Then, take one peanut shell and paste it below all those shells.
Step #10: Pasting Peanut Shells For Another Two Plants
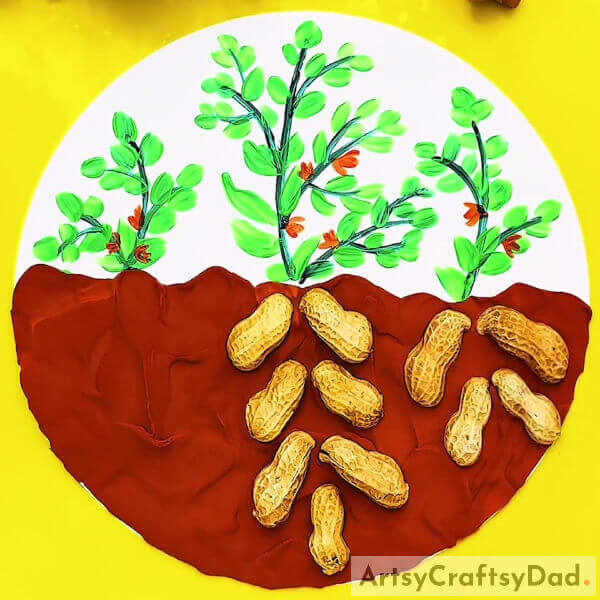
Paste four peanut shells under the plant on the right side and four peanut shells under the plant on the left side.
Our Plants With Roots In The Soil Clay Craft Is Done
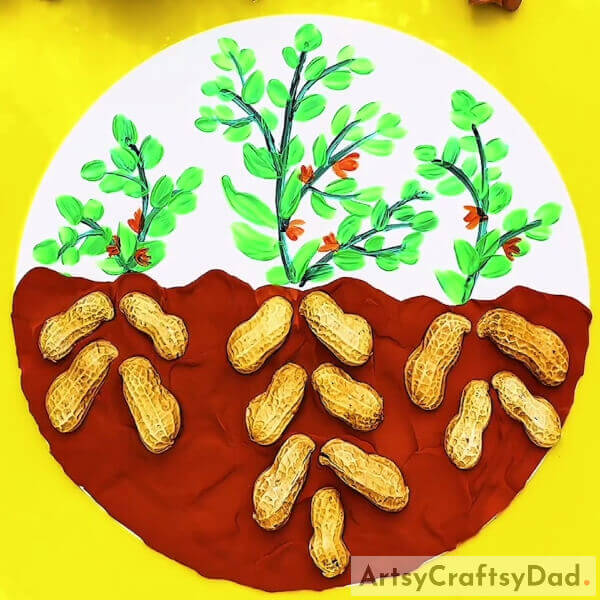
Easy plants with roots in the soil craft are ready! This is such an easy craft that anyone can create without any effort and using very few steps. You can try this simple craft in your free time.
We hope you all like this step-by-step plant with root in soil craft tutorial. Share your thoughts about this tutorial in the comment section below and visit our website for more craft and art tutorials.
Thank you for visiting our website.
You May Also Like
- Clay Snails On Leaves Craft Tutorial For Kids
- Clay-Paper Sunflower Garden Craft Tutorial
- Clay Heart Leaf Tree Craft Tutorial For Kids
- Clay Chicks In Garden Craft Tutorial
- How to plants hanging form waste plastic bottle


