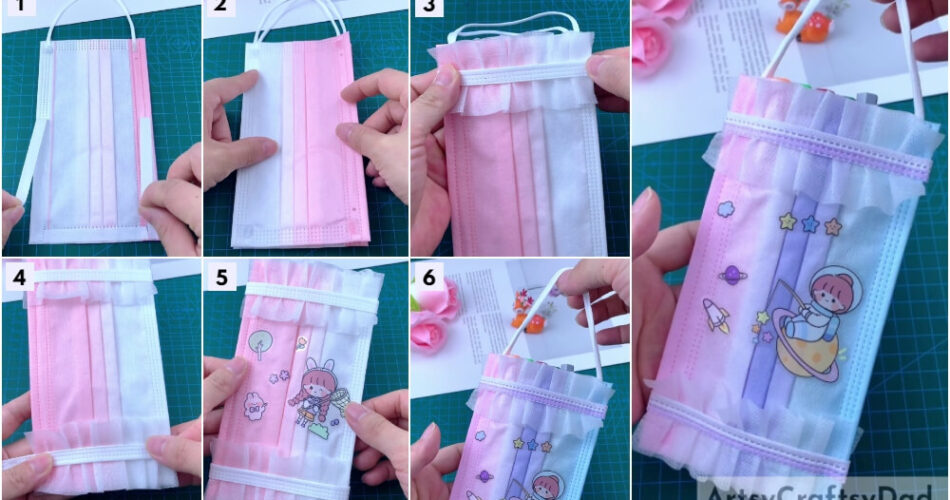
This tutorial will help you with how to create your DIY pouch using a surgical mask with step-by-step instructions.
Welcome to this tutorial! Using this tutorial, you can learn how to make an easy surgical mask pouch. This craft is perfect for children of all ages, to create this pouch you will need a few supplies like a surgical mask, glue, scissors, and stickers. This simple craft is easy to make, which is useful for carrying stationery things for your kids. Let’s begin!
DIY Pouch Using Surgical Mask Craft
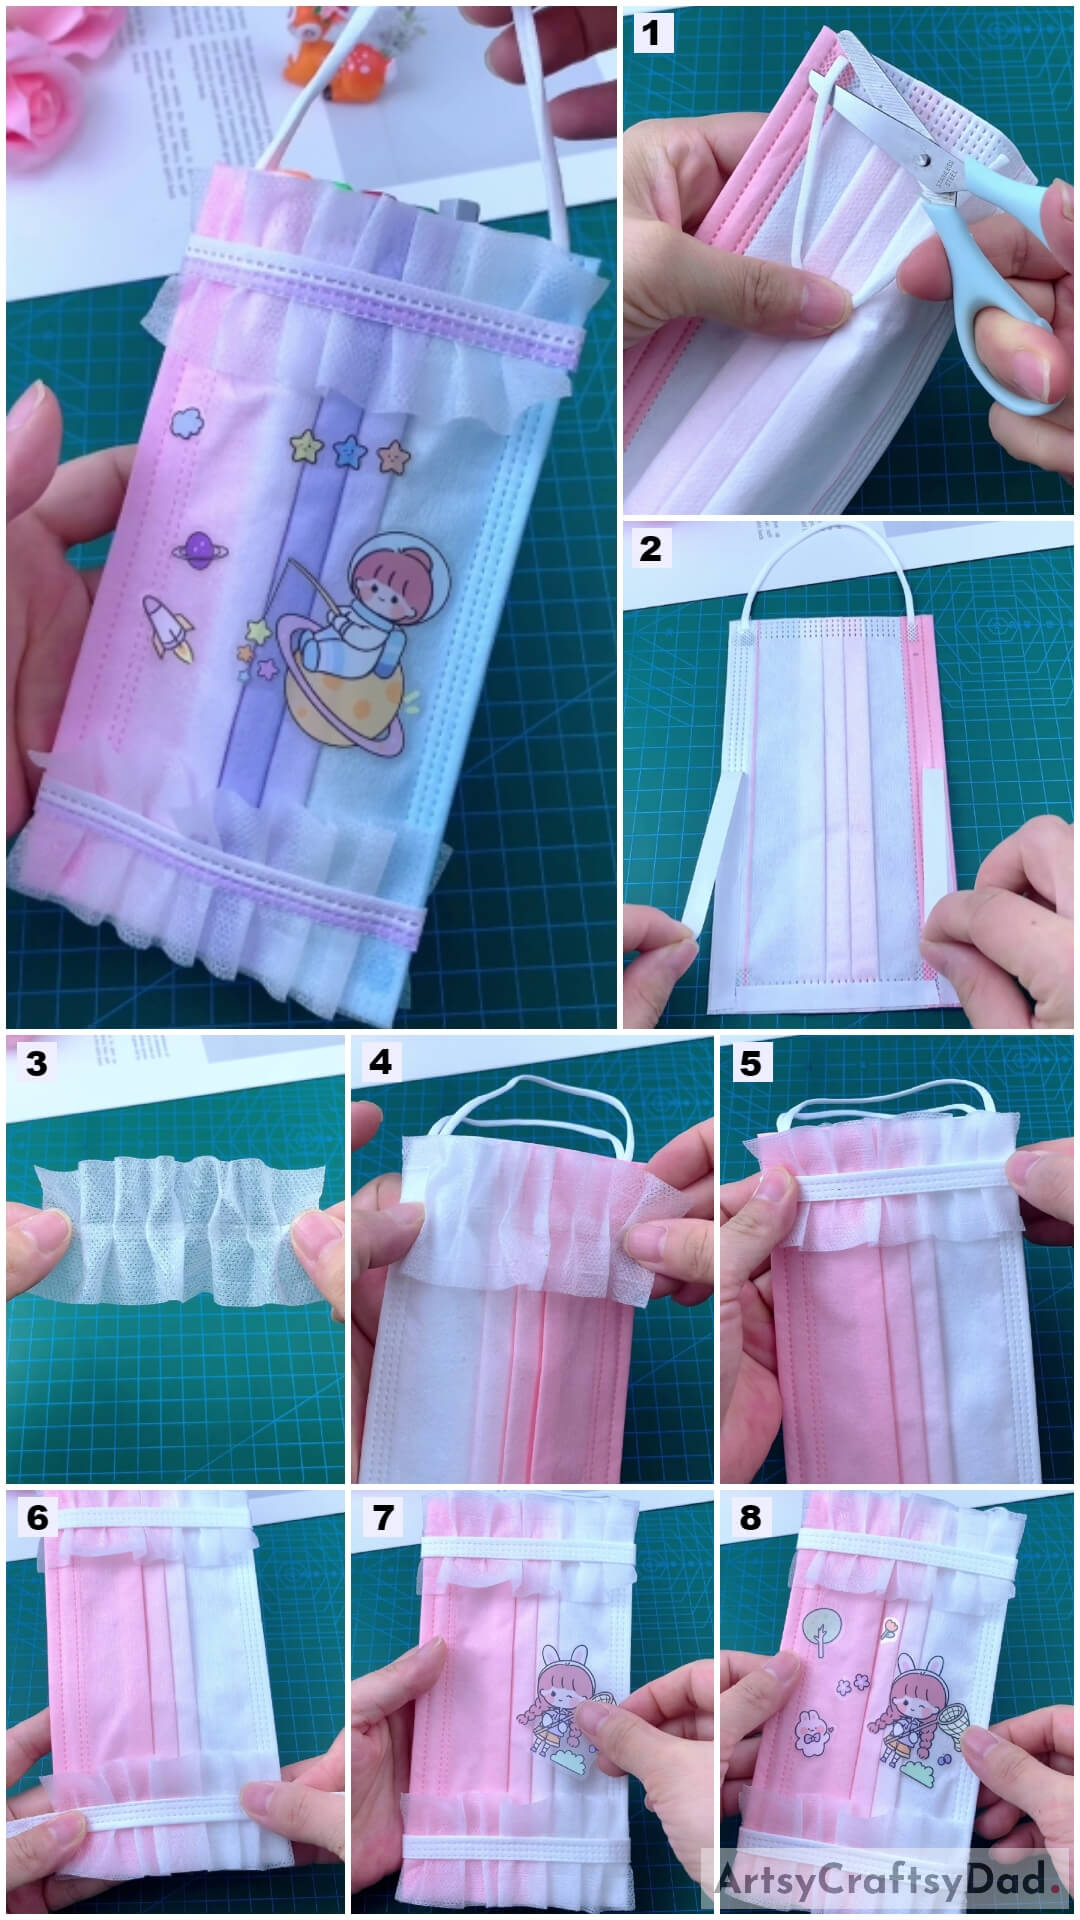
Must Read: Recycled carry bags transform into beautiful flower bunches
Supplies & Tools
- Three surgical mask
- Scissors
- Double-sided tape and glue
- Cute stickers
Mask Craft Instructions
Step #1: Cutting The Elastic Strap Of Surgical Mask Using Scissors
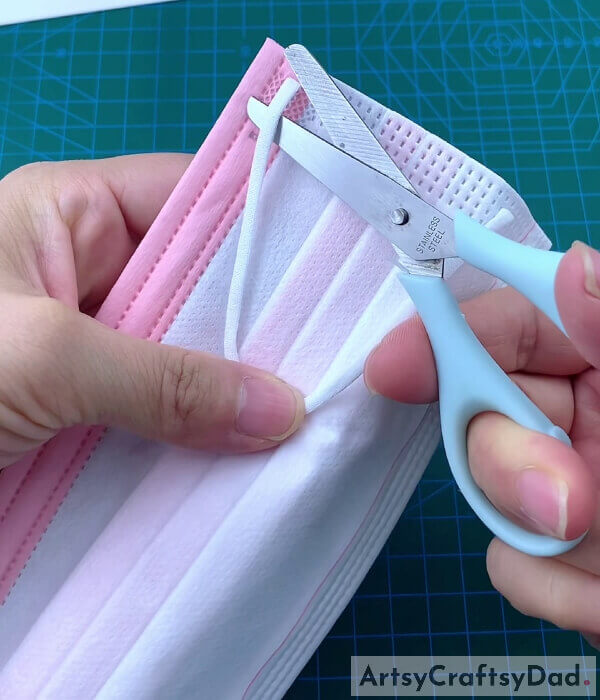
Take two pieces of surgical mask and cut one elastic strap of both surgical masks using scissors.
Step #2: Pasting Double-sided Tape On A Surgical Mask
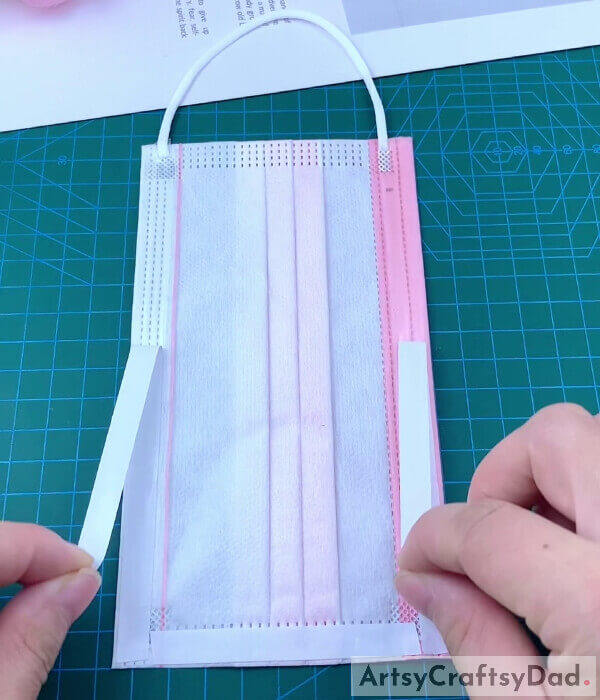
Cut two lengthy and one medium size piece from double-sided tape. Paste two lengthy pieces of double-sided tape on both the left and right sides of your mask and another piece at the bottom of your mask.
Step #3: Pasting Two Masks Together
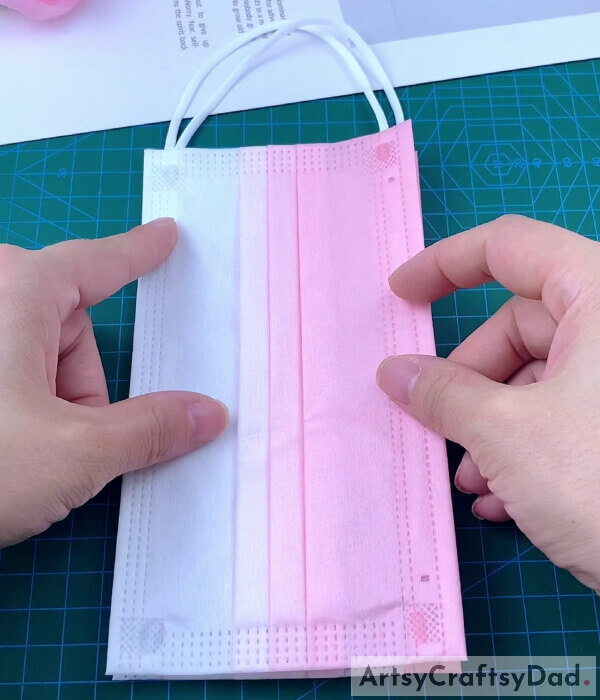
Now, peel another side of your double-sided tape and paste two masks together as shown in the image to create a pouch.
Step #4: Creating Pleats With Thin Layer Of Mask
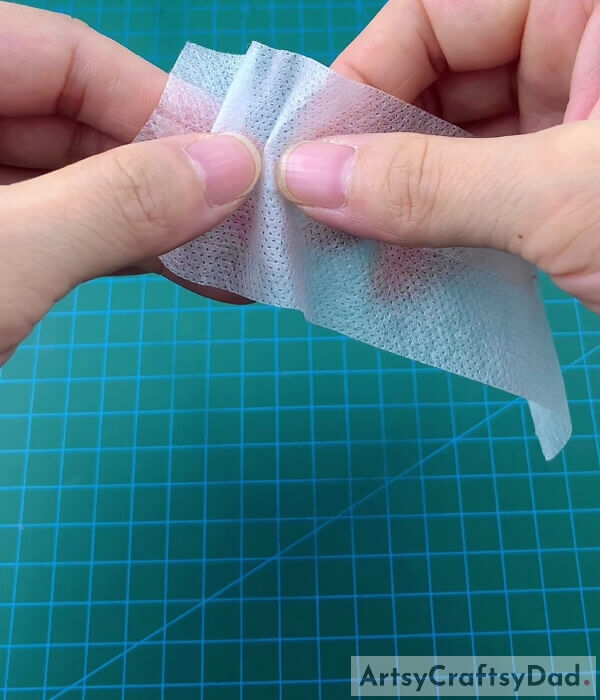
Cut another surgical mask and take a rectangle-shaped thin layer from it. Then create pleats on that piece as shown in the image.
Step #5: Pasting Double-sided Tape With The Piece Of Mask
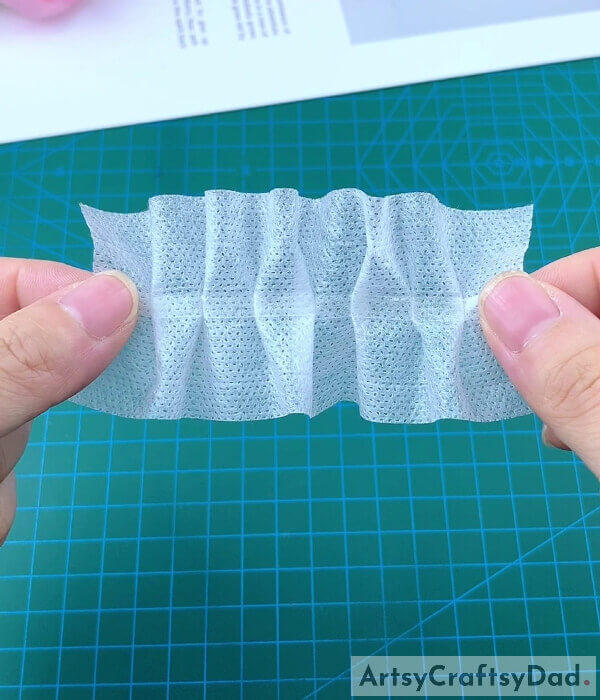
Cut a piece of double-sided tape and paste it with that piece of thin layer from our mask.
Step #6: Pasting That Piece Of The Mask With The Pouch
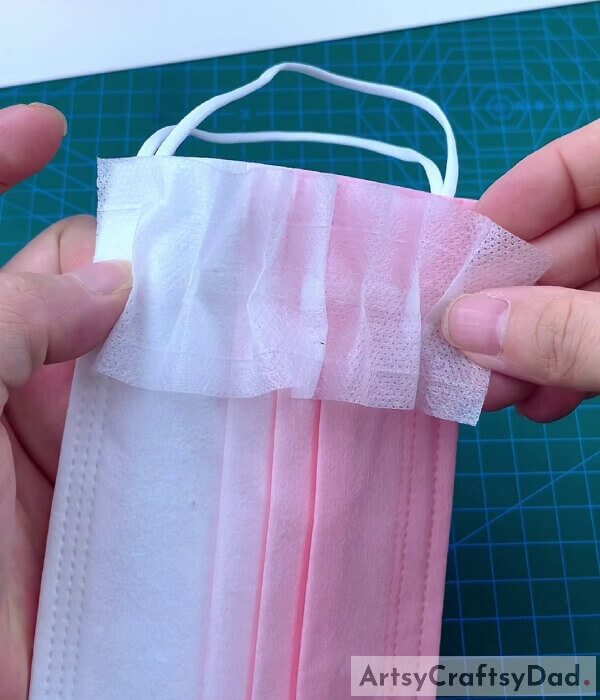
Now paste that folded piece of mask at the top of your pouch for decoration.
Step #7: Pasting Thick Piece Of The Mask With Our Pouch
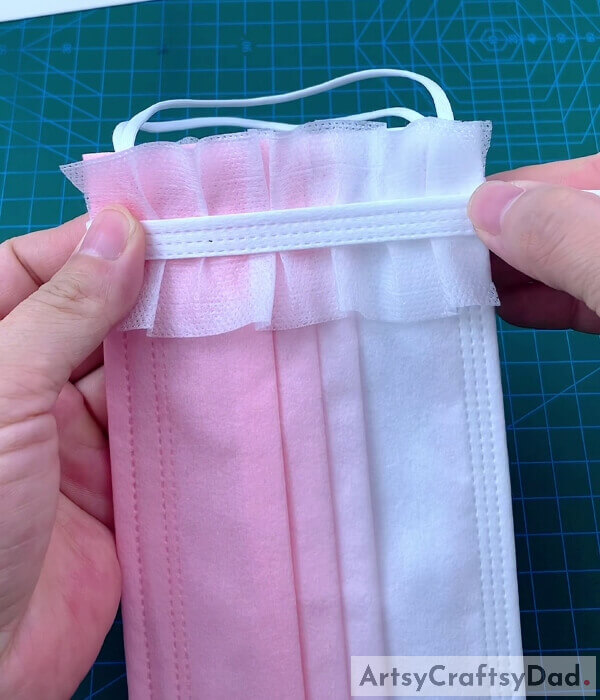
Cut two thick lengthy parts of your surgical mask (you can find them on the top and bottom of the mask) and paste it in the middle of the thin piece of mask, which we paste before for decoration as shown in the image.
Step #8: Creating And Pasting One More Thin Layer Of Mask
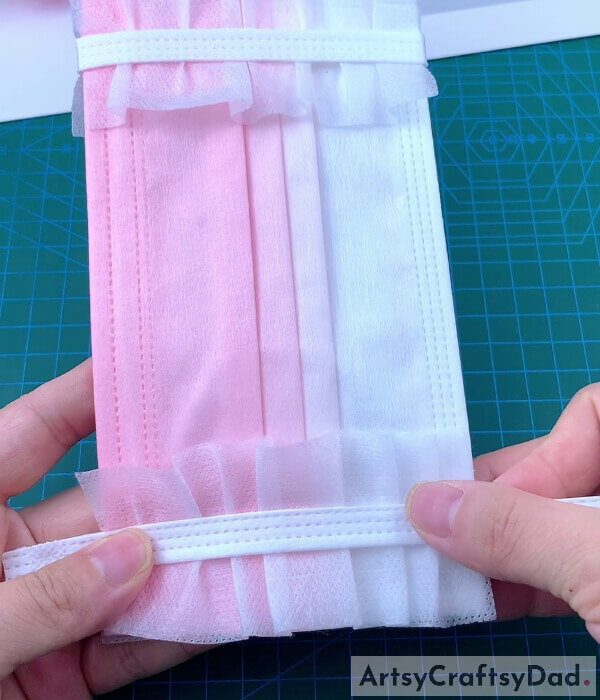
Follow step 4 to step 7 to create one more thin pleated piece of mask for decoration and paste it at the bottom of your pouch.
Step #9: Pasting Cute Stickers With Our Surgical Mask
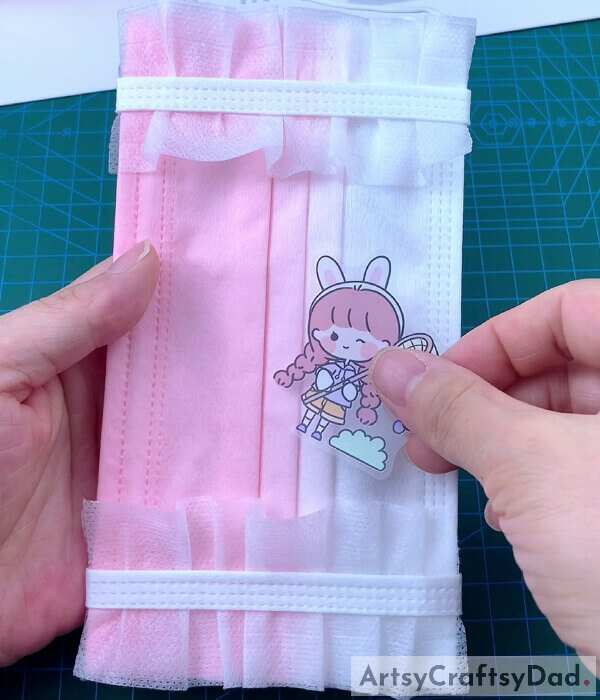
Paste some cute and adorable stickers on the center of your surgical mask pouch.
Step #10: Pasting More Stickers For Decoration
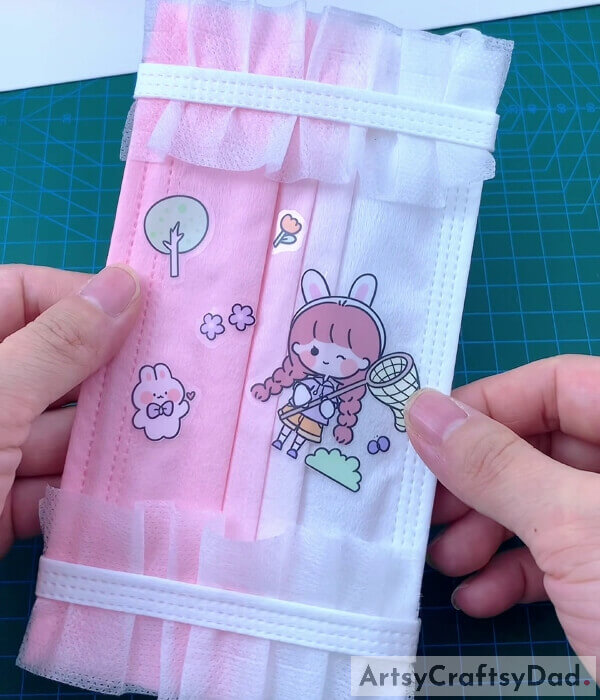
Paste more cute and colorful stickers on the center of your surgical mask pouch.
Step #11: Putting Pencils And Pen In Our Pouch
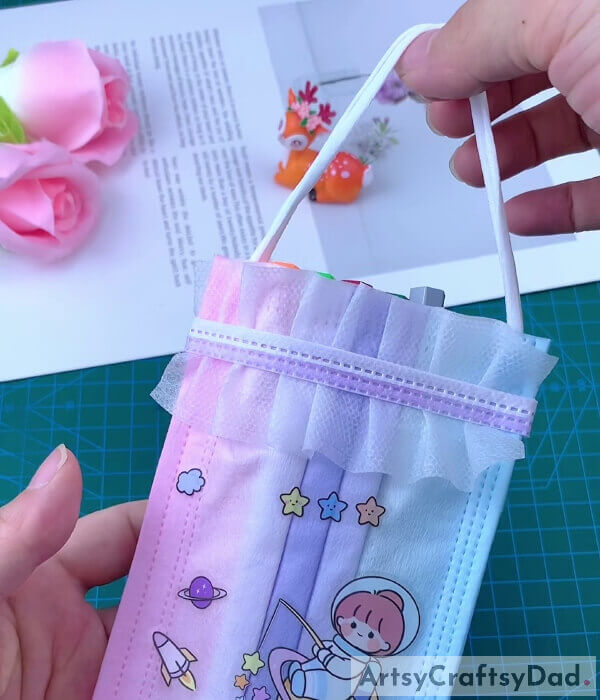
Now, you can put your stationery things like pens, pencils or your color crayons and color pencils into your pouch.
Your Adorable Surgical Mask Pouch Is Ready!
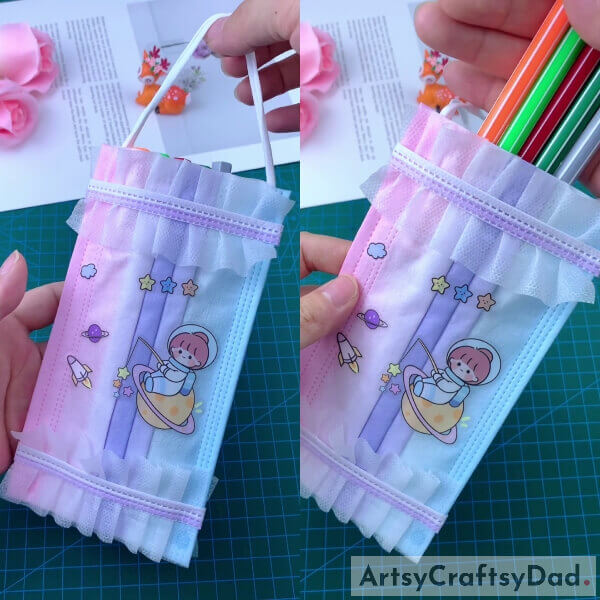
This pouch is really easy to make, which is very useful for young kids. With the help of our step-by-step tutorial, you can make this cute craft with zero effort.
We hope you found this surgical mask pouch tutorial useful, Share your thoughts in the comment section and visit other projects from your website.
Thank you for visiting our website.
You May Also Like
- How To Make a Sanitary Pad Pouch (Tutorial)
- Clay Snails On Leaves Craft Tutorial For Kids
- How to make tribal mask from plastic bottle for wall art
- Clay Heart Leaf Tree Craft Tutorial For Kids
- Clay-Paper Sunflower Garden Craft Tutorial
