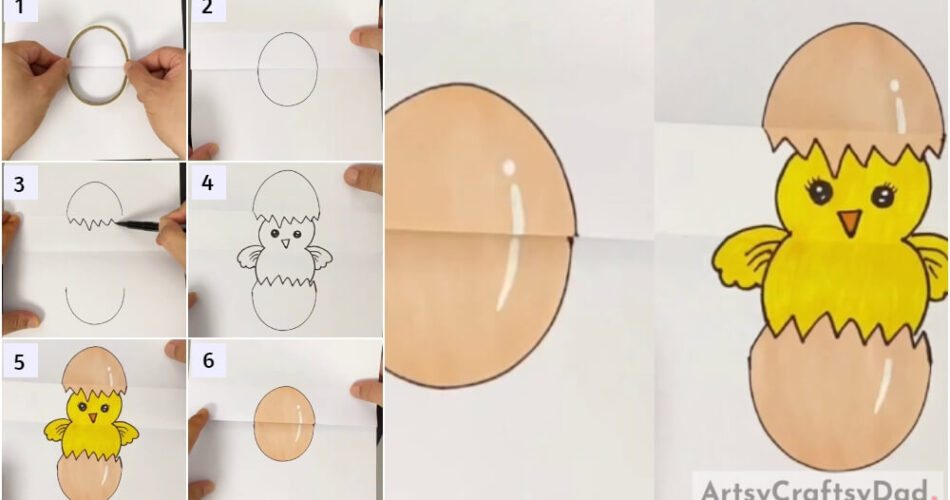
This is a step-by-step tutorial for a craft idea where kids will learn to make a drawing where they can show egg and then a chick hatching from it. Interesting, right?
This is not like that conventional chick hatching from an egg drawing; it is rather more interesting and fascinating. You will draw an egg and as soon as you unfold the sheet, there, you will get a chick hatching from an egg! This is a beginner-level drawing. It is apt for kids of ages around three and above. Kids can use this technique to showcase a process or a transformation of something, just as in this tutorial.
Let’s begin….
Easy Chick Hatching Drawing Fun Craft

Must Read: Colorful Flowers Drawing & Finger Painting Tutorial
Tools & Supplies
- A White Sheet Of Paper
- A Cello Tape
- A Pencil
- An Eraser
- A Black Marker or Sketch Pen
- A Light Brown Marker or Sketch Pen
- A Yellow Marker or Sketch Pen
Chick Drawing Instructions
Step #1: Fold A Side Of A Sheet And Place A Cello Tape

Take a white sheet of paper. Fold one-third of the sheet. Now, place a cello tape in the center of the sheet as in the image above. Place it in the size of an oval.
Step #2: Draw An Oval, Outlining The Cello Tape
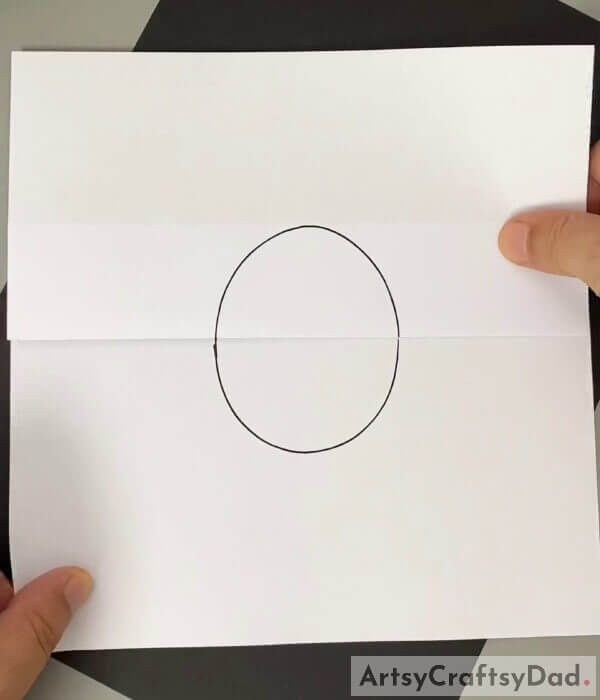
Draw the outline of the oval using a pencil to get an egg. Trace the pencil outline with a black sketch pen or a marker.
Step #3: Unfold And Finish Making A Broken Egg
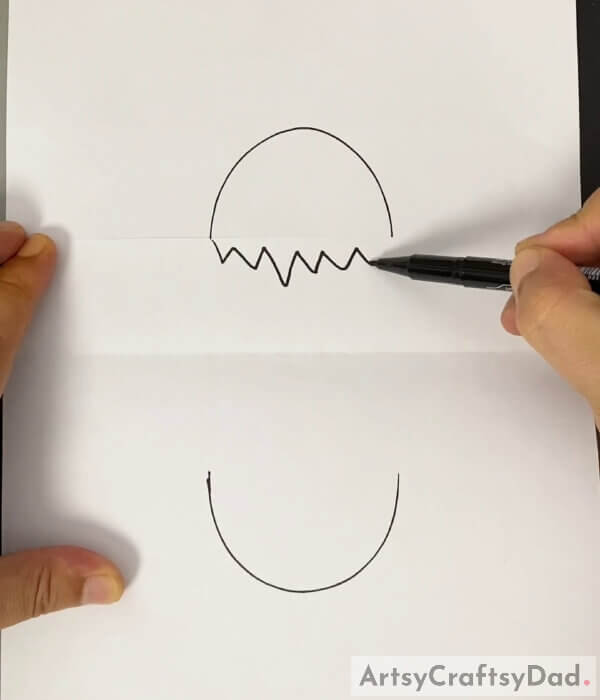
Unfold the sheet. Now, you will see arcs on both sides. Make a zig-zag from one end of an arc to another end of the same arc. Repeat the same with another arc as well. They will now look like two pieces of a hatched egg.
Step #4: Make A Chick In Between The Egg Pieces
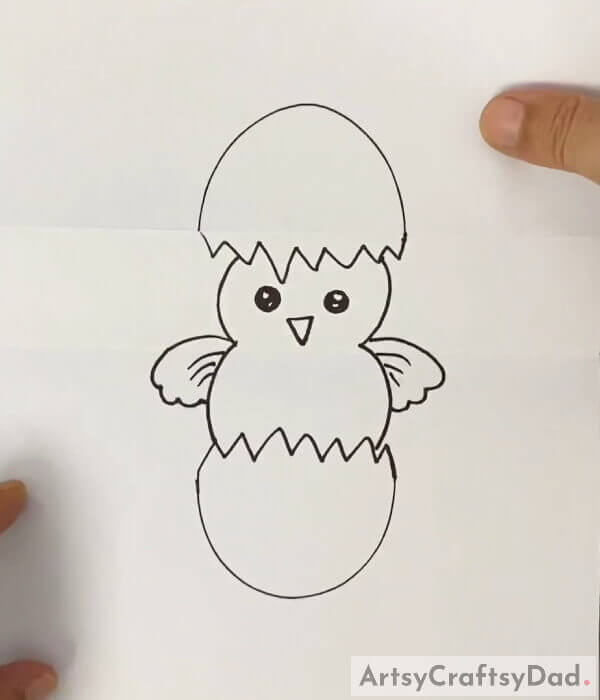
Between these two pieces, make a drawing of a chick and trace it with a black sketch pen or a marker. Use the assistance of the above image as a proper reference for the drawing.
Step #5: Color The Entire Drawing

Color the drawing now. The eggs with light brown sketch pen or marker, leaving a white reflection, and the chick with a yellow sketch pen or marker.
Step #6: Fold Back With The Crease
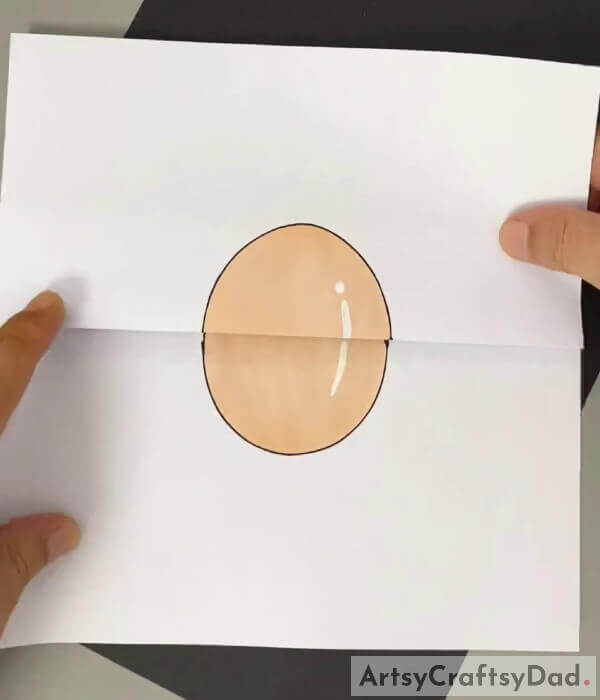
Fold the paper again as per the settled crease on the sheet. You will see a proper, complete egg.
This Is How It Will Look At The End
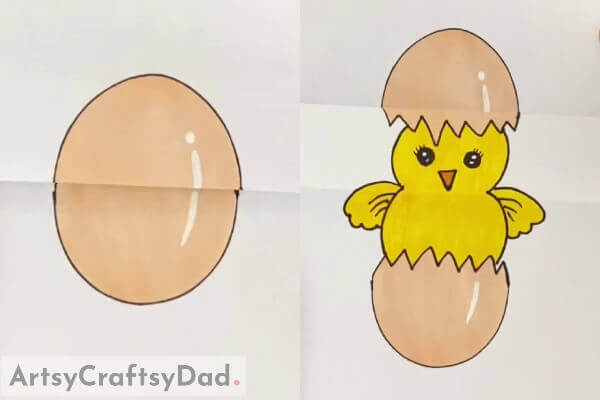
The Final Image is the last step in a project and it is the result of all the hard work put into it. It is the image that will be presented to the world and it is the lasting impression of the project.
Well, we are done here. And you can use this amazing trick to draw a lot of different items as well. For more such interesting articles, tutorials, ideas, or anything related to art and craft, visit our main website. Mention the reviews, suggestions, or anything in the comment section. We hope you like it. Thank you for your time and support.
You May Also Like
- Chick Hatch Fun Paper Craft Tutorial For Kids
- Oil Pastel Rose Bouquet Drawing Hack Craft Tutorial
- Girl & Boy In Rain: Cute Drawing Tutorial
- Hand Gesture Outline Elephant Drawing Tutorial For Kids
- Leaf Ballerina Pose – Drawing Craft Tutorial For Kids


