Looking for a fun and creative craft tutorial? Learn how to make a beautiful clay flower and tissue paper bouquet with our step-by-step guide. This DIY project is perfect for all ages and is a great way to add a pop of color to your home decor.
Flowers are a universal symbol of beauty and happiness, and they can brighten up any space. While fresh flowers are a wonderful option, they do not last forever. That’s where clay flower and tissue paper bouquet crafts come in. This tutorial will guide you through the process of creating your everlasting bouquet using clay flowers and tissue paper. Whether you want to decorate your home, get ready to unleash your inner artist and bring a touch of beauty that will last a lifetime with this clay flower and tissue paper bouquet craft tutorial.
Flower Bouquet Craft Using Tissue Paper & Clay Tutorial
Must Read: Flower Bouquet: Clay & Tissue Craft Tutorial
Supplies & Tools
- Scissors
- Colored Clay (Bubblegum, Flamingo, Baby Pink, Green)
- Tissue Paper
- White Construction Paper
- Green Sketch Pen
- Red Ribbon Note
Flower Bouquet Craft Procedure
Step #1: Making Flower Petals From Clay
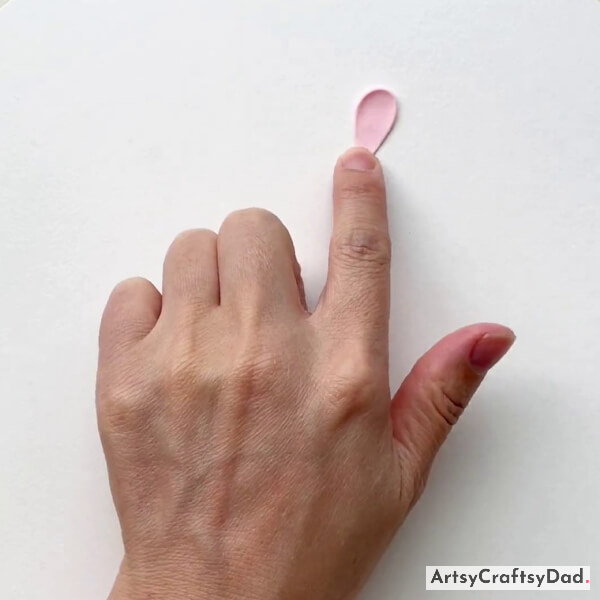
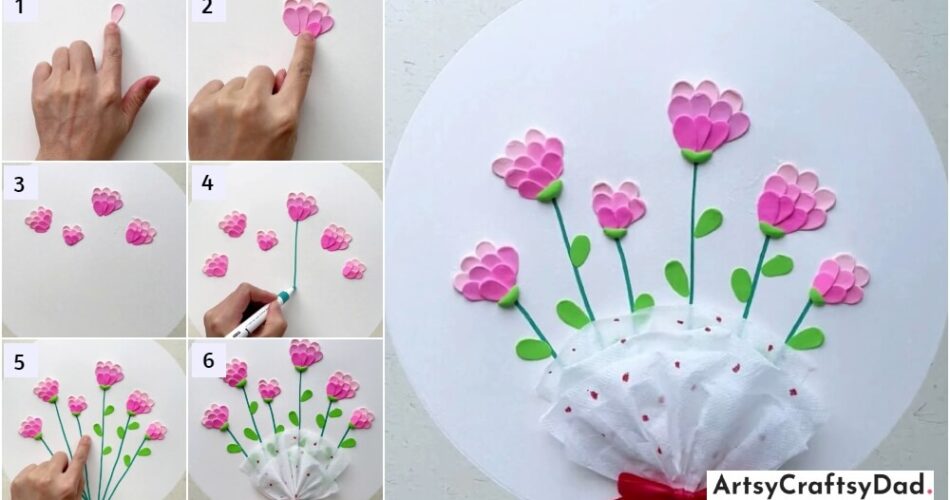
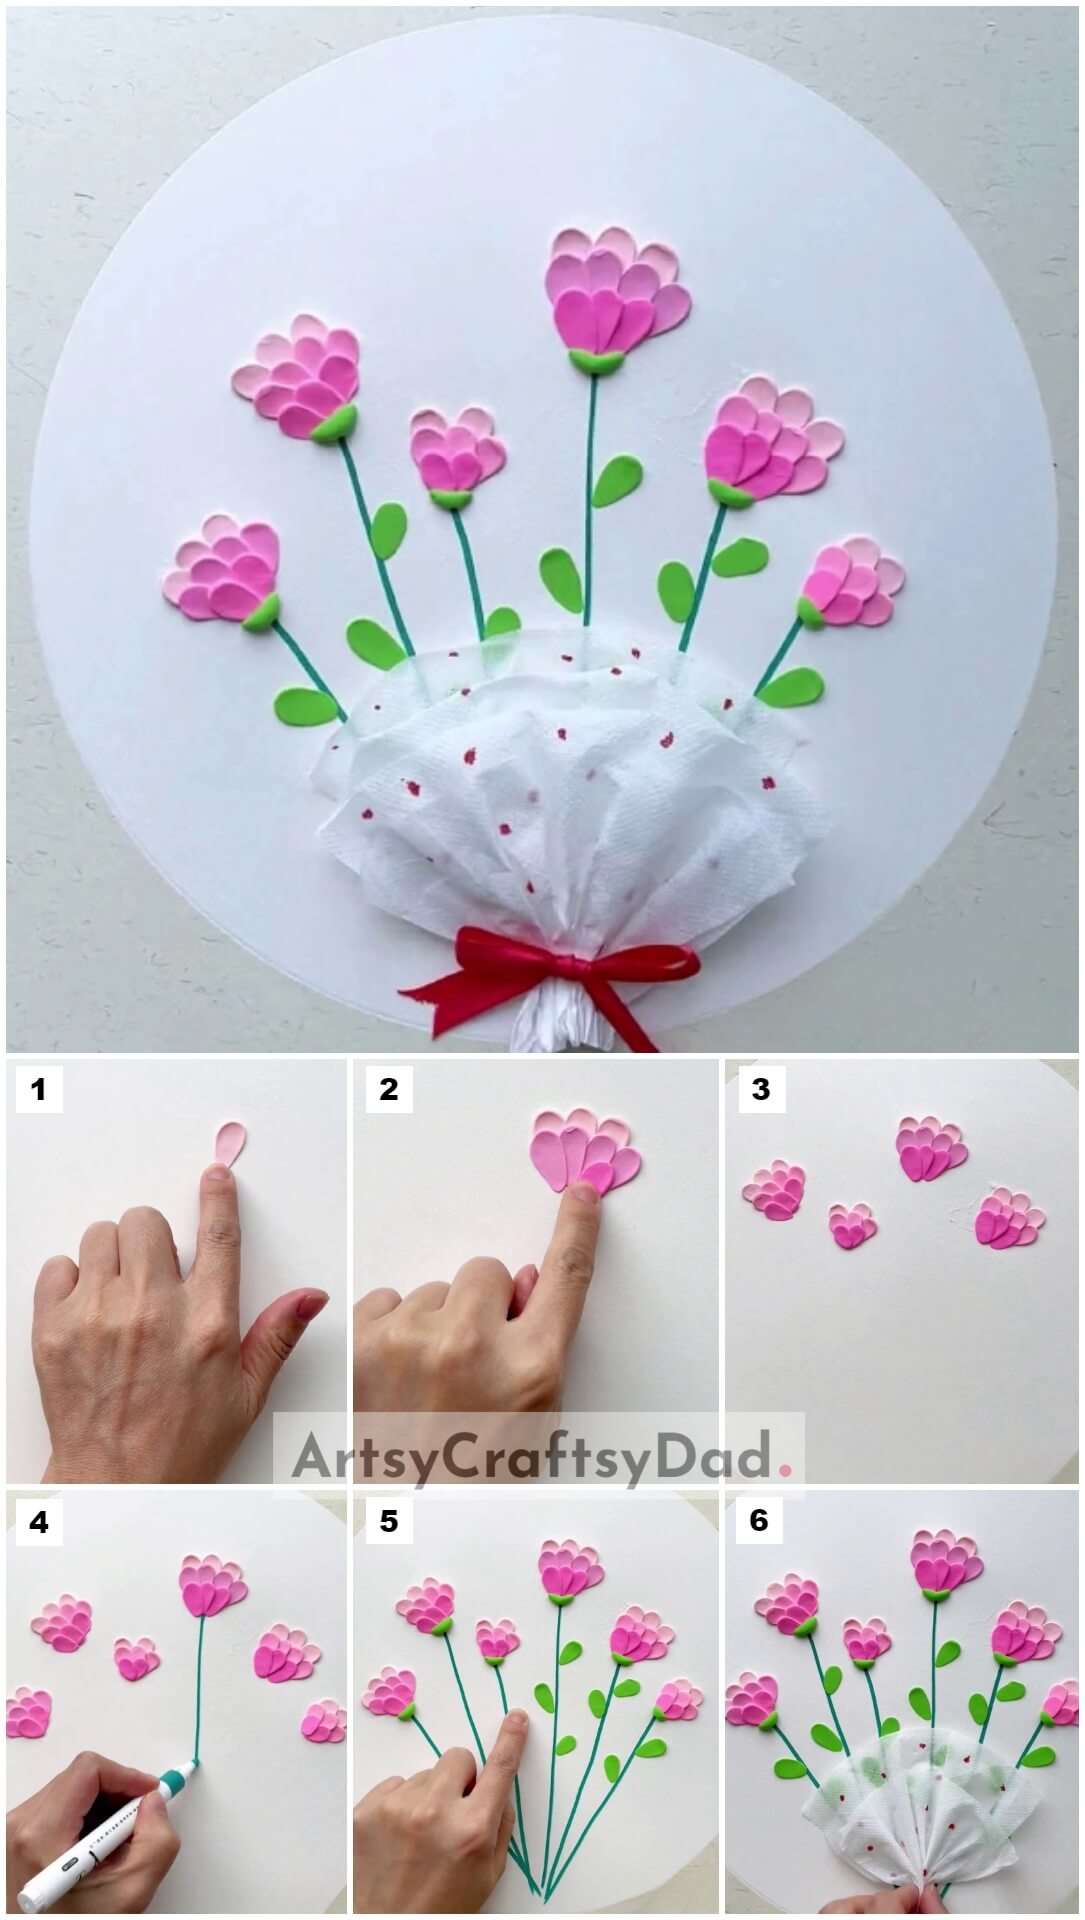
Take a white construction paper draw a big circle on it and cut out this big circle by using scissors. We will use it as our craft base.
Take a piece of bubblegum shade color clay & make a little ball shape from it & then put it on the upper side of the white base & give that ball a petal shape with the help of an index finger.
Step #2: Making More Flower Petals
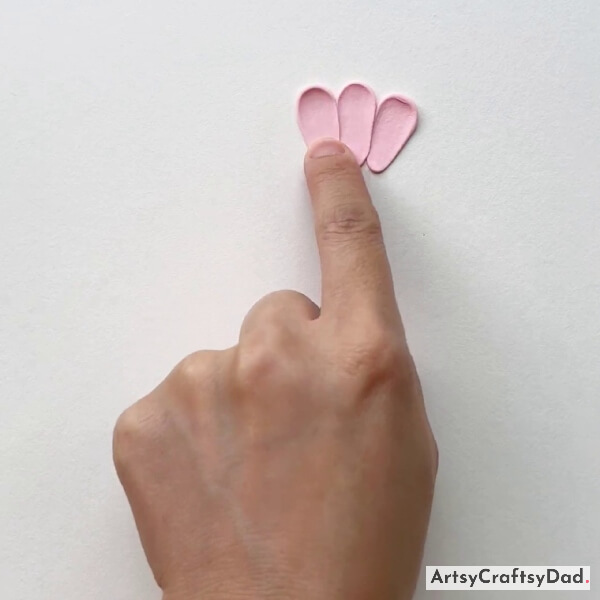
Complete the first layer of the flower with 3 petals.
Step #3: Making Another Layer Of Flower Petals
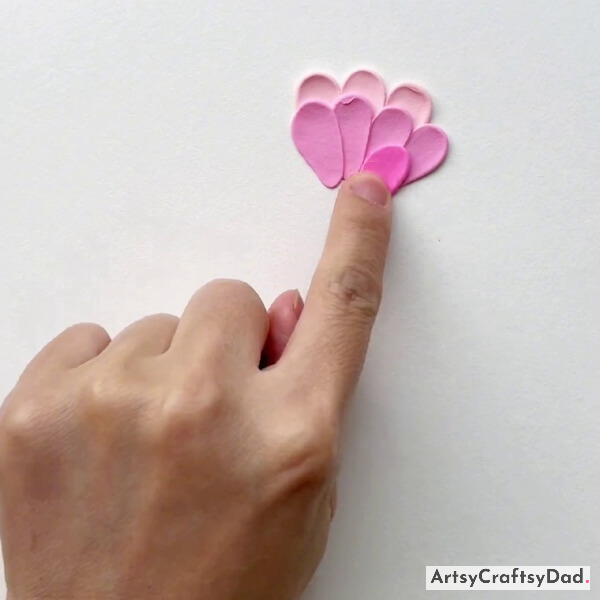
When the first layer of the flower is completed, make the second layer of the flower with flamingo shade color clay and then continue making the third layer of the flower with the baby pink color shade, remember to make a minimum of 3-4 petals in every layer.
Step #4: Complete Flower
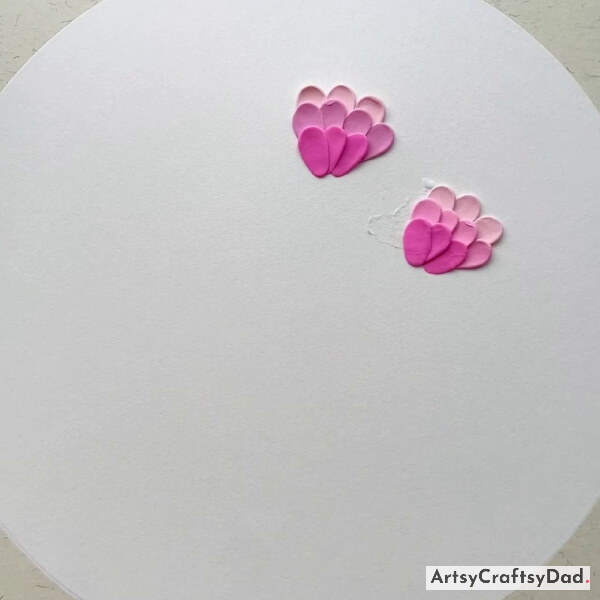
When one flower is completed then make more such flowers with the same process, making all flowers a little bit closer to each other not too far away.
Step #5: Making More Flowers

Make some flowers big and some small in size as a bouquet consists of both small and big flowers.
Step #6: Drawing Flower Stem
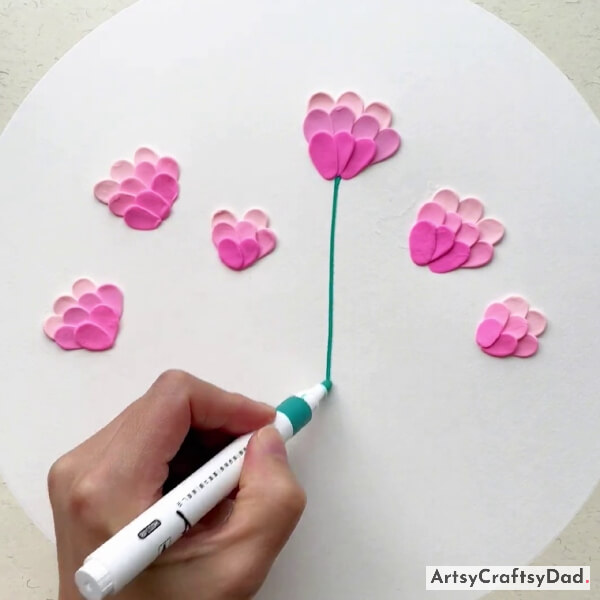
Take a green color Marker and draw a nice and straight stem under the flower.
Step #7: Drawing Stem Of All Flowers
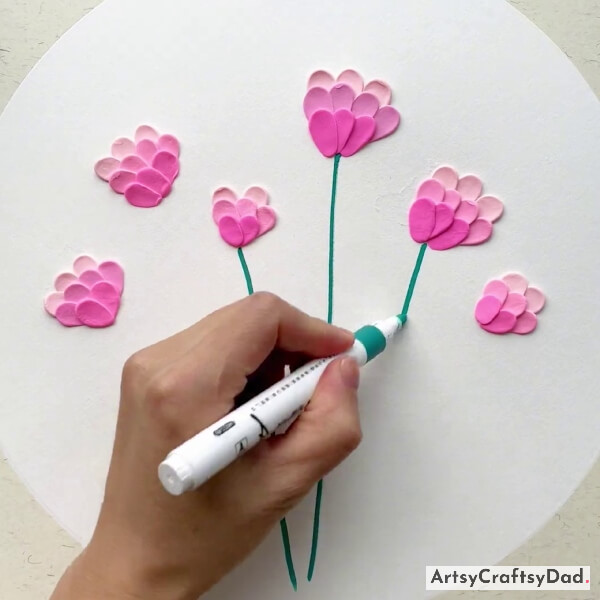
Draw the Stem of each flower of the bouquet nicely.
Step #8: Making Sepal Of Flower
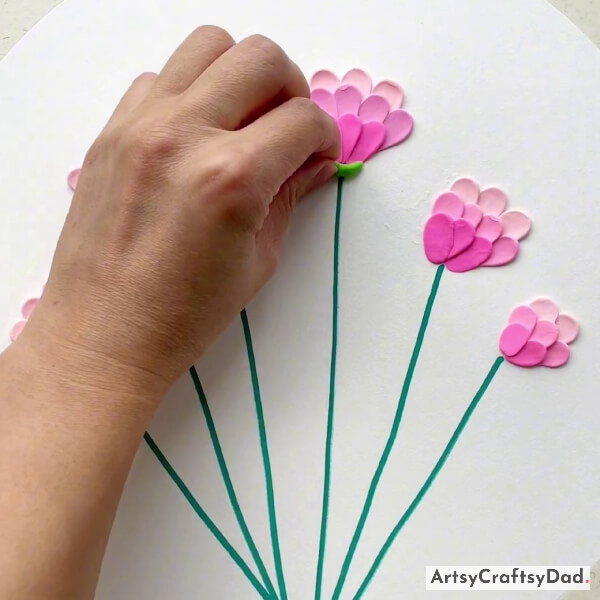
Take a little piece of green color clay make a little roll of it and paste it just below the flower’s lower end for the sepal part. The sepal is the outer part of the flower (often green and leaf-like) and encloses a developing bud.
Step #9: Making Leaves Of Stem
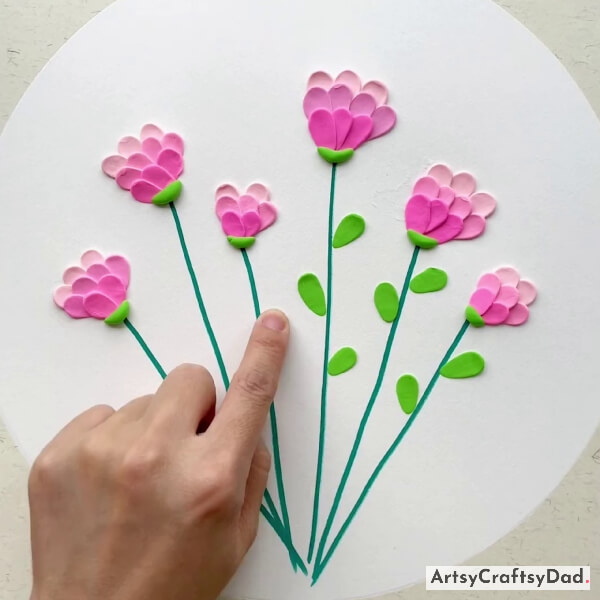
Repeat the same process & paste some more sepals for the other flowers. Now, make leaves shape from the green clay & paste them around all stems in the same manner as shown in the above image.
Step #10: Working With Tissue Paper
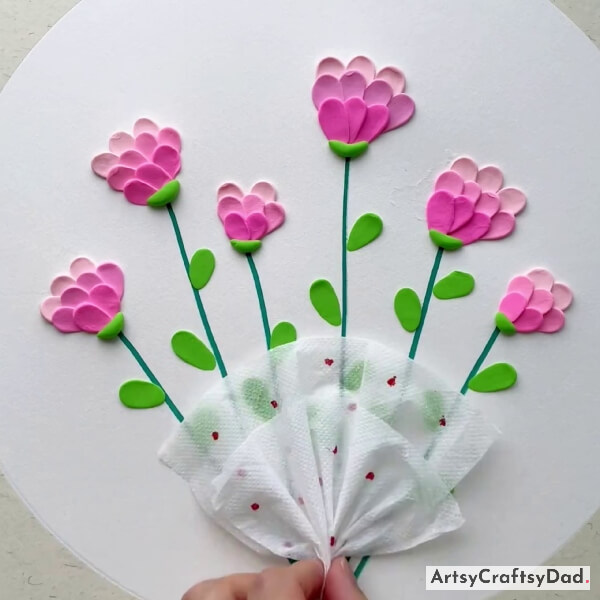
Take a new piece of tissue paper and make some dots on it with a red color marker, then give the tissue paper the shape of a bouquet.
Step #11: Pasting Bouquet
Give tissue paper the complete bouquet shape and paste it at the bottom side of the flower stems.
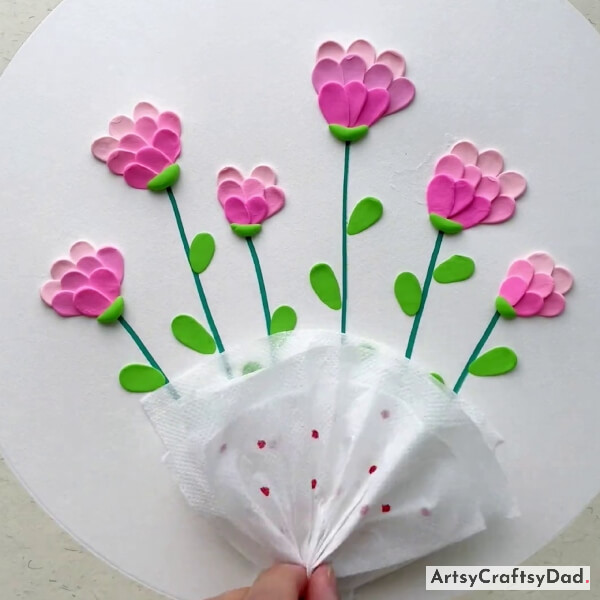
Your Beautiful Clay Flower & Tissue Paper Bouquet Craft is Ready!
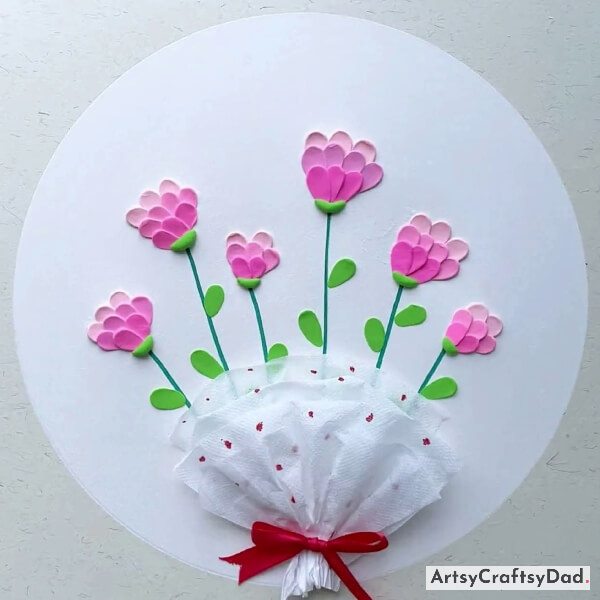
Now, complete the craft by pasting a ribbon note on the lower side of the bouquet to make the bouquet beautiful. Yay! your beautiful clay flower & tissue paper bouquet craft is ready!
I hope you have enjoyed the process of making flower bouquets & have fun as much as I have. Not only does it provide a chance to explore artistic skills, but it also allows for the opportunity to personalize and customize a beautiful bouquet that will last longer than real flowers.
Whether it is for a special occasion or simply as a decorative piece, this tutorial provides a step-by-step guide to help anyone create a stunning bouquet that is sure to impress. You could share this with your friends & family this will bring a smile to their faces. So don’t stop yourself from making mistakes because small efforts will make a big project. Don’t forget to share your comment in the comment section.
Thanks for choosing us!
You Might Also Like This
- Mini Rose Bouquet: Clay & Surgical Mask Craft Tutorial
- How To Make Round Tissue Paper Flower – Tutorial
- Colorful Butterfly: Tissue Paper Sketch Pen Hack Craft Tutorial
- Clay Flower Pot Model Craft Tutorial For Kids
- Clay Flower Vase Model Craft Tutorial For Kids


