Looking for a fun and easy craft project to do with your kids? Check out our step-by-step tutorial on how to make paper snowflakes! With just a few simple materials and a little bit of creativity, you can create beautiful and intricate snowflakes to decorate your home this winter.
Welcome to our easy-to-follow tutorial on making paper snowflakes! Whether you’re looking for a fun craft activity to do with kids or simply want to add a touch of winter wonder to your home, this tutorial has got you covered. With just a few simple materials and easy-to-follow steps, you’ll be able to create beautiful paper snowflakes in no time. Let’s get started!
Simple Paper Snowflake Craft For Kids
Must Read: Snowflake In Star Shaped – Simple Paper Design Tutorial
Supplies & Tools
- White Craft Paper
- Scissors
- Pencil
Snowflake Craft Instruction
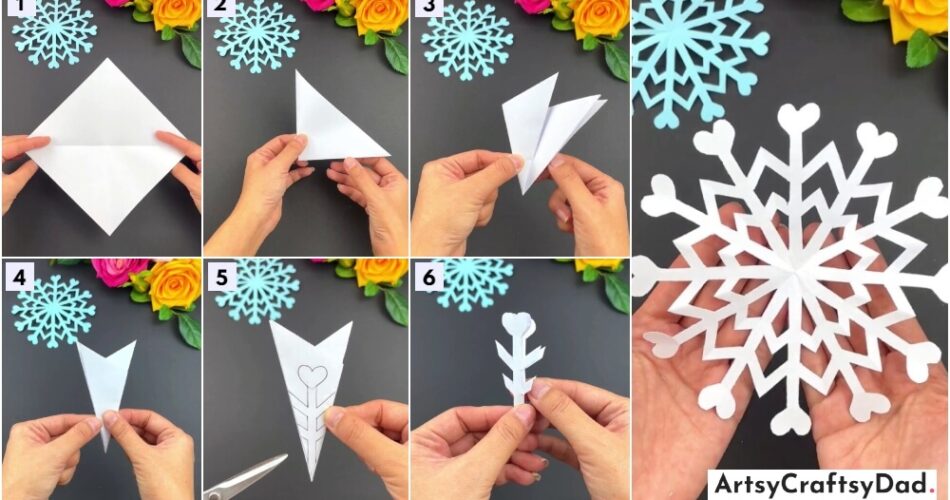
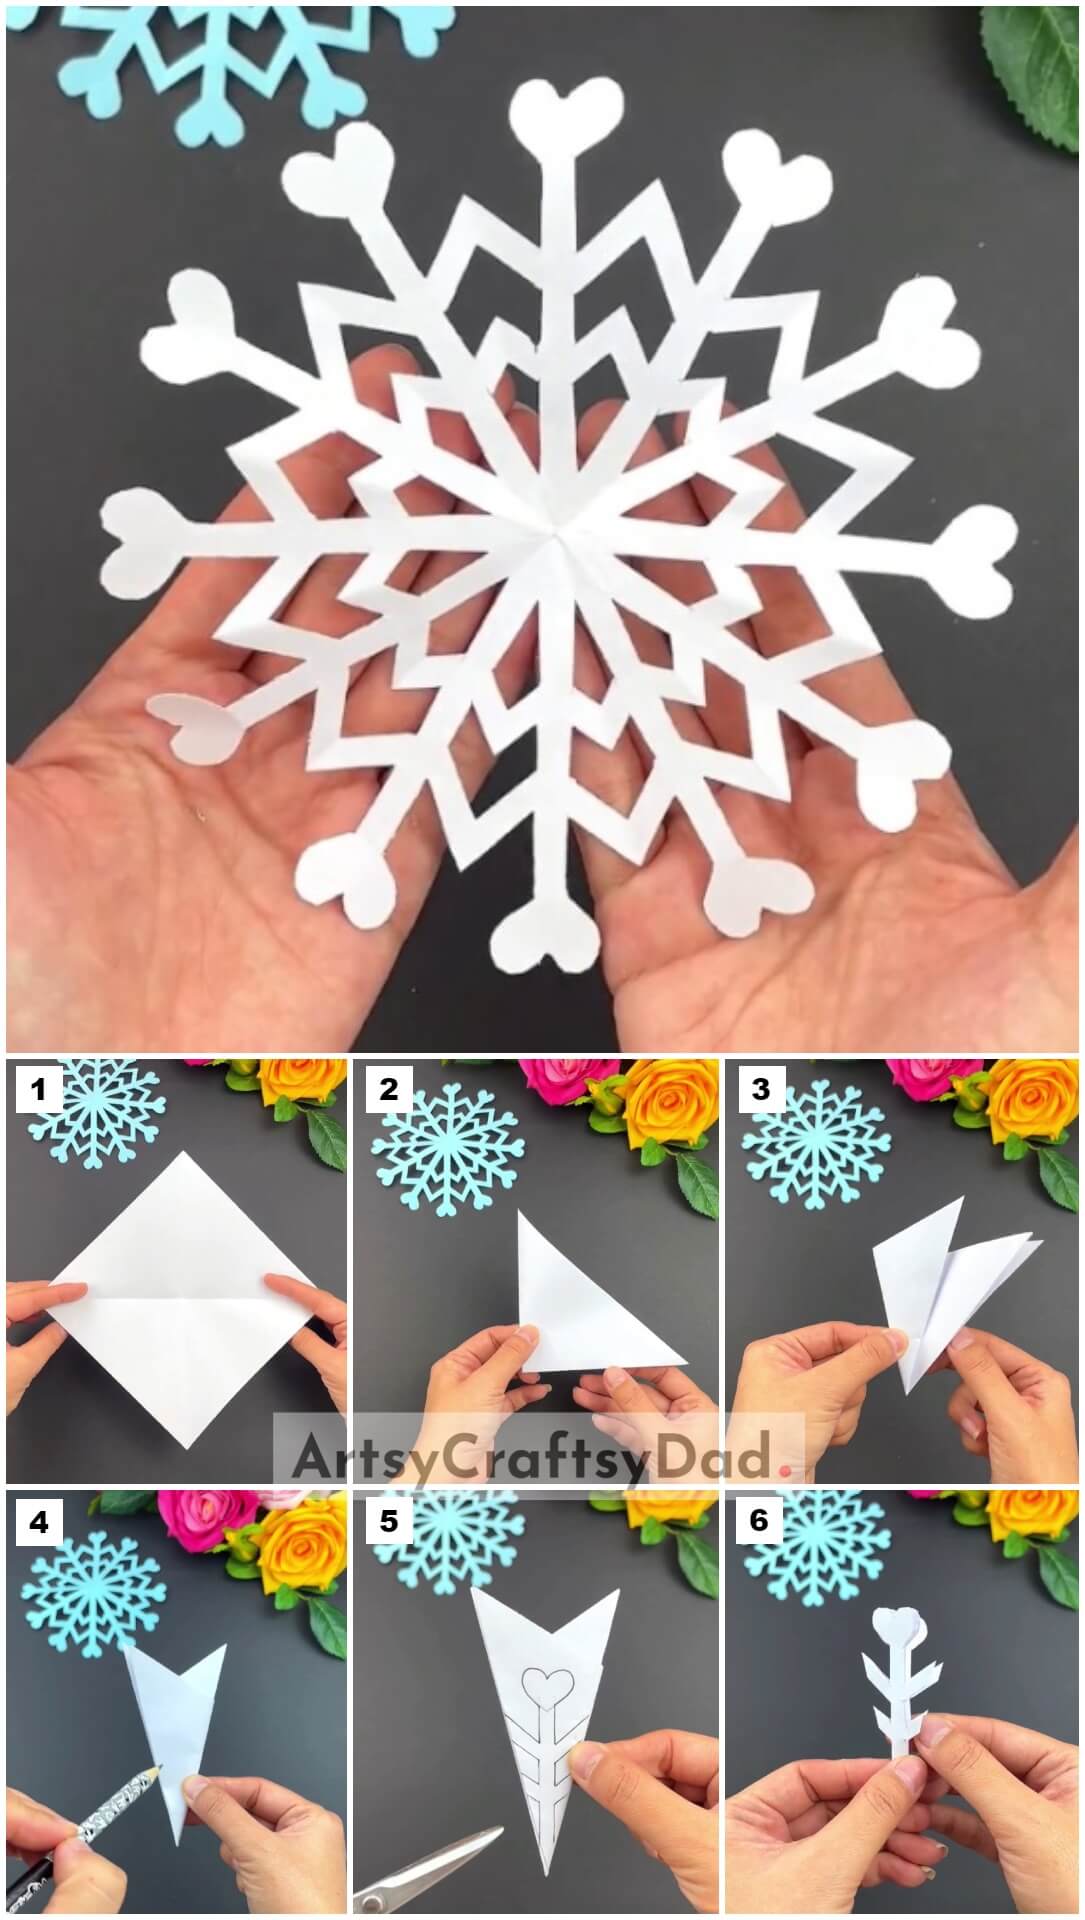
Step #1: Making Creases By Folding Paper In Half
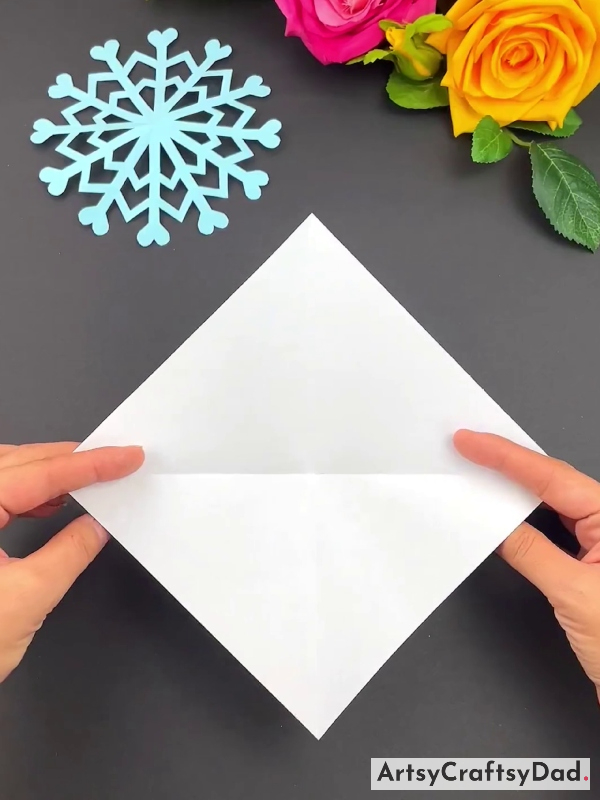
Take a white craft paper & cut it into a square shape by using scissors. Take this square-shaped craft paper and place it diagonally as shown above & fold it horizontally half from the center to make creases then unfold the paper.
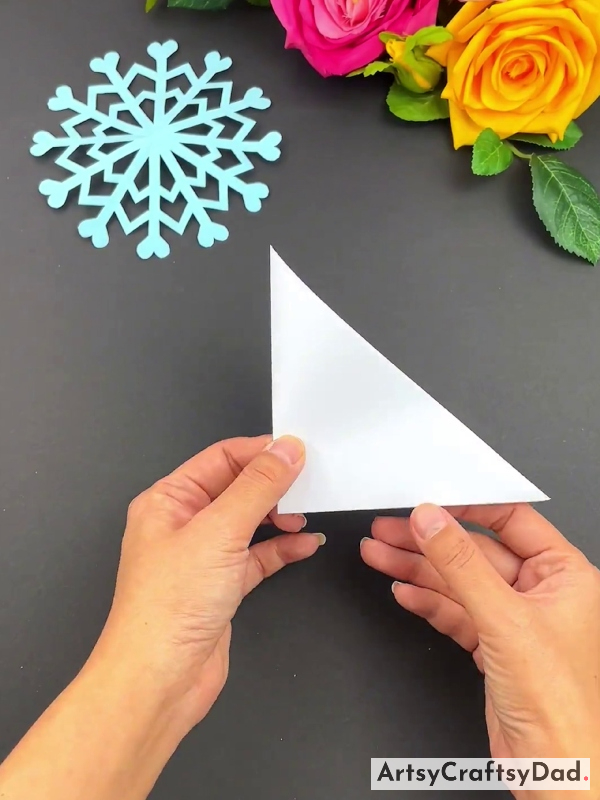
Step #2: Making a Triangle Shape
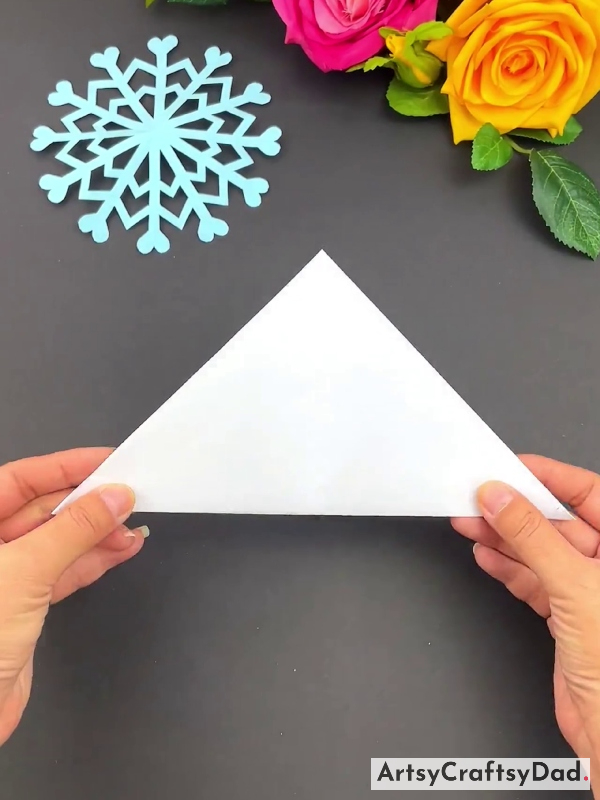
Now fold the paper diagonally to make a triangle shape.
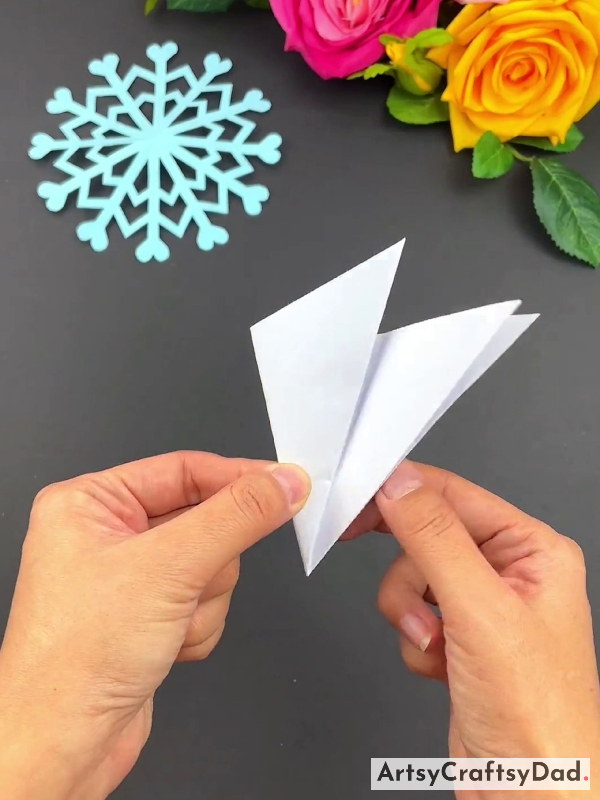
Step #3: Folding Paper In Half Again
Now, fold the paper in half again so that the pointed corners meet.
Step #4: Folding The Paper In One By Third Part
Now, fold the paper in one by third, and fold the left-hand pointed corner towards the center.
Step #5: Overlap The Right Handed Pointed Corner
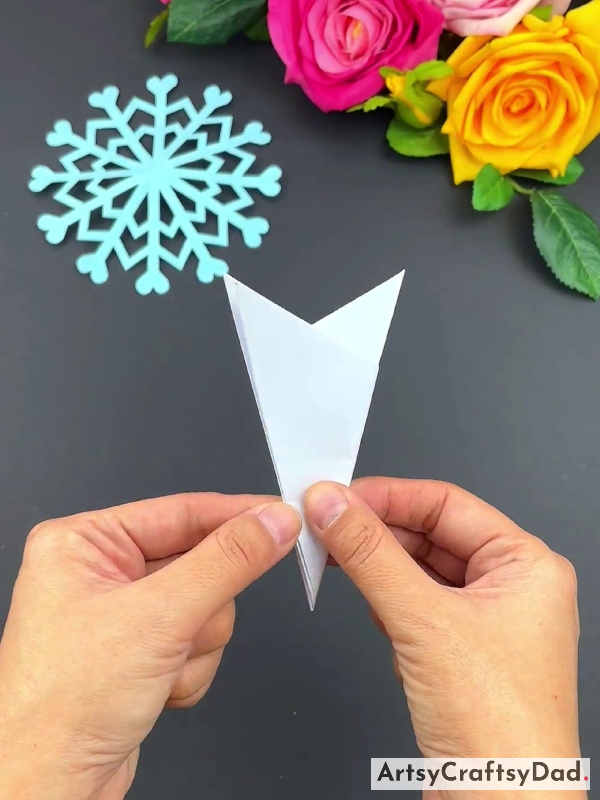
After folding the left side, overlap the right-hand side pointed corner over the triangle.
Step #6: Drawing Snowflake Pattern On Paper
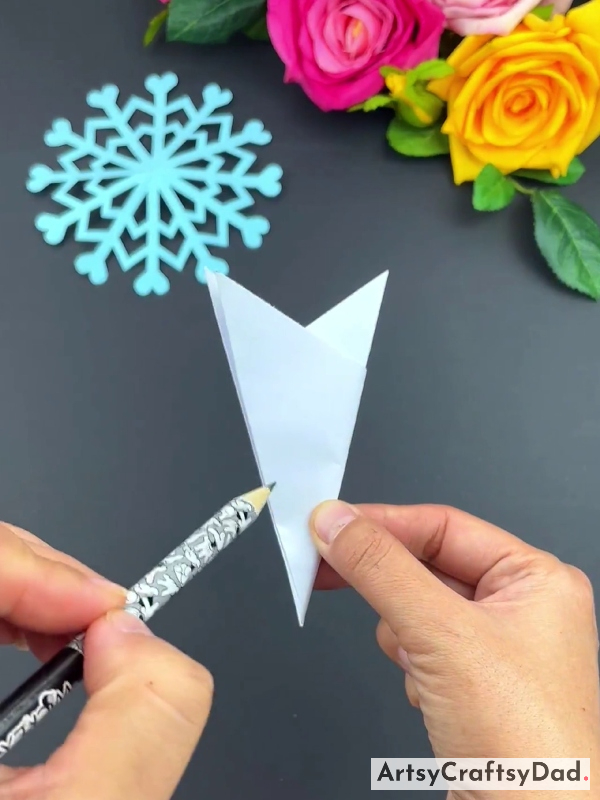
Now, take a sharpened pencil to draw a snowflake pattern on this paper.
Step #7: Cutting Out The Outlined Part
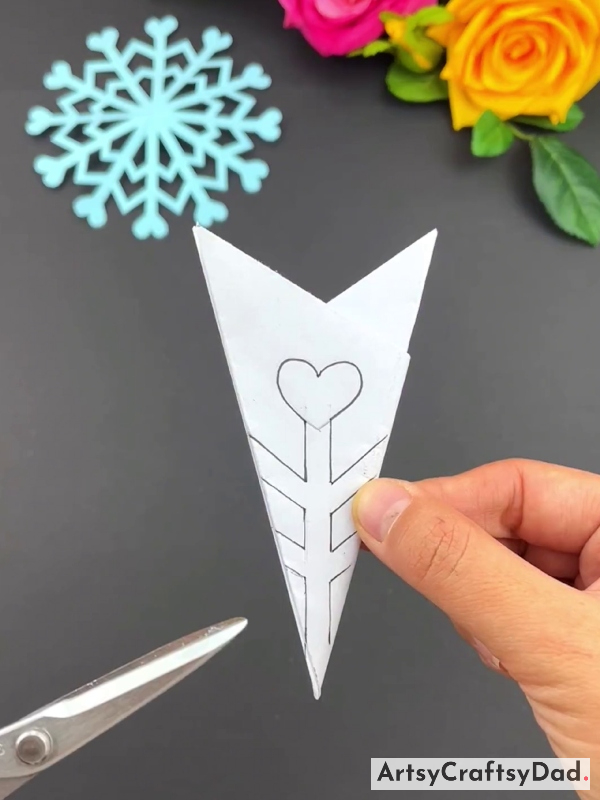
After drawing, cut out the outlined design with scissors.
Step #8: Opening The Outlined Part
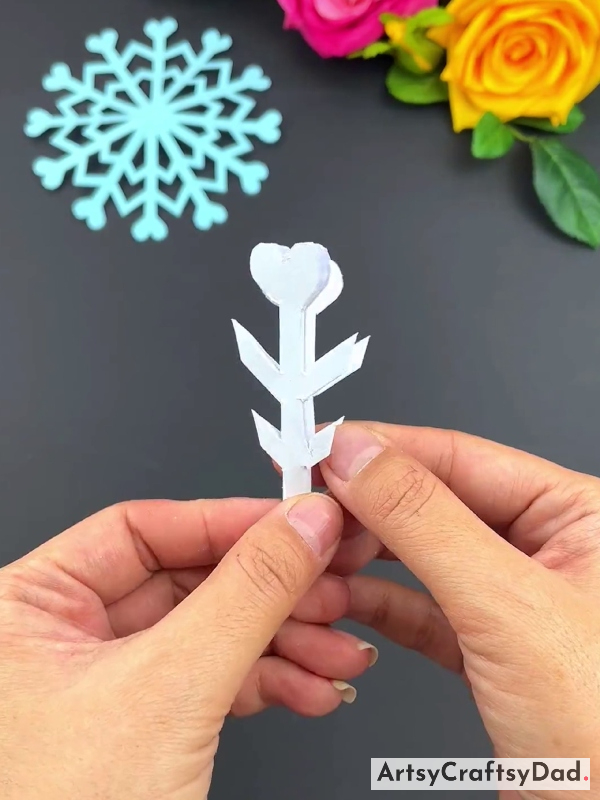
After cutting, open up the design to show the complete snowflake craft.
Final Look Of Our Paper Snowflake Craft!
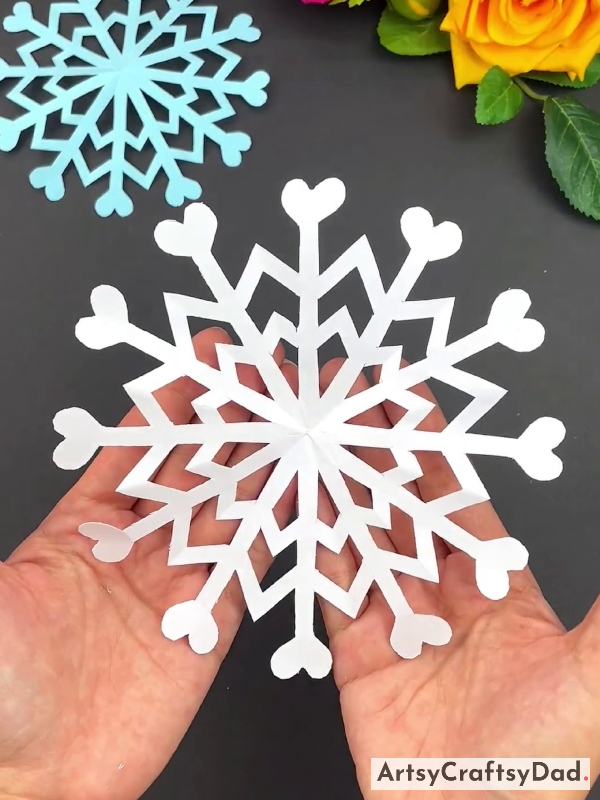
finally, our snowflake craft is ready!
Our snowflake paper craft is ready. I hope you have enjoyed the process & made the craft without any difficulty by following all the step-by-step instructions. With just a few simple steps, anyone can create beautiful and unique snowflakes to decorate their homes during the winter season. If you want to make your own designs & moderate snowflake craft according to you then you could draw the designs that you want & make more creative & attractive snowflake designs. The possibilities are endless when it comes to making paper snowflakes. Don’t forget to share this craft with your friends they will enjoy it. Please drop your feedback in the comment section.
Thanks for visiting our website!
You Might Also Like This
- Origami Bow Paper Craft Tutorial For Kids
- DIY Origami Paper Designer Frock Craft Tutorial
- Paper Organizer/Keeper Origami Craft Tutorial
- Paper Cutting Cute Tigers Craft Tutorial For Kids
- Paper Origami Sofa Craft Tutorial For Kids


