This is a step-by-step furry cat painting tutorial for kids. It is a beginner-level painting idea. It is easy and simple with this tutorial.
This is a step-by-step Furry Cat Painting Hack Tutorial for Kids. It is a beginner-friendly and beginner-level painting with a hack for kids. It is suitable and apt for kids of ages around five and above. It is a freehand and a very simple painting. This will help them to get a good grip on their paintbrush. This painting tutorial also presents different ways to paint or different materials to paint with apart from the paintbrush. Paintbrush is the most common way and the most known way to paint but that is not the only way. This tutorial will introduce the kids to some of them.
Cute Furry Cat Painting Hack For Kids
Must Read: Cute Birds On Tree Painting Hack Tutorial
Tools & Supplies
- Cardboard
- Black Pen
- Paintbrush
- White And Pink Paint
- Circle Stamp
- Toothbrush
Furry Cat Instructions
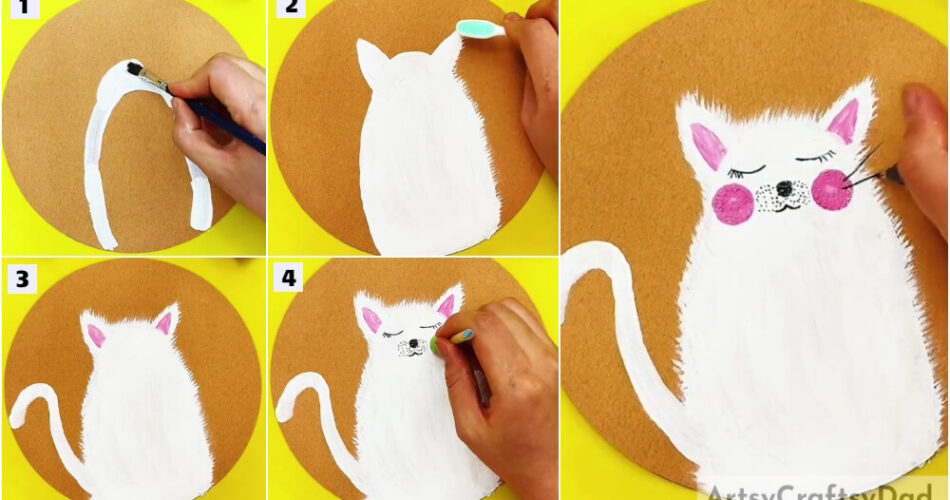
Step #1: Making The Body Of The Cat
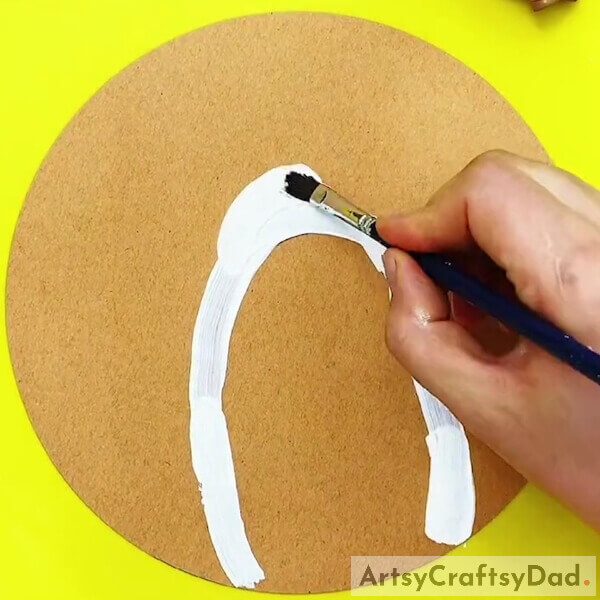
Take a circular piece of cardboard. Grab a paintbrush and some white paint. Make the body of the cat, like an oval on the cardboard as shown in the image. Paint the white paint inside the outline as well.
Step #2: Making The Ears Of The Cat
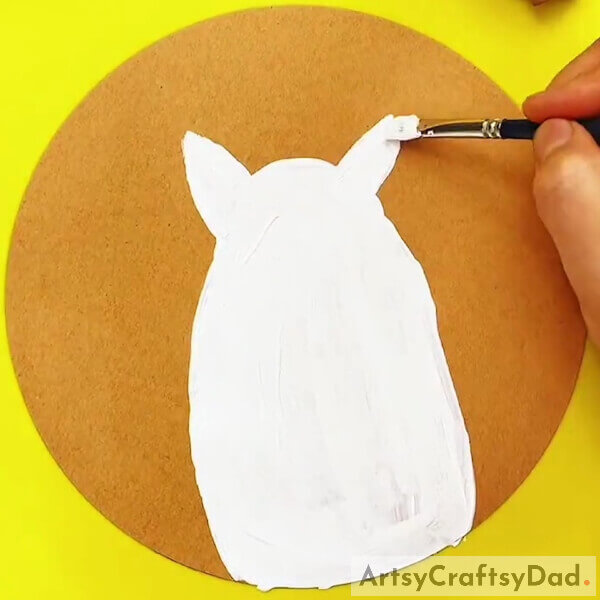
Using the same white paint and the same paintbrush, make the ears and head of the cat, right above its body. See the image for reference.
Step #3: Making Fur On The Cat’s Body
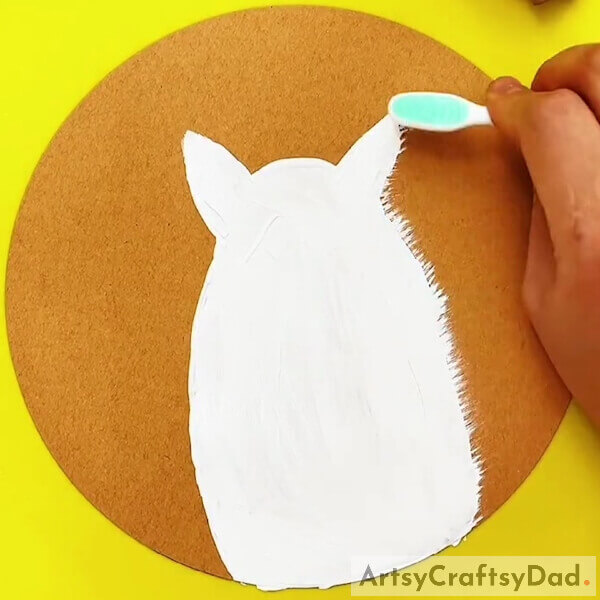
Take a toothbrush now. You can also use an old toothbrush here. Now, with light hands, but a firm grip, slowly stroke the brush outwards from the outline of the cat. The strokes must be very small. Make sure of that and of near-to-equal length. They must be straight as well. These will look like the fur of the cat.
Step #4: Making Tail Of The Cat
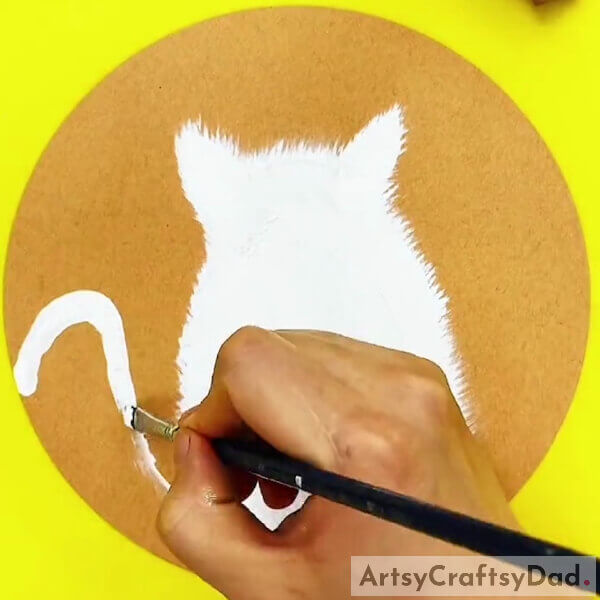
Make a wavy tail of the cat on the left side of its body using the white paint from a paintbrush. See the image for reference.
Step #5: Making Skin Of The Ears
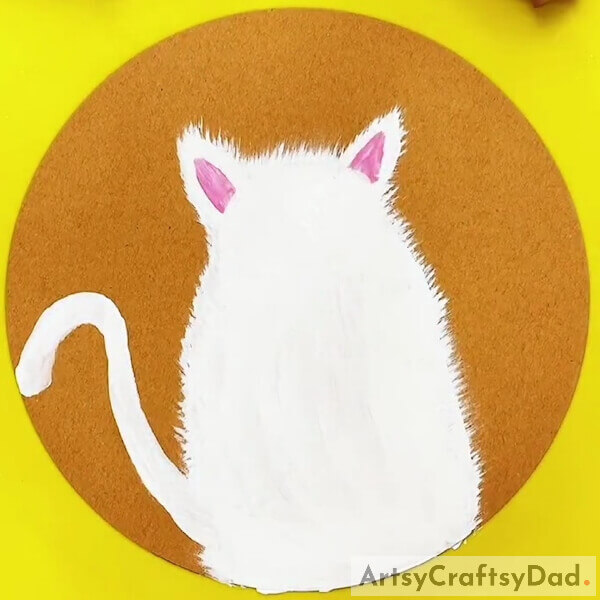
To make the skin of the ears, get some pink colored paint and dip the paintbrush in it. Using it, make the skin of the ears a curved triangular shape over the ears as shown in the image.
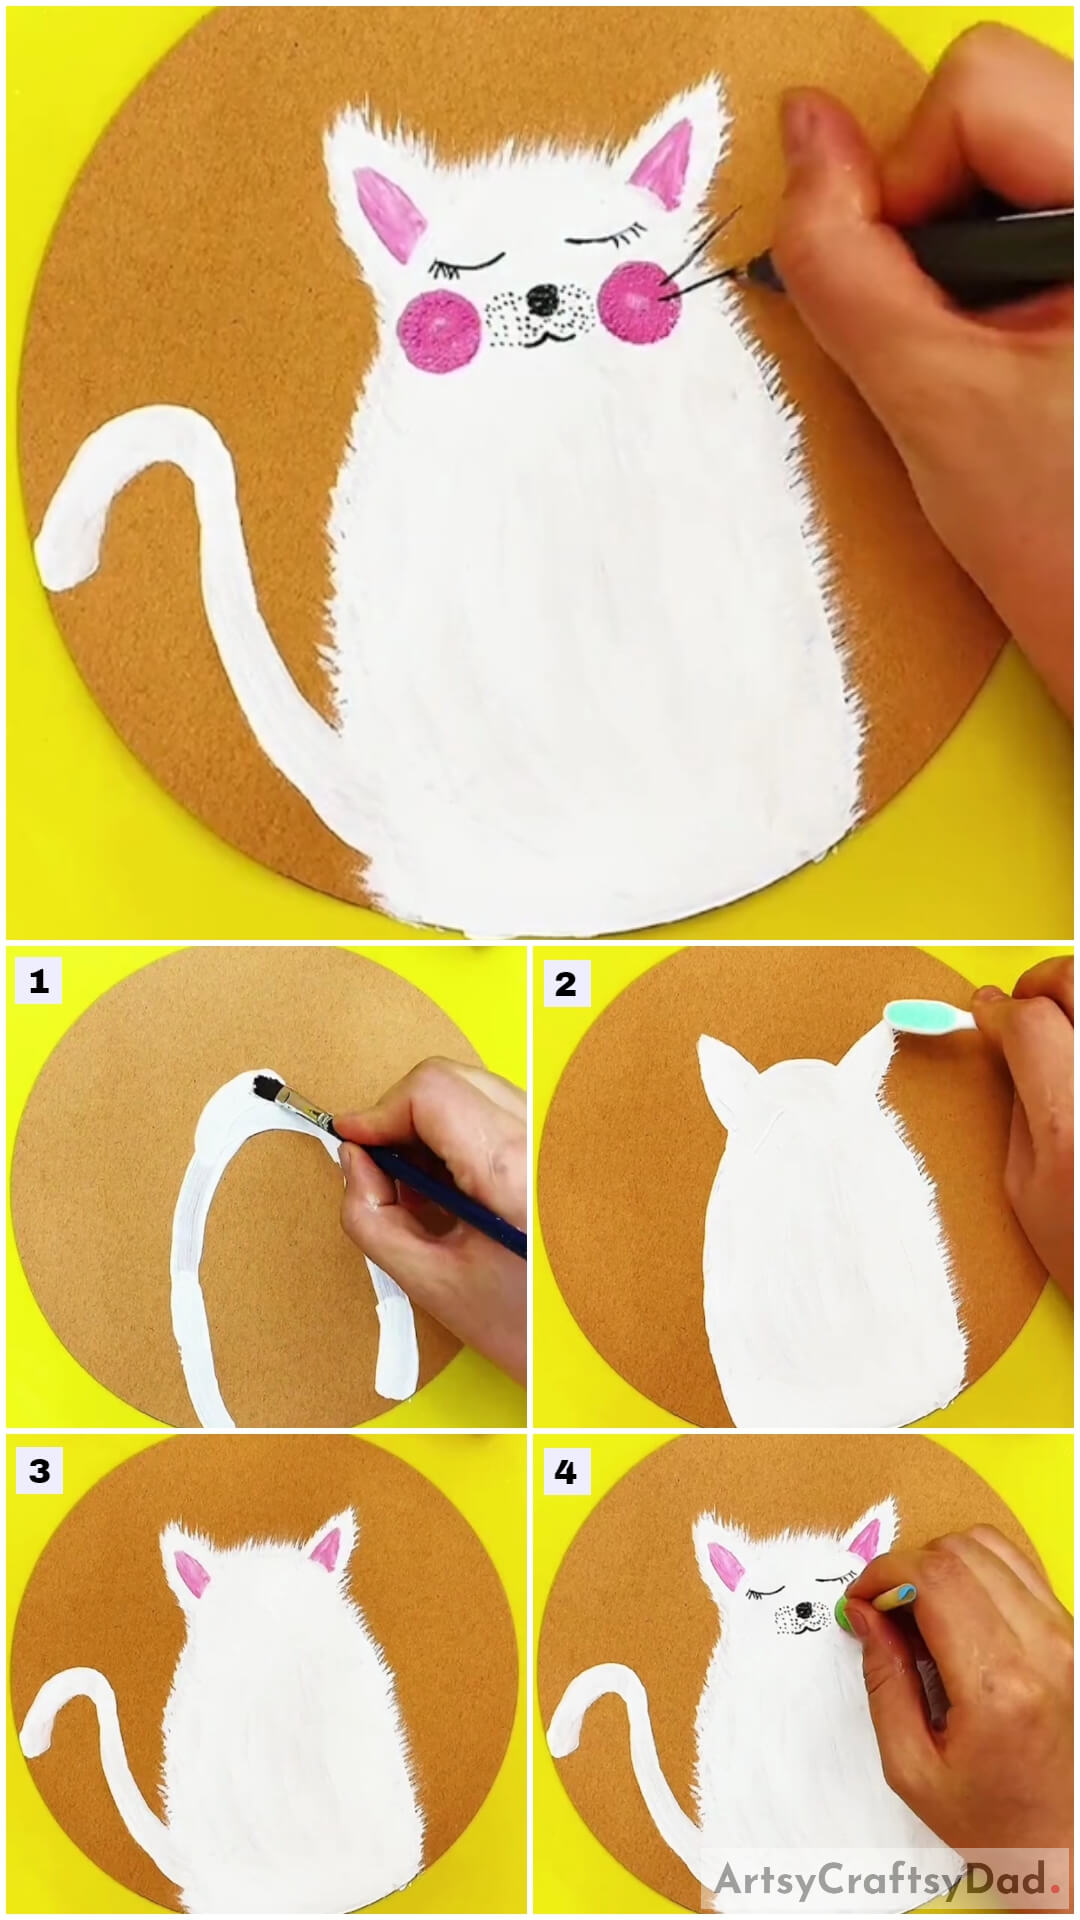
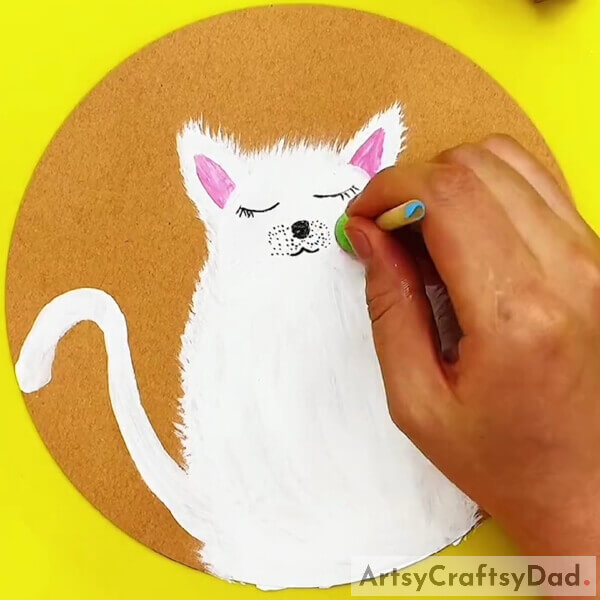
Step #6: Adding Features To The Face Of The Cat
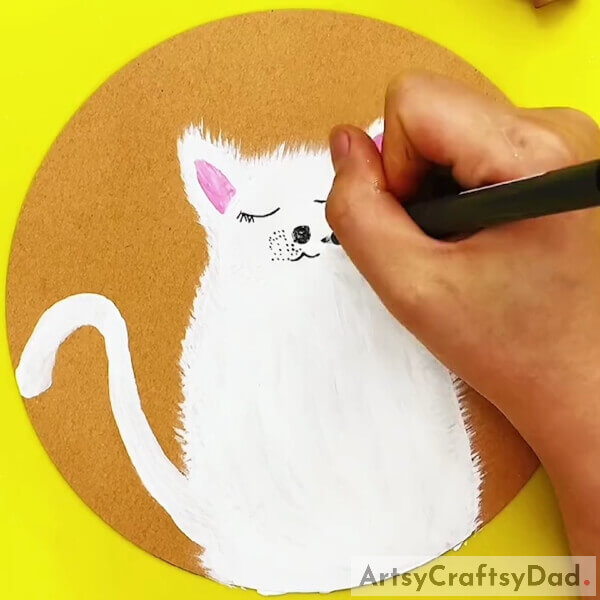
We are done with the painting part now. Let us get to the details. Get hold of a black sketch pen and draw the curved closed eyes, a circular nose, and a curved mouth below the nose of the cat. Also, make dots above the mouth representing the texture of the cat’s mouth.
Step #7: Completing Texturing The Cat’s Mouth

Using the black pen, completely make the dots above the mouth to texture the cat’s mouth. See the image for reference.
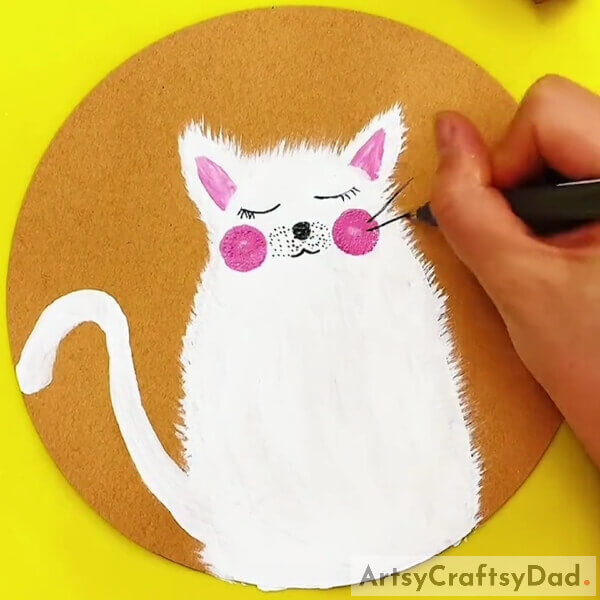
Step #8: Making Blush On The Cat’s Cheeks
You need the pink paint again in this step. Paint the surface of a circle stamp to make its impression on both cheeks of the cat, just as done in the image to make the blush. For the last step, using the black pen, make horizonal titled strokes coming from outward the face of the cat from the blush to make its whiskers on both sides.
Here Is The Final Look Of The Cat!
Looks like we are now finally done! We hope you enjoyed doing this, had fun, and learned something in the process too. If you wish to go on with the same painting, you can give it a night background. You can draw and paint something or give it a solid color. You can make a grassy field with birds and butterflies of different colors and shades, or you can also paint a beautiful sky of any color or colors that you like. Sunset or sunrise or night or noon or twilight, you have a lot of options here. You can literally do anything.
Thank you.
You May Also Like
- Cute Kitten Stamp Painting Tutorial For Kids
- Wildflower Sketch Pen Painting Tutorial For Kids
- Giraffe Face Painting Step by Step Tutorial For Kids
- Bubble Wrap Snowman Painting Craft Tutorial For Kids
- Cute Dinosaur: Stamp Painting Tutorial For Kids


