Make a tree of your fantasy world! Yes, this step-by-step tutorial can help you make a tree drawing just like the one in your fantasy world!
Hello little artist! Today, we brought a drawing article just for you! This drawing includes a tree with big colorful leaves, and you know what? The tree has cute eyes and has the shape of a hand! The results will definitely be eye-catching and will be loved by everyone! This drawing is suitable for kids of 4-9 age and can make it easily without the help and guidance of an elder or experienced! This step-by-step tutorial will cover you on each and every step! Let’s begin!
Simple Palm Outline Happy Tree Drawing
Must Read: Clay-Paper Sunflower Garden Craft Tutorial
Supplies & Tools
- White Circular Paper Sheet
- Black Marker
- Sketch Pens
- Crayons
Palm Tree Instructions
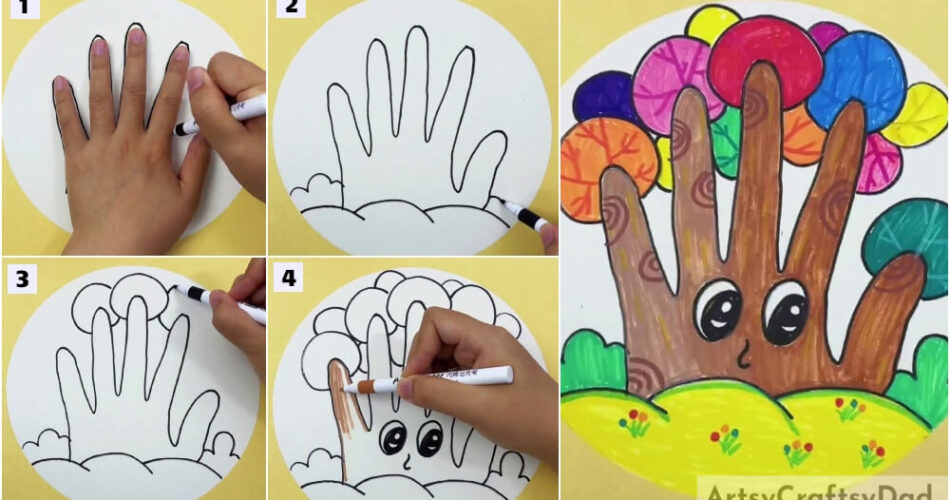
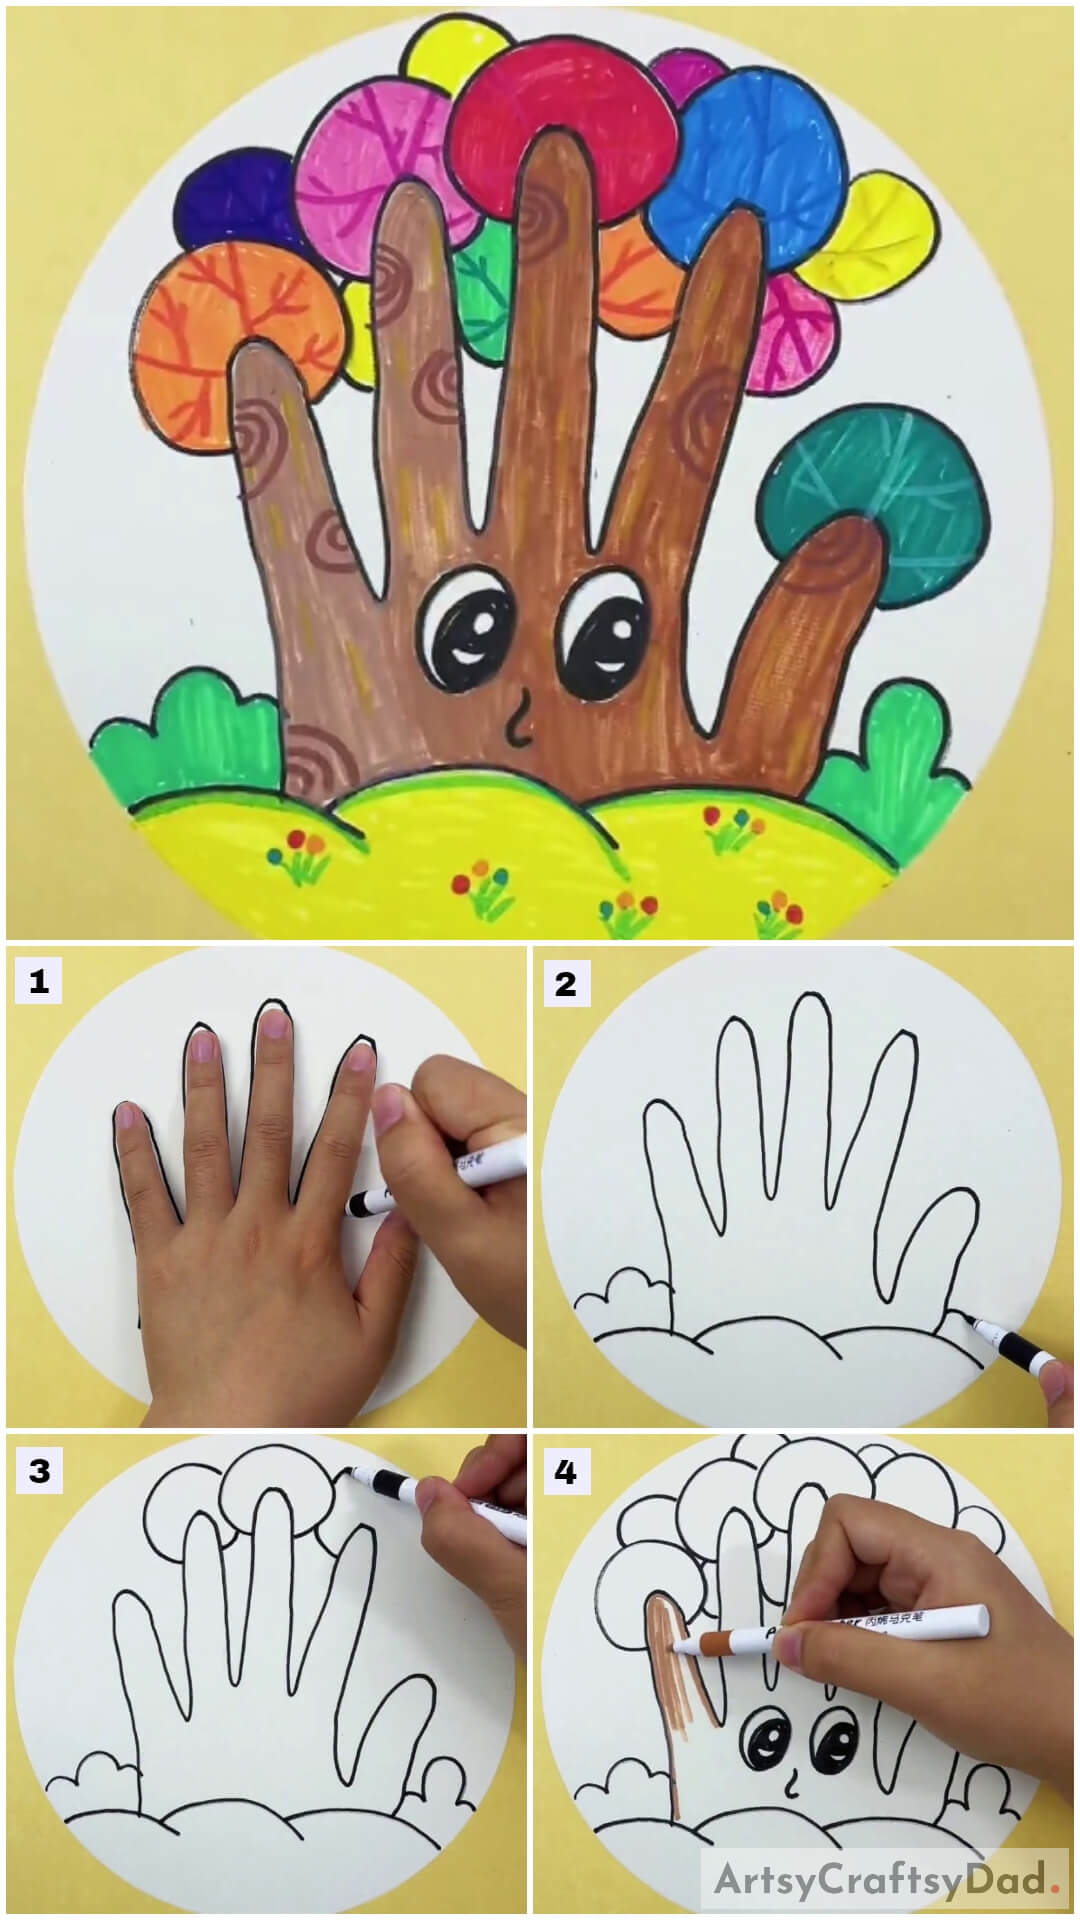
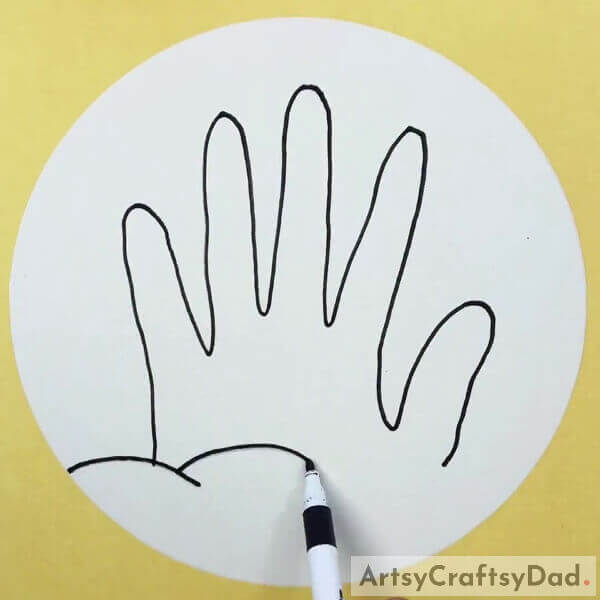
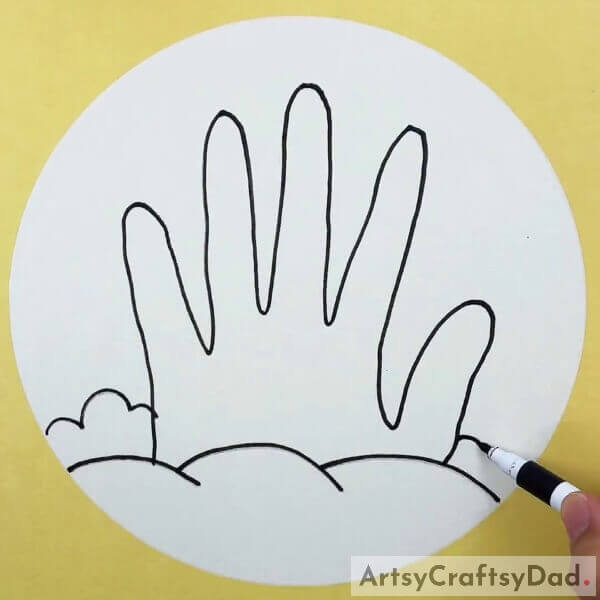
Step #1: Outlining The Palm
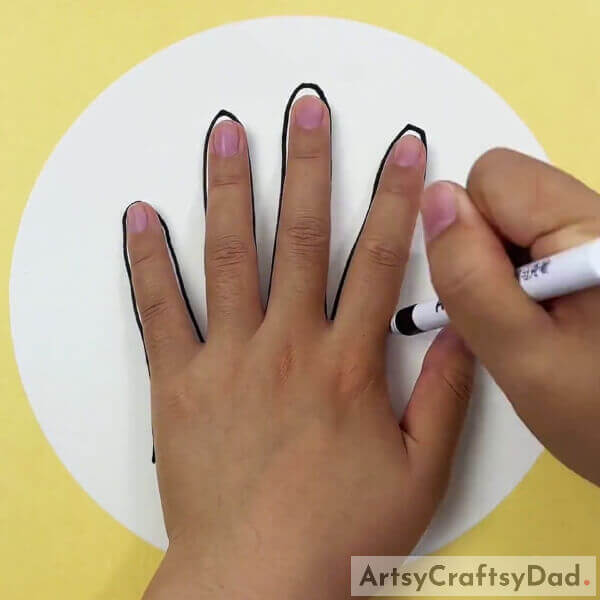
Begin this drawing by taking a white circular paper sheet as the base for this drawing and a black marker. Place your left hand on the base and using the marker, outline your palm over it Make sure to just outline till the end of your thumb, not the palm till the bottom. This will be the tree trunk of your drawing.
Step #2: Making Ground Beneath The Tree Trunk
Using the marker, make the curvy-lined ground beneath the tree trunk base as shown in the image.
Step #3: Making Bushes
Using the marker, make the curvy bushes above the ground on the sides of the trunk.
Step #4: Making Circle Leaves Of The Tree
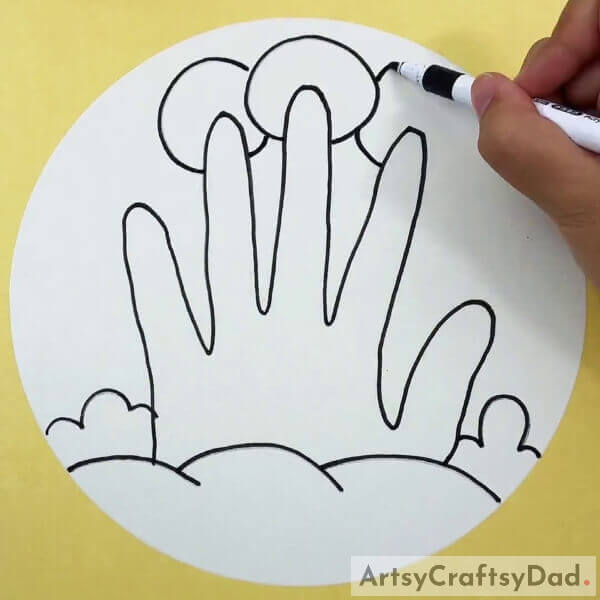
Now, using the marker, make the circles on the tips of the tree representing the leaves. Make sure to not overlap the boundary of the circle over the tree, make it as if the leaves are behind it as shown in the image. Also, make more circle leaves look like at the back of the tip ones, make a bunch of them.
Step #5: Completing The Tree
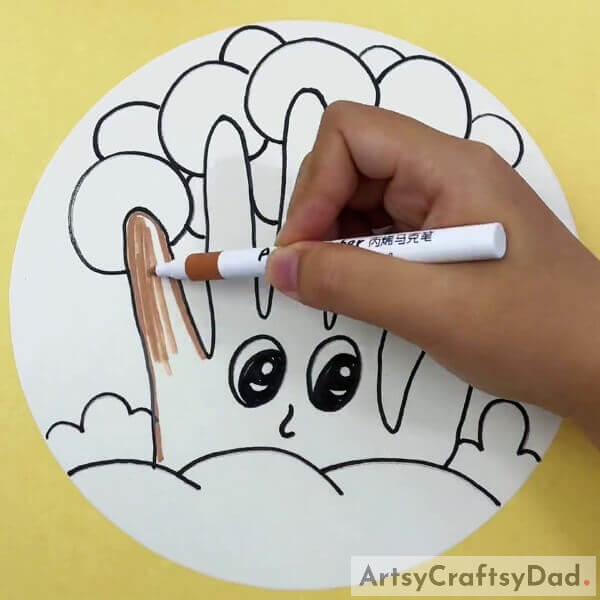
Using the black marker, make the oval eyes of the tree below the finger outline part region with the eyeballs on the right bottom. Color out the eyeballs leaving a circle and a crescent shape in them to look like shiny eyes. Also, make a curvy nose below and in between the eyes.
Grab a brown sketch pen, and start to color the tree trunk.
This Is The Final Look Of Your Happy Tree Drawing!
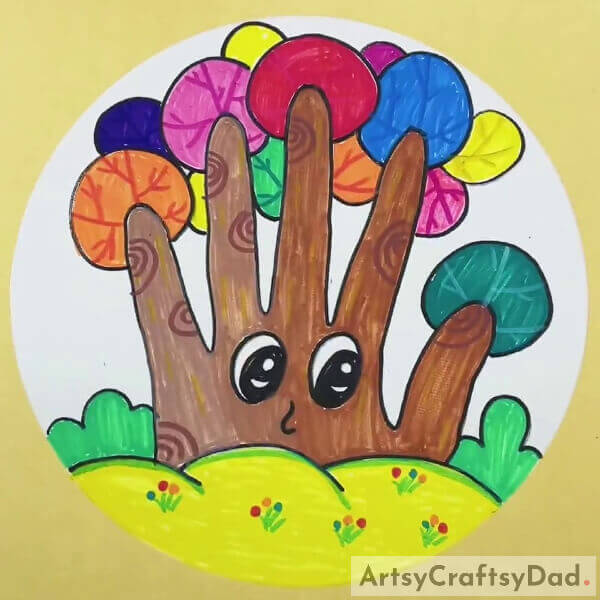
For the last step, take a dark brown sketch pen and make random circles on the tree trunk as shown in the image. Also, color the leaves using crayons and make the leaf veins over them using sketch pens. Color the bushes using a green sketch pen and the ground using a yellow/lime green sketch pen, also, outline the ground using the green sketch pen. Draw curvy grass stroked on the ground using a green sketch pen and make dotted flowers over them using a red, blue, and orange sketch pen.
Yes, you did it! You have completed your palm outline tree drawing!
You can now decorate this drawing as a wall decor in your room to get into your pleasant imagination just by looking at it! This drawing can also be used as the school art project that will be a banger in your classroom and everyone will be envious of your drawing and you being the teacher’s favorite! You can also customize this drawing by adding more to it as you imagine, or can even use different types of colors, which you are comfortable with!
We are hoping you like this drawing and the tutorial! Drop your feedback and tell us about your drawing journey and output in the comments section! We would love to hear from you!
You May Also Like
- Easy Town Landscape Drawing Tutorial For Kids
- Clay Heart Leaf Tree Craft Tutorial For Kids
- Clay Snails On Leaves Craft Tutorial For Kids
- Henna Palm Design – Step By Step (Tutorial)
- Easy Drawing for Kids – Flowers and Animals


