This simple tutorial will teach you to make a beautiful Rose Bouquet using Circle stamps and paints. Decorate your home with your own handicrafts today!
Rightly titled as the Queen of Flowers, roses are exquisite, vividly coloured gems of the soil that bring life to every setting they are placed in. There is a simple, budget-friendly way of bringing a glimpse of these flowers into your home, and that is through the medium of Art and Painting. Follow this step-by-step Circle Stamp Rose Bouquet Painting and Drawing Tutorial to add this aesthetic masterpiece to your home decor today.
Easy Circle Stamp Rose Bouquet Painting
Must Read: Oil Pastel Rose Bouquet Drawing Hack Craft Tutorial
Tools & Supplies
- Plain White Sheet
- Circular Stamp
- Pink Coloured Paint
- Sketch Pens Of Different Colours
Rose Bouquet Painting Instructions
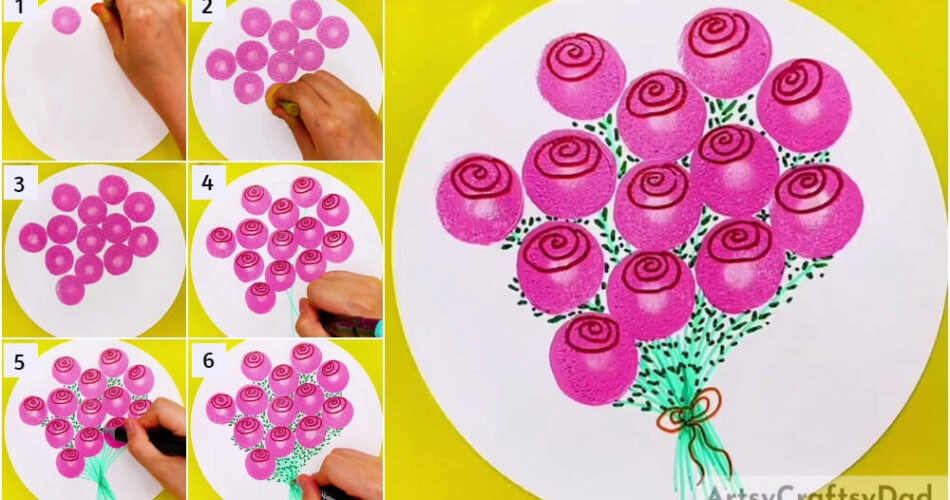
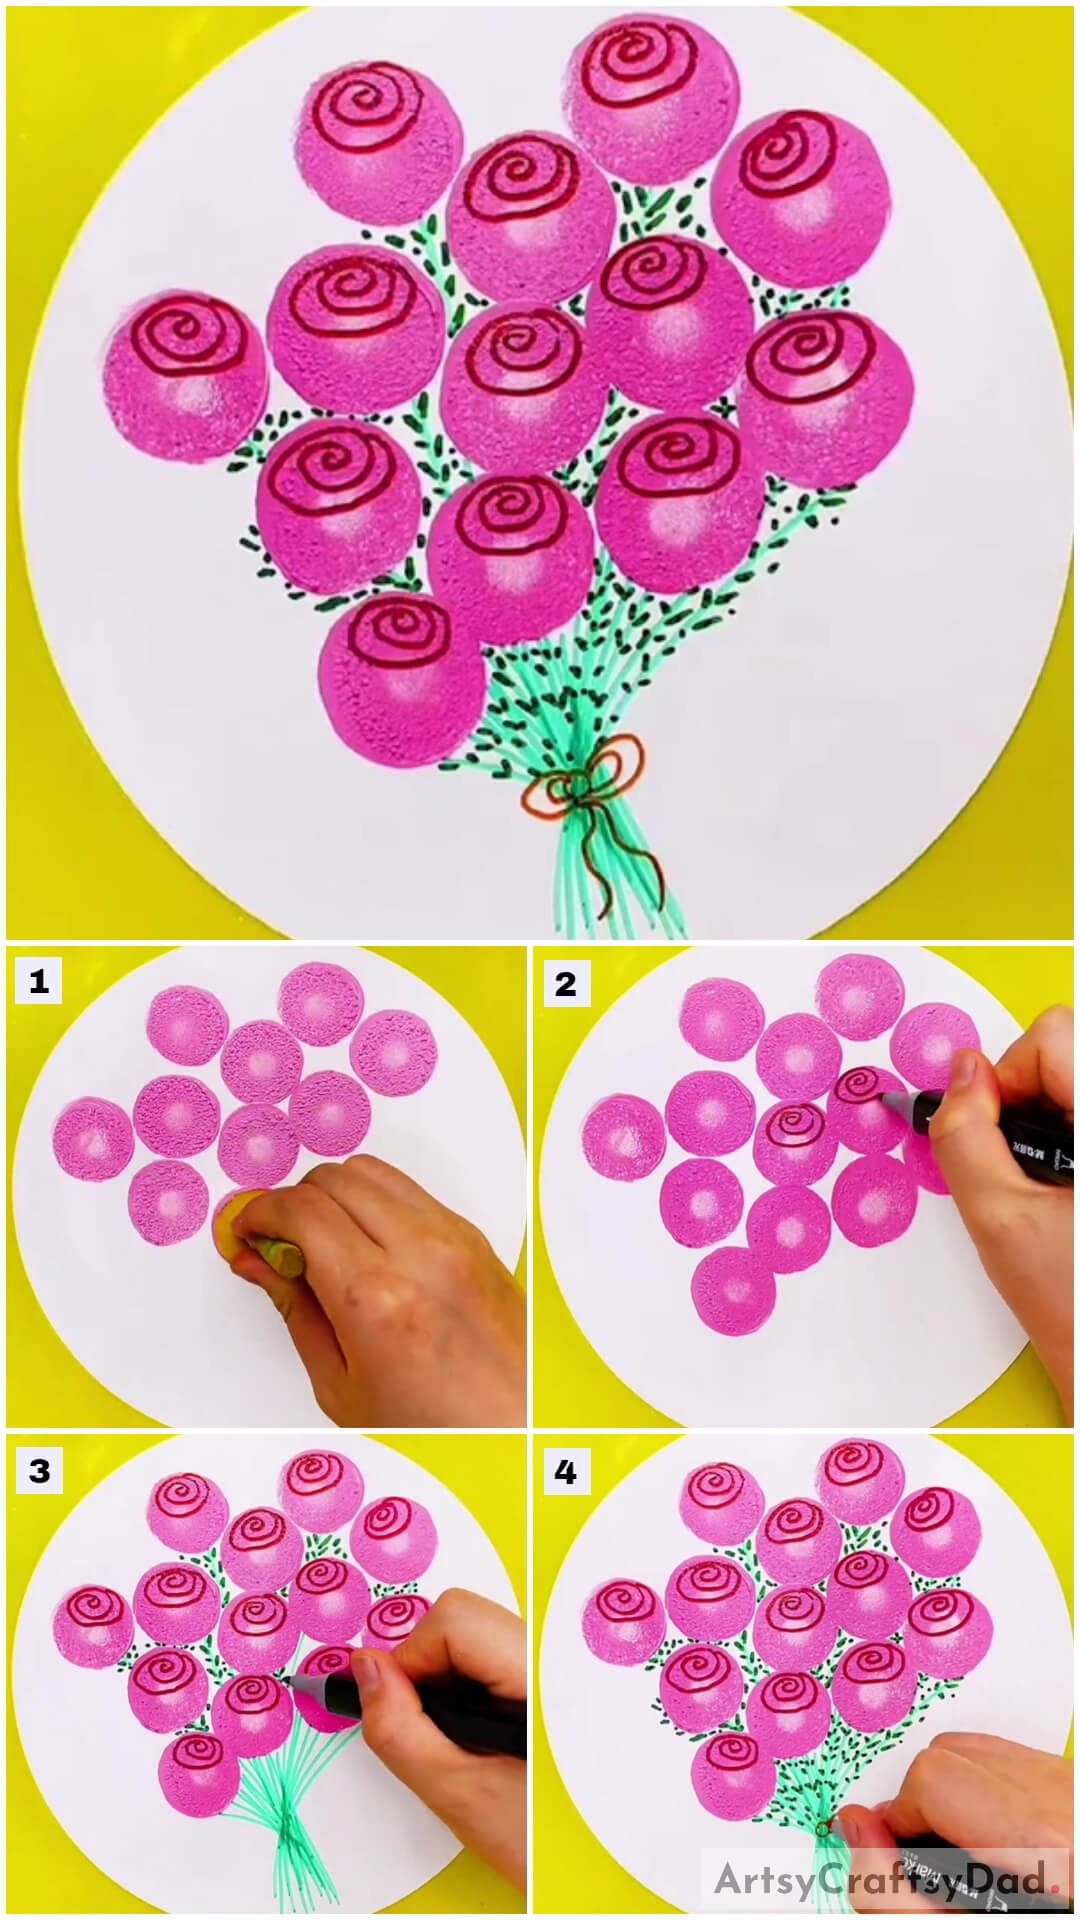
Step #1: Dip The Circular Stamp In Pink Paint And Start Stamping
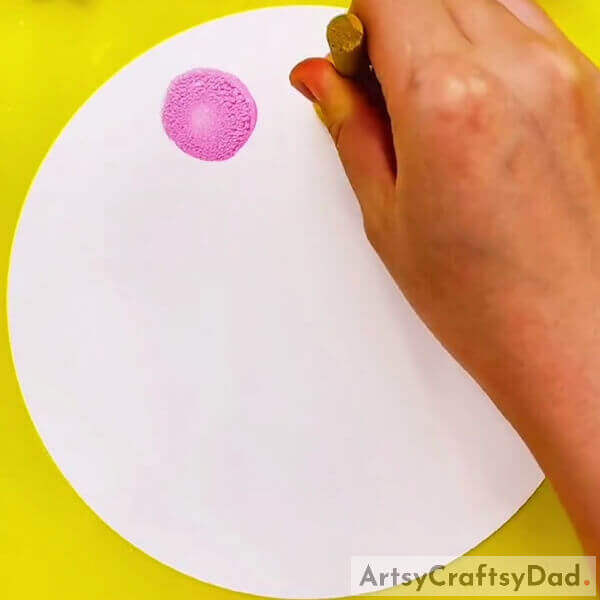
Begin this blossoming artwork by first getting all your materials ready. When everything’s ready, take your circular stamp and dip it lightly into the pink paint, to cover the stamp’s hollow space entirely. Stamp one circle on the top of the sheet and check whether the circle is entirely filled with colour, as shown in the picture. If there are any gaps or white spaces in between, dip the stamp in colour again.
Step #2: Stamp Pretty Pink Roses Onto The Sheet
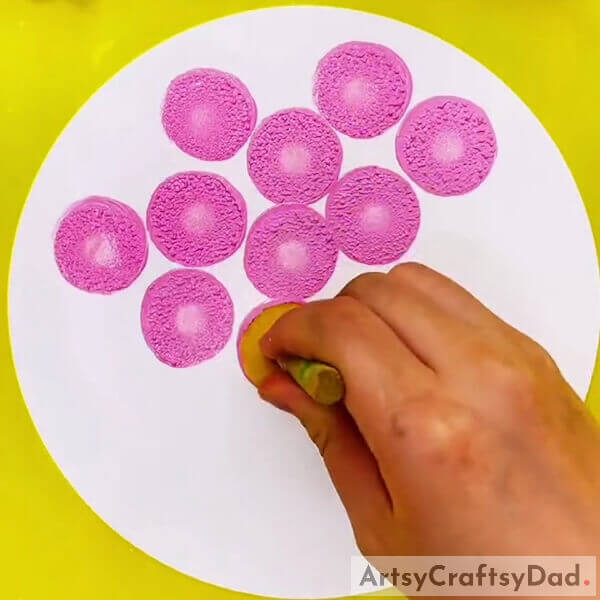
Holding the stamp in your hands, make more circles on the sheet in close proximity to each other. Stamp these circular shapes of the flowers as depicted in the picture. Let there be very little gap between the flowers, but at the same time, prevent the flowers from overlapping with each other.
Step #3: Fill The Sheet With These Pink Circular Roses
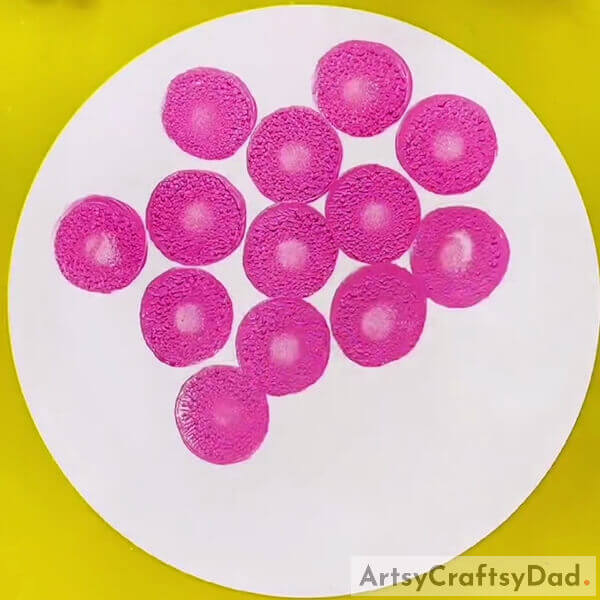
Cover three-fourths of the sheet with these pink circular flower shapes, stamped closely to each other. When your paper looks as full and pink as the picture shown above, that means your stamping work is complete.
Step #4: Draw The Spiral Petals On The Pink Circular roses
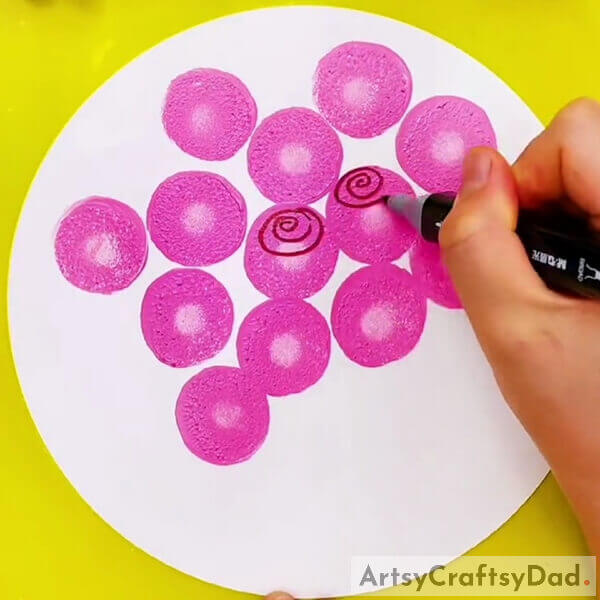
Let’s begin the sketching work now. Grab a red sketch pen, and draw layers of rose petals in the form of spirals on the top half of the circles. Draw this for each flower and see their royal beauty come to life.
Step #5: Give Each Rose A healthy Green Stem
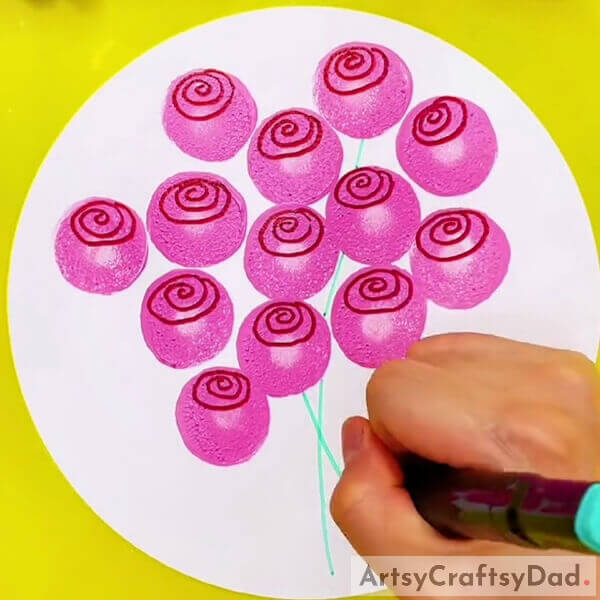
It is now time to draw the stems of these flowers. Take a light green colour sketch pen and draw a green stem emanating from the bottom of each flower. Make each thin line that you draw out of each flower intersect at a common point to form a bouquet of flowers tied together at its stems.
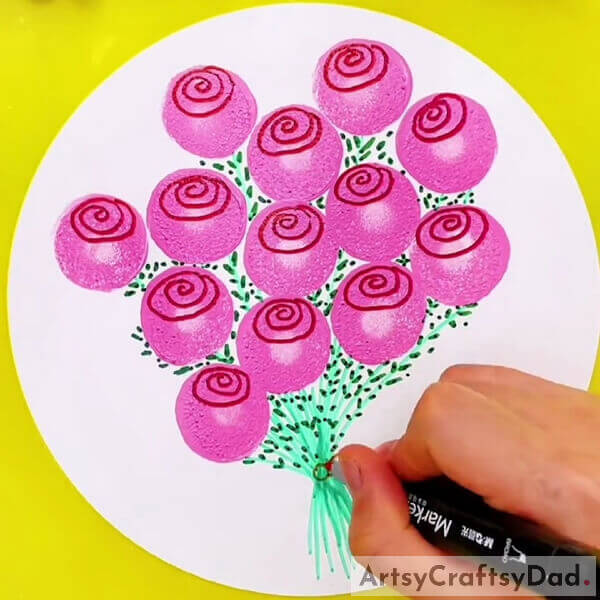
Step #6: Sketch Leaves or Thorns Onto The Rose Stems
Add a realistic touch to your flowers with this step. Take another green sketch pen, a shade darker than the stems, and draw multiple small leaves or thorns (however, you’d like to interpret it) growing on the stems of the rose plant. Cover the surface of the stems with these intermittent lines to give the Rose bouquet a realistic touch.
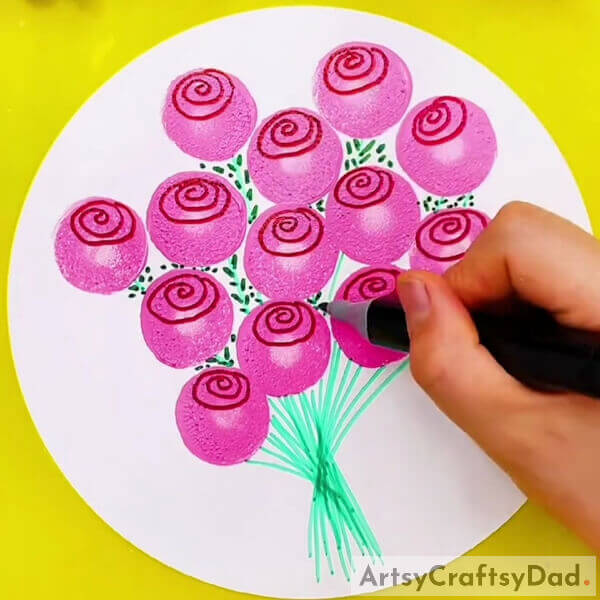
Step #7: Tie Your Bouquet Together With A Pretty Ribbon
For the final touch, draw a pretty ribbon with a sketch pen colour of your choice to bind the Rose bouquet together into one bunch at the bottom.
Final Image: Your Rose Bouquet Is Ready!
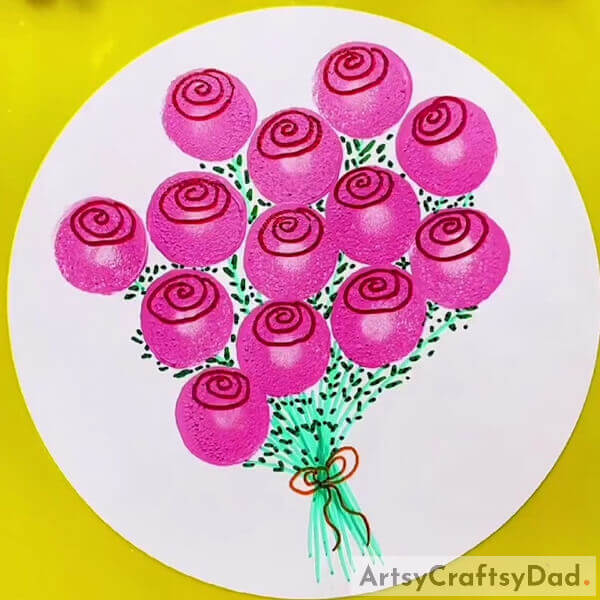
Your Circle Stamp Rose Bouquet artwork is ready and good to go! This tutorial is simple, and even young children can follow it step-by-step, under adult supervision to create an elegant gift or valuable home decor item. Why not make this craft with your children today?
I hope you enjoyed this tutorial and were creatively inspired by it. Please leave your thoughts and feedback in the comments below. Don’t forget to visit our other articles for more artistic ideas like this!
You May Also Like
- Colorful Lollipops Stamp Painting & Drawing Tutorial
- Beautiful Rose Vase: Easy Hacks Painting Tutorial
- Cherries On Tree Branch: Stamp Painting Tutorial
- Mini Rose Bouquet: Clay & Surgical Mask Craft Tutorial
- Red Vector Flowers Stamp Painting Art Tutorial For Kids