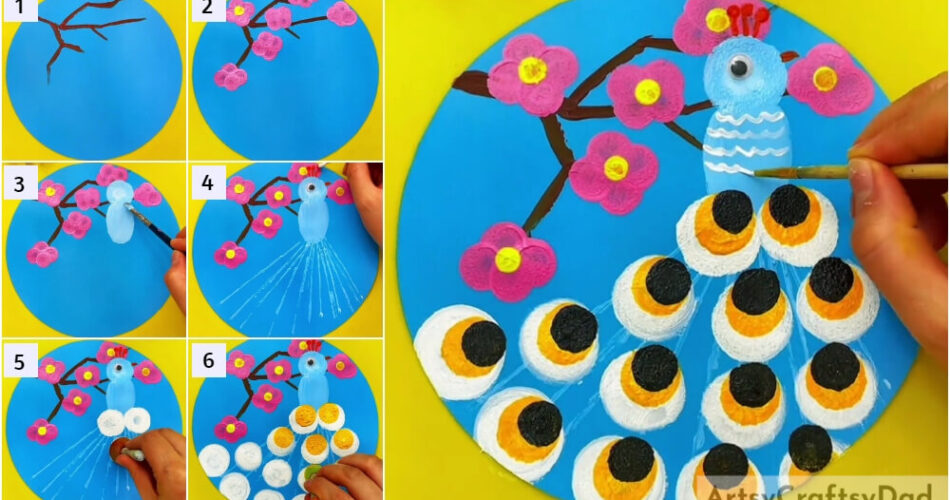
Engage your kids in a fun stamp painting activity with our tutorial on creating a cartoon peacock. Easy steps and colorful results make it perfect for fostering creativity in children.
Welcome to our fun and engaging tutorial on stamp painting a cartoon peacock for kids! In this tutorial, we will guide young artists through simple steps to create a colorful and adorable cartoon peacock using stamps. This activity is perfect for fostering creativity and introducing kids to the joy of painting.
Cartoon Peacock Stamp Painting Tutorial For Kids
Must Read: Shaded Cactuses: Stamp Painting Step-by-Step Tutorial
Supplies & Tools
- Stamp
- Paints (White, Yellow, Black, Pink, Red, Sky Blue)
- Colored Papers (Yellow, Sky Blue)
- Paint Brush
- Scissors
- Glue
- Cotton Buds
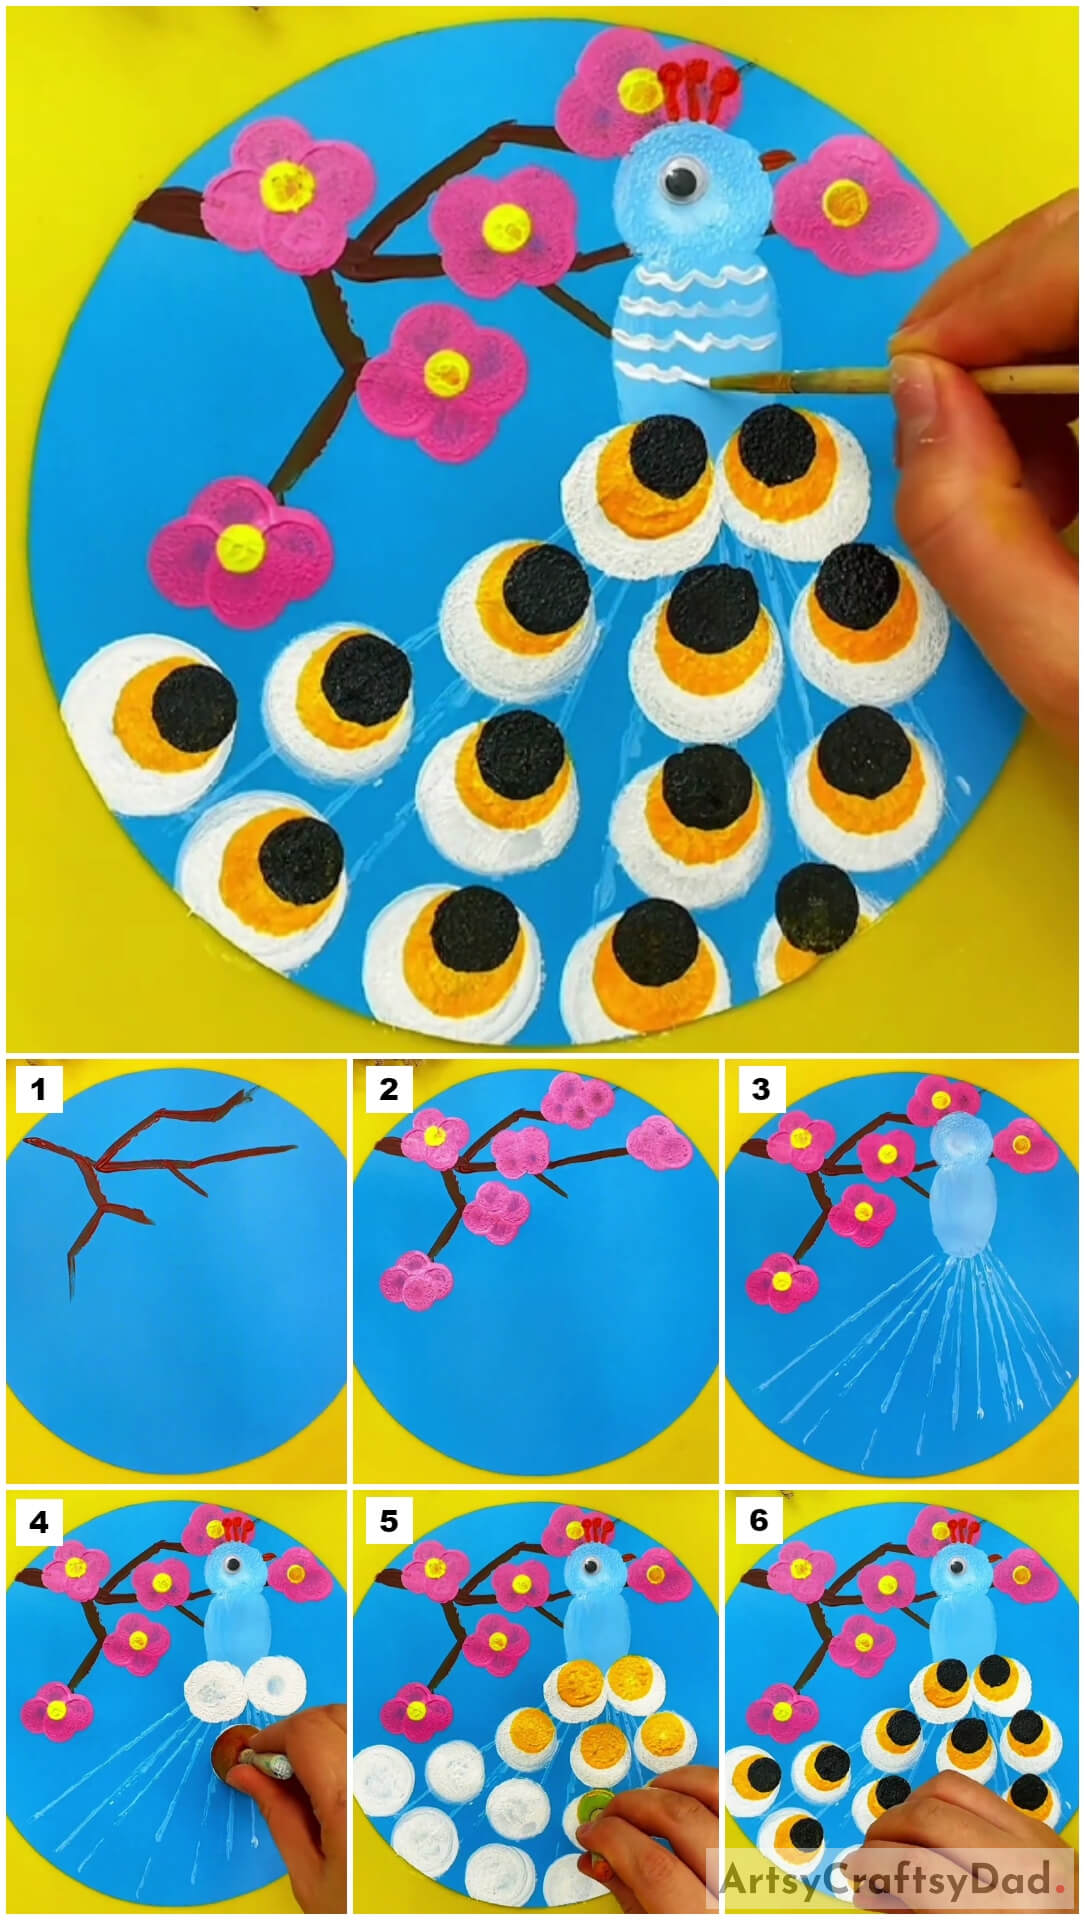
Stamp Painting Cartoon Peacock Tutorial
Step #1: Making Tree Branches
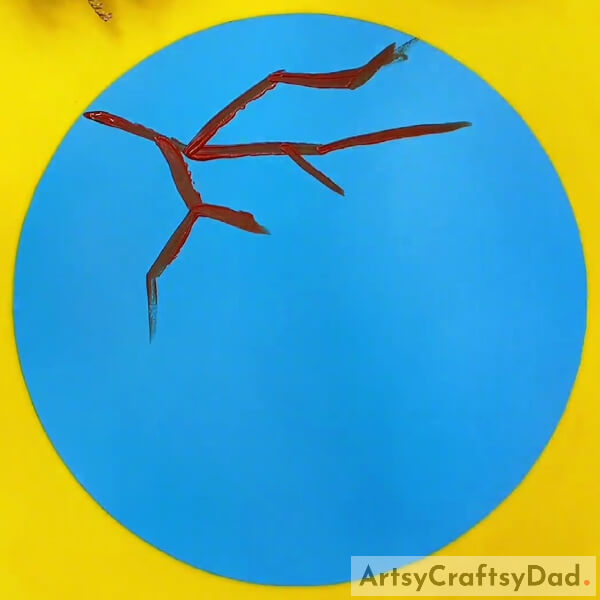
Here We take yellow paper as the base. Now take a blue paper & cut it into a circle shape with the help of scissors. Now paste the blue circle on yellow paper with the help of glue. Now use brown paint & make tree branches using the paintbrush on the top of a blue circle.
Step #2: Making Pink Flowers By Using Stamp
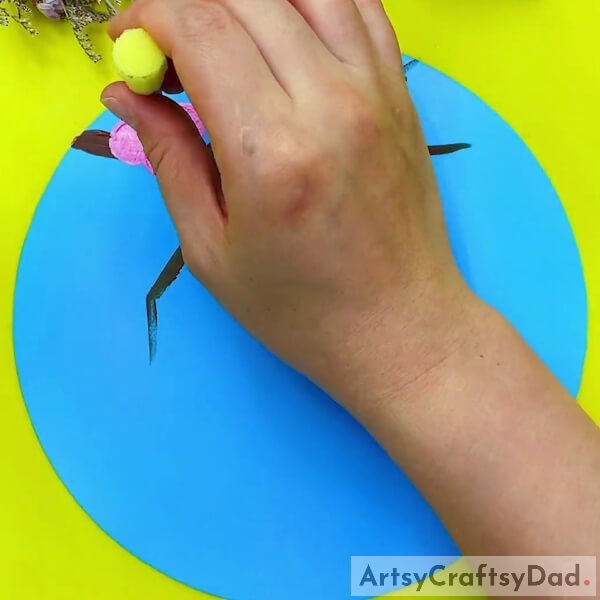
Here we going to make pink flowers on a tree using stamps. Take a stamp & stamp two pink circles on the left side of the tree branches using the stamp. Now again make two more circles on the right side on those two pink circles as shown in the above image to make a flower with the help of a stamp.
Step #3: Making More Flowers
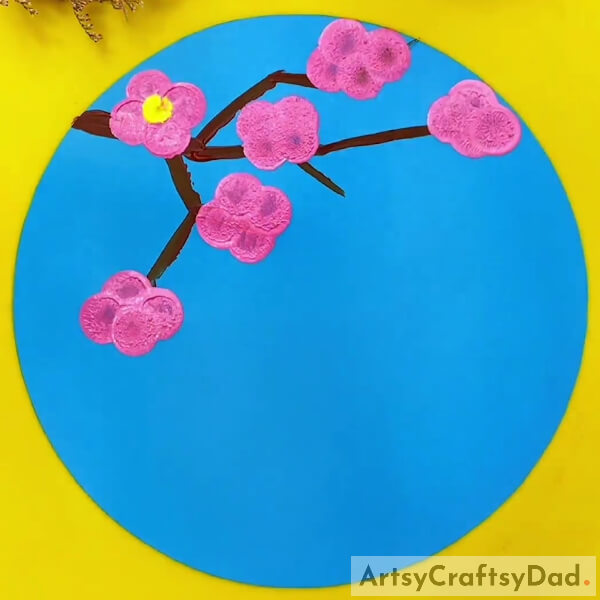
Now make more pink flowers on tree branches by following the same procedure as we mentioned above. Now make a yellow paint dot in the middle of the pink flower as shown in the above image.
Step #4: Making Circle Using Stamp With Sky Blue Paint
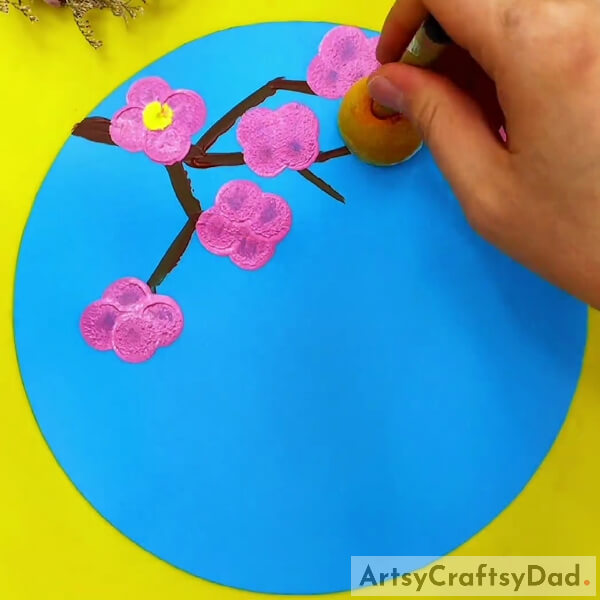
Here we going to make a peacock head. Take a stamp & make a sky-blue circle on the right side on the branch with the help of a stamp.
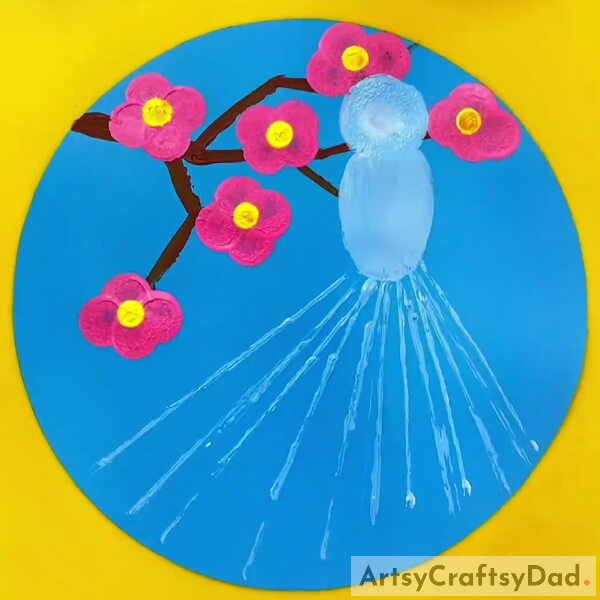
Step #5: Making Cartoon Peacock With Sky Blue Paint
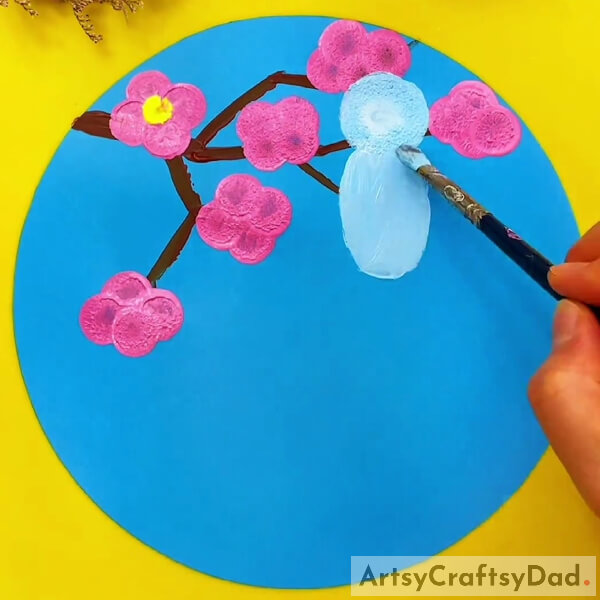
Now we make the lower body of the peacock by using a paint brush from blue paint.
Step #6: Making Lines At the Bottom Of the Peacock
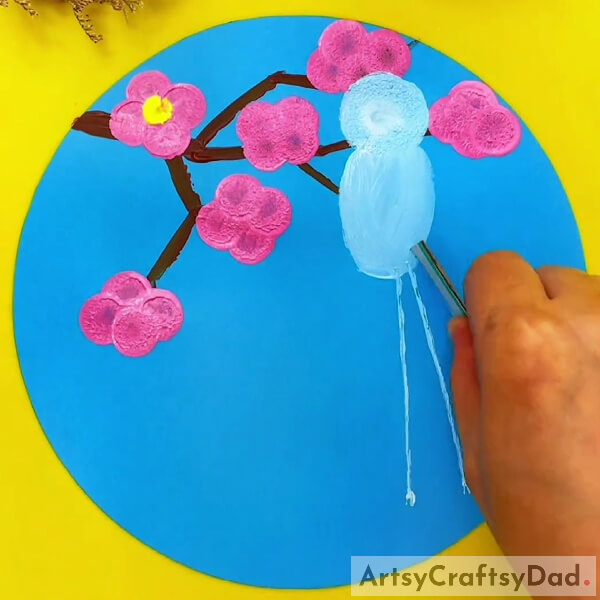
Making rectrices using a thin strip of paper. The length of the rectrices determines the shape of the tail. The rectrices of peacocks are concealed under powerfully developed upper tail coverts that have ocellated spots on them.
Step #7: Making More Lines
Make more rectrices using blue paint as shown in the above image.
Step #8: Making Red Crest On Peacock Head Using Cotton Buds
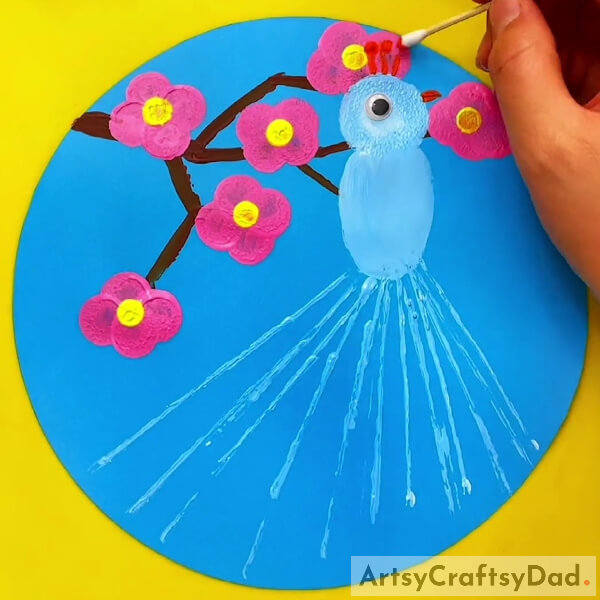
Make a crest on the head of the peacock with the help of cotton buds. Here we use red paint & make a crest on the top of the head of a peacock with the help of cotton buds. Here we use a googly eye & paste it on the head of a peacock with the help of glue. Now we make a beak of a peacock with red paint using a paintbrush.
Step #9: Making Ocelli Circles Using Stamp For Peacock
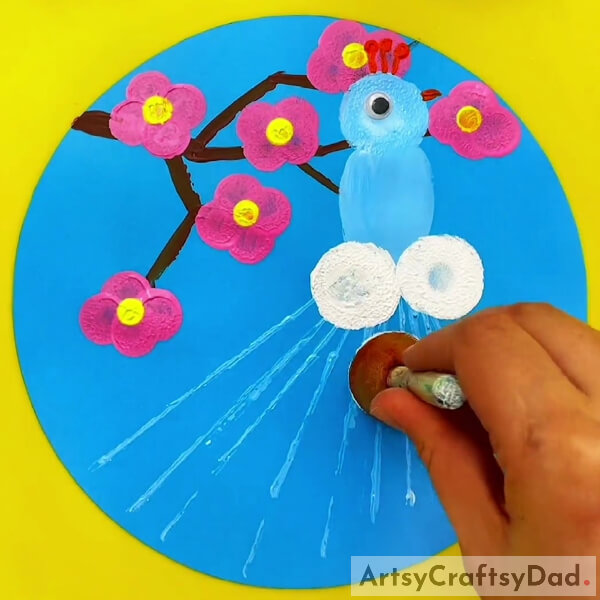
Here we going to make ocelli on rectrices with the help of stamp. Take a stamp & use white paint to make circles on the rectrices with the help of a stamp.
Step #10: Making Yellow Color Circles Using Stamp
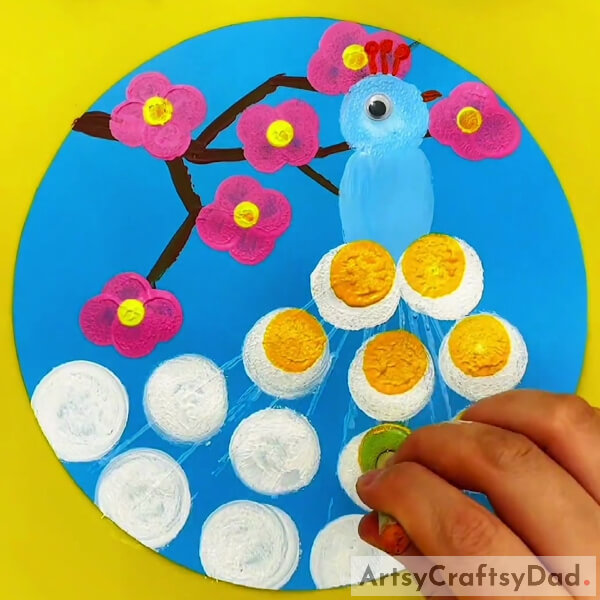
Now here we stamp yellow circles smaller in size on white circles using stamps of smaller size one by one.
Step #11: Making Small Circle Using Smaller Stamp
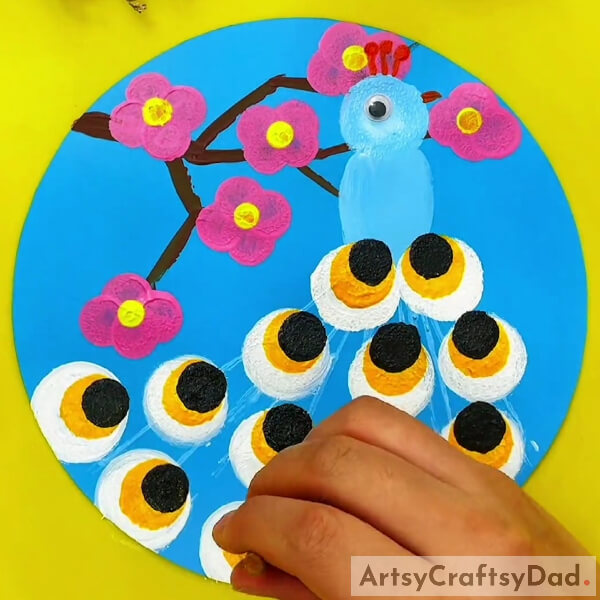
Here we again use another stamp that is smaller in size than the other stamps that we used in the above step & use black paint to make circles on yellow circles with the help of the stamp one by one.
Final Step: This Is The Final Look Of Our Cartoon Peacock!
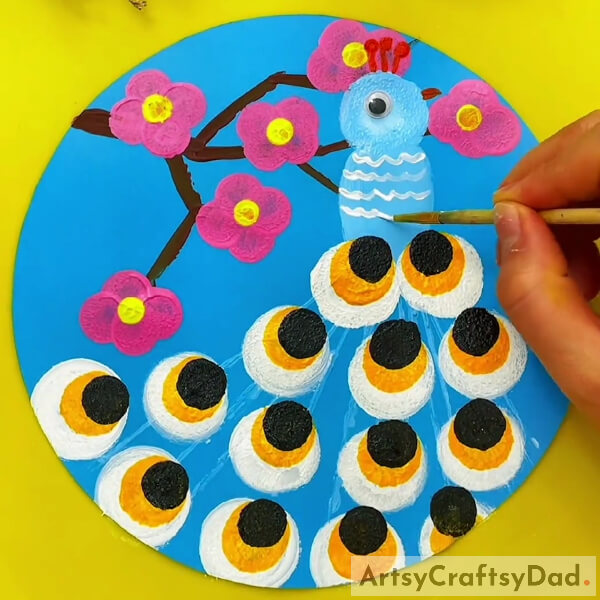
Here we use white paint. Now make some curvy white lines on the peacock by using a paintbrush. Now this is the final look of your cartoon peacock.
In conclusion, stamp painting a cartoon peacock is a delightful and educational activity for kids. By following the step-by-step instructions in this tutorial, children can explore their artistic abilities, enhance their fine motor skills, and create charming artwork that showcases their imagination. Get ready to unleash your creativity with stamps!
You Might Also Like
- Peacock Stamp Painting With Hacks Tutorial
- Circle Stamp Capsicum Painting Tutorial For Beginners
- Giraffe Face Painting Step-by-Step Tutorial For Kids
- Cute Dinosaur: Stamp Painting Tutorial For Kids
- Cute Kitten Stamp Painting Tutorial For Kids


