Looking for a fun and easy craft project for kids? Check out our orange peel ladybug and leaf craft tutorial! This step-by-step guide will show you how to create adorable ladybugs using orange peels and leaves. It’s a great way to teach children about recycling and nature while also sparking their creativity. Get ready for a bug-tastic crafting adventure that your little ones will love!
Are you looking for a fun and creative craft project to do with your kids? Look no further than this clay ladybug and leaf craft tutorial! This activity is not only enjoyable but also educational, as it helps children develop their fine motor skills and creativity. With just a few simple materials and easy-to-follow instructions, your little ones will have a blast making their very own adorable ladybug and leaf creations. So, gather up some leaves, and let’s get started on this exciting craft adventure!
Ladybug on Leaf – Easy Craft Tutorial Using Orange Peels
Must Read: Leaf Frogs In Pond Scenery Craft Tutorial For Kids
Supplies & Tools
- Scissors
- Glue
- Lacy Maple Leaf
- Orange Peel
- Black Marker
- Colored Pen Or Marker (Orange, Pink, Sky Blue)
- White Construction Paper
- Google Eyes
Ladybug On Leaf Procedure
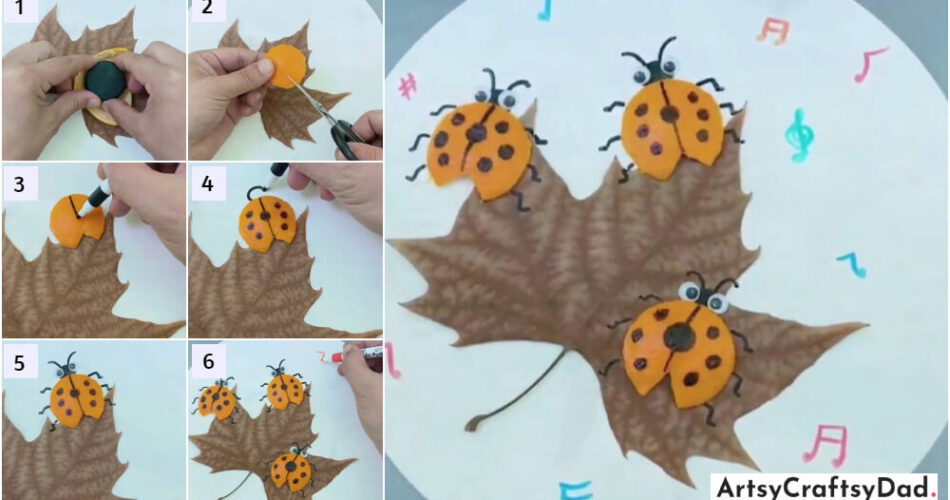
Step #1: Applying Glue On Lacy Maple Leaf

Take a white construction paper & cut it into a circle shape by using scissors. Now, take a lacy maple leaf & apply some glue on the backside of the leaf.
Step #2: Pasting Leaf
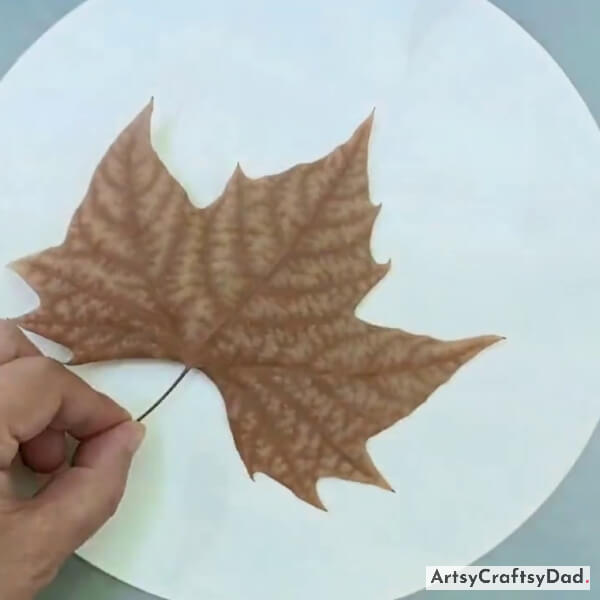
Now, paste the leaf on the white paper circle.
Step #3: Making Lady Bug From Orange Peel
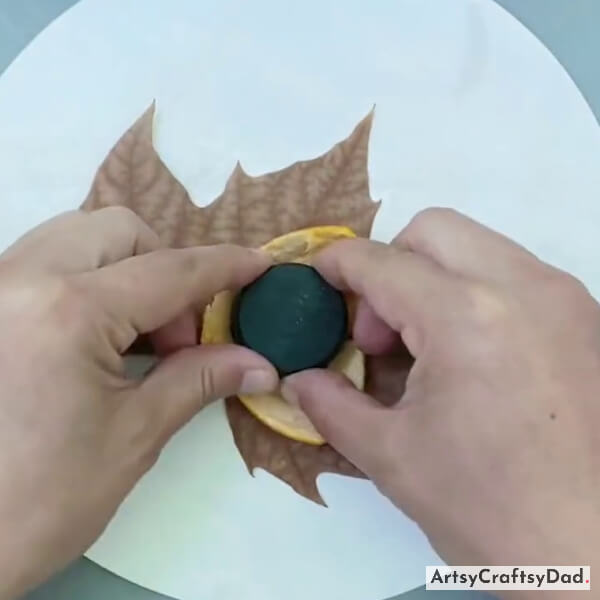
Take a piece of orange peel & cut it into a circle shape to make an elytra (Elytra is the first pair of wings the hardened part that protects the flight wings underneath. When the ladybug takes flight, the elytra opens, and the thin, veined wings unfold.) for the ladybug by pressing the bottle cap on the orange peel.
Step #4: Making A Cut For Abdomen At Elytra
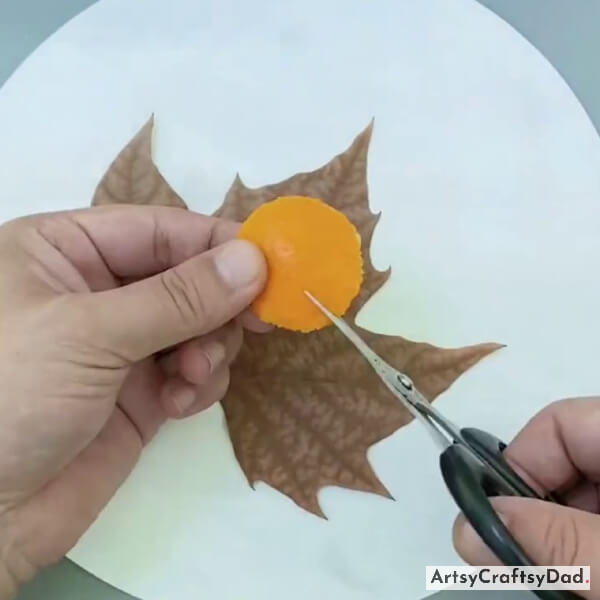
Take an orange peel circle part & cut it with the help of scissors to make the abdomen (The abdomen contains organs for digestion, respiration, and reproduction) on the ladybug’s body.
Step #5: Pasting Ladybug Body On Leaf
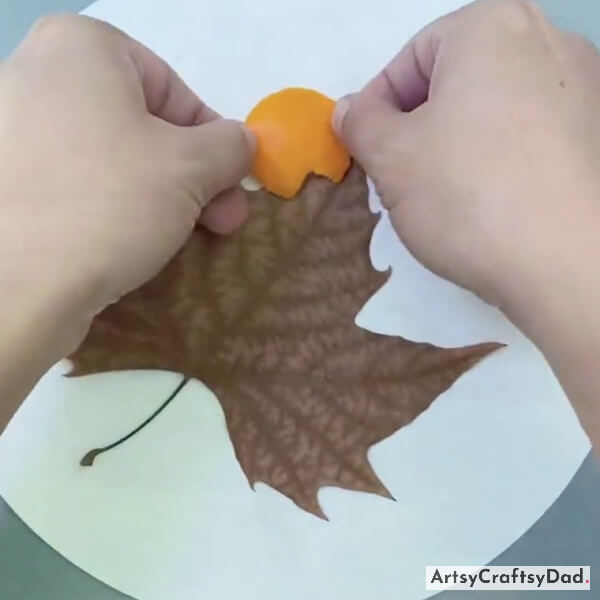
Now, paste the ladybug body on the top of the leaf as shown in the above image.
Step #6: Drawing A Vertical Line Over Lady Bug’s Body
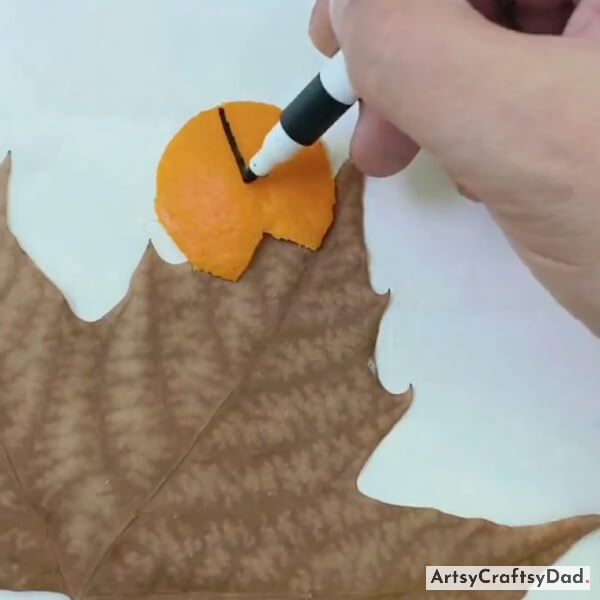
Take a black marker & draw a straight vertical line on the ladybug’s body towards the abdomen part.
Step #7: Drawing Head
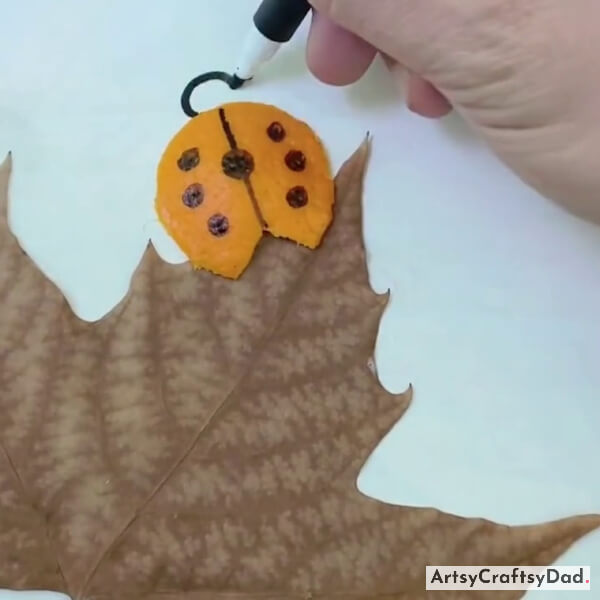
Take a black color marker & draw some dots for spots on the ladybug’s body. After that draw a head for ladybug.
Step #8: Drawing Legs

Take a black color marker & draw two antennas on the head & paste two googly eyes under the antennas as shown in the above image. After that draw legs for the ladybug, three on the left & three on the right sides using a marker.
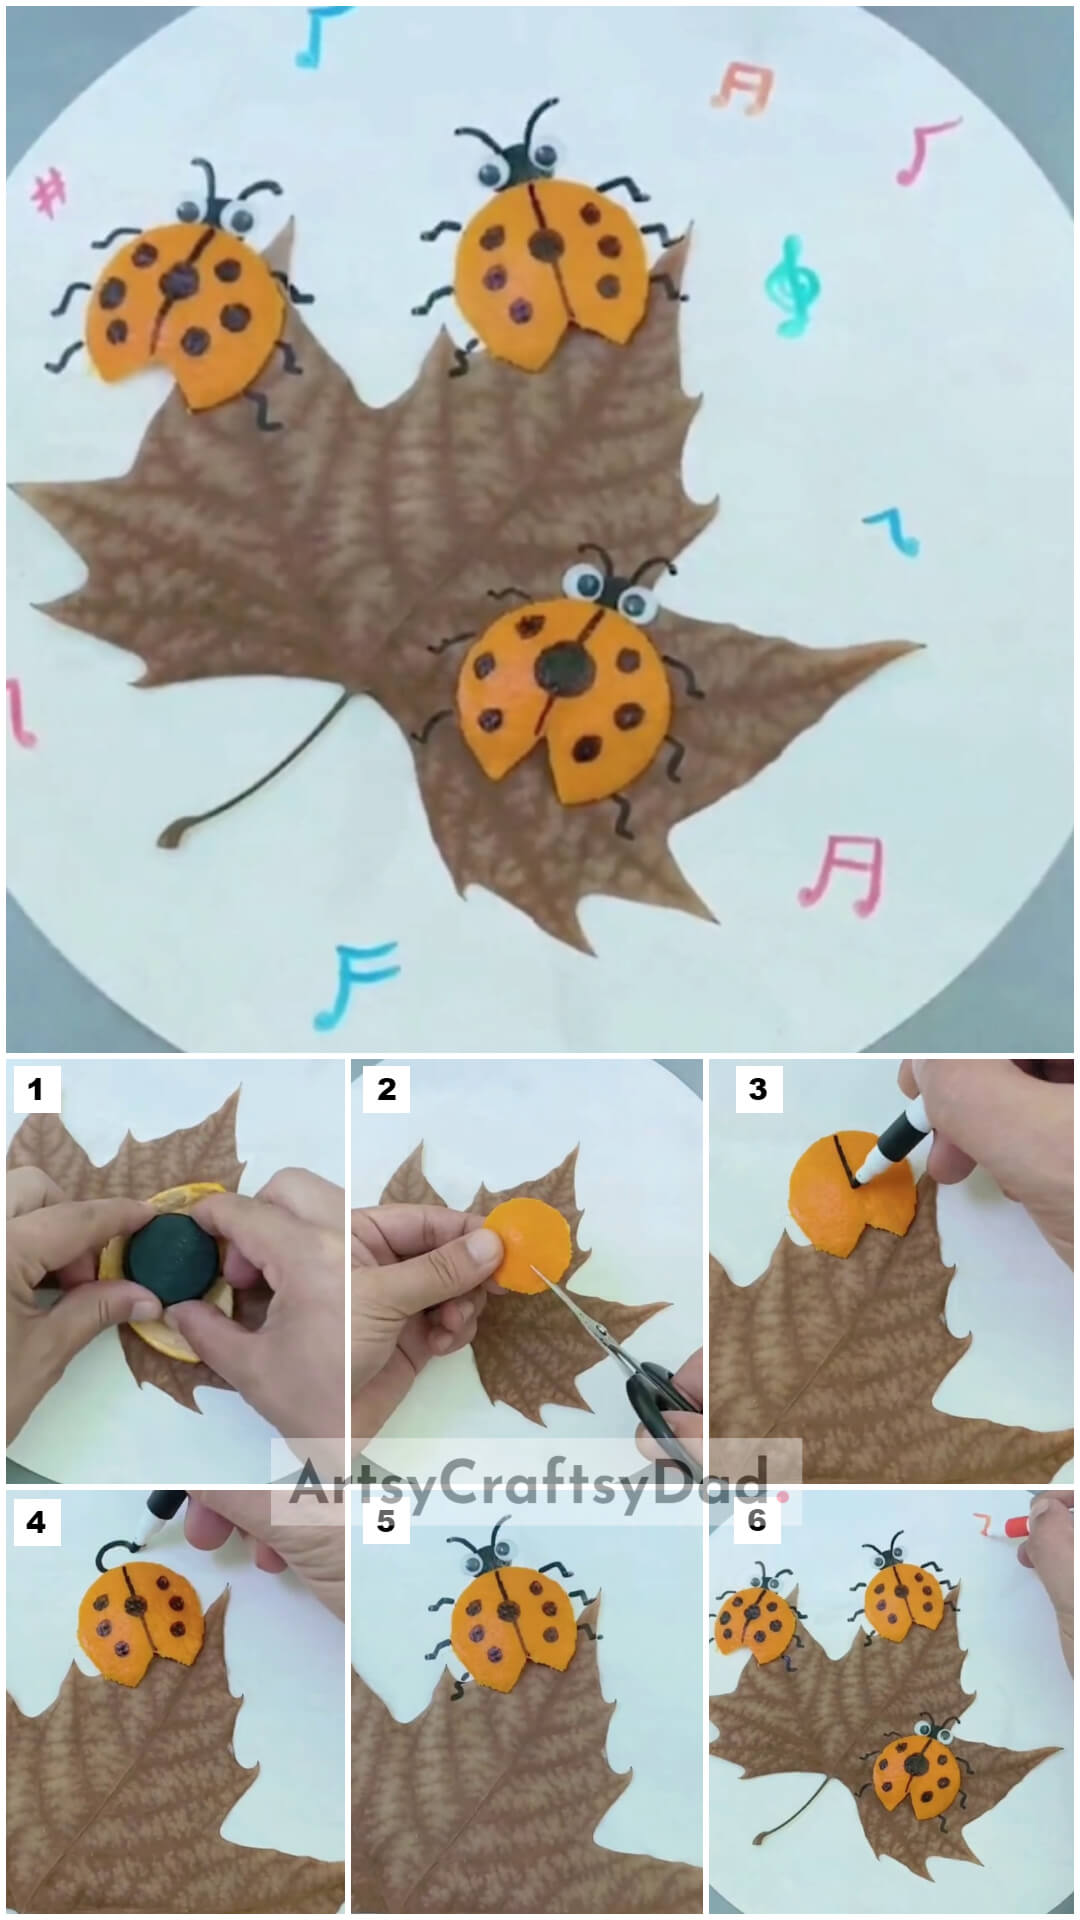
Step #9: Making Two More Lady Bugs
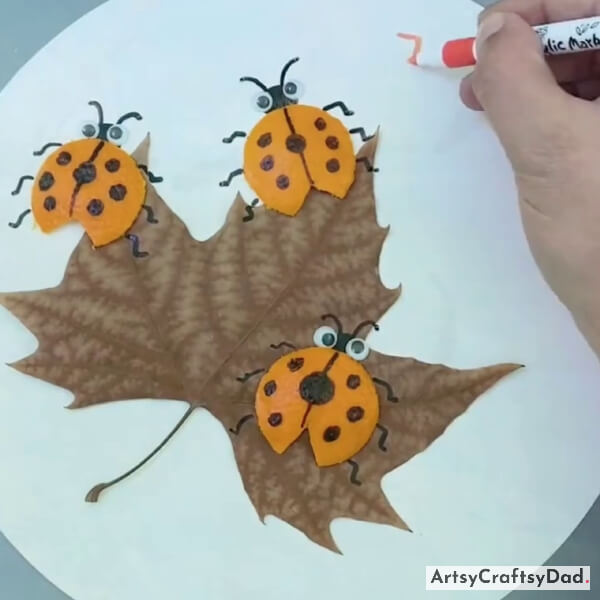
Make two more ladybugs by following the same procedure as we mentioned above & paste them on the leaf. Take an orange color sketch & add some detailing on the whiteboard.
Our Ladybug Leaf Craft Is Ready Now!
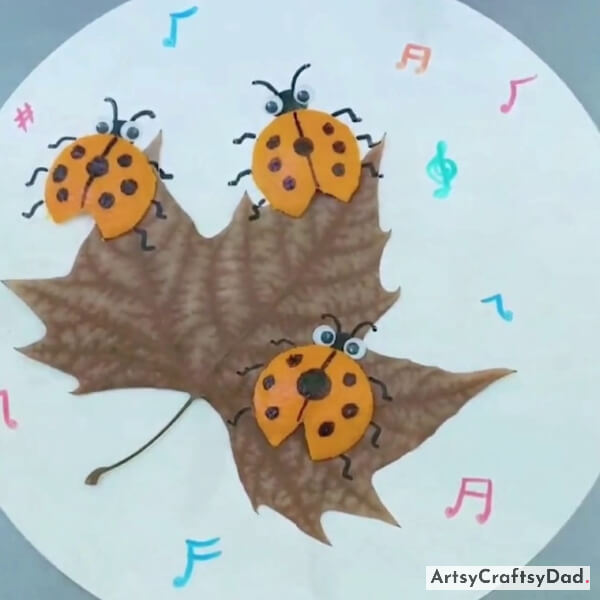
Our ladybug leaf craft is ready now & decorate your home with this adorable craft.
This is the final look of our ladybug and leaf craft tutorial. I hope you have enjoyed this craft. By following the step-by-step instructions, children can create their unique ladybug craft using leaves. This tutorial provides a great opportunity for kids to learn about insects and nature while having a great time. You could customize this craft by adding your ideas. Don’t miss to share your thoughts in the comment section because your small step motivates us to create for the future amazing crafts.
Thank you so much for visiting our website!
You Might Also Like
- Leaf Fox Craft Step-by-Step Tutorial For Kids
- Clay Heart Leaf Tree Craft Tutorial For Kids
- Leaf Ostrich Craft Tutorial For Kids
- Leaf Retro Plane Craft Tutorial For Kids
- Caterpillar Over Leaf Scenery: Leaf Craft Tutorial


