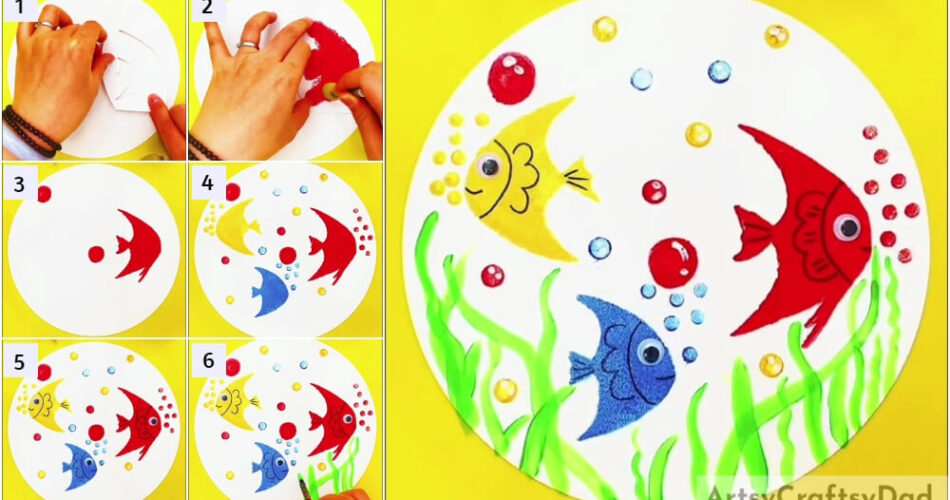
This tutorial will let out your kid’s underwater world’s imagination by making the pretty angelfish using paper stencil & stamp painting!
Hello and welcome to the wonderful world of art and craft! Today, we brought a stunning painting idea for you! Angelfish swimming underwater! This painting will let out the kid’s imagination on the underwater world which has a lot of wonderful creatures and views and one of them is the angelfish, they have a unique appearance and structure! Using a paper stencil, stamp, and other easily available art supplies that you already have at home, you will make this one! Let’s begin!
Underwater Angelfish Painting Using Paper Stencil
Must Read: Clay Crabs Underwater Scenery Craft Tutorial
Supplies & Tools
- White Circular Paper Sheet
- Circle Stamps (Big, Medium, And Small)
- Paintbrush
- Googly Eyes
- Glue
- Angelfish Paper Stencils
- Black Sketch Pen
- Paint Colors (Red, Yellow, Blue, Green, And White)
Angelfish Painting Instructions
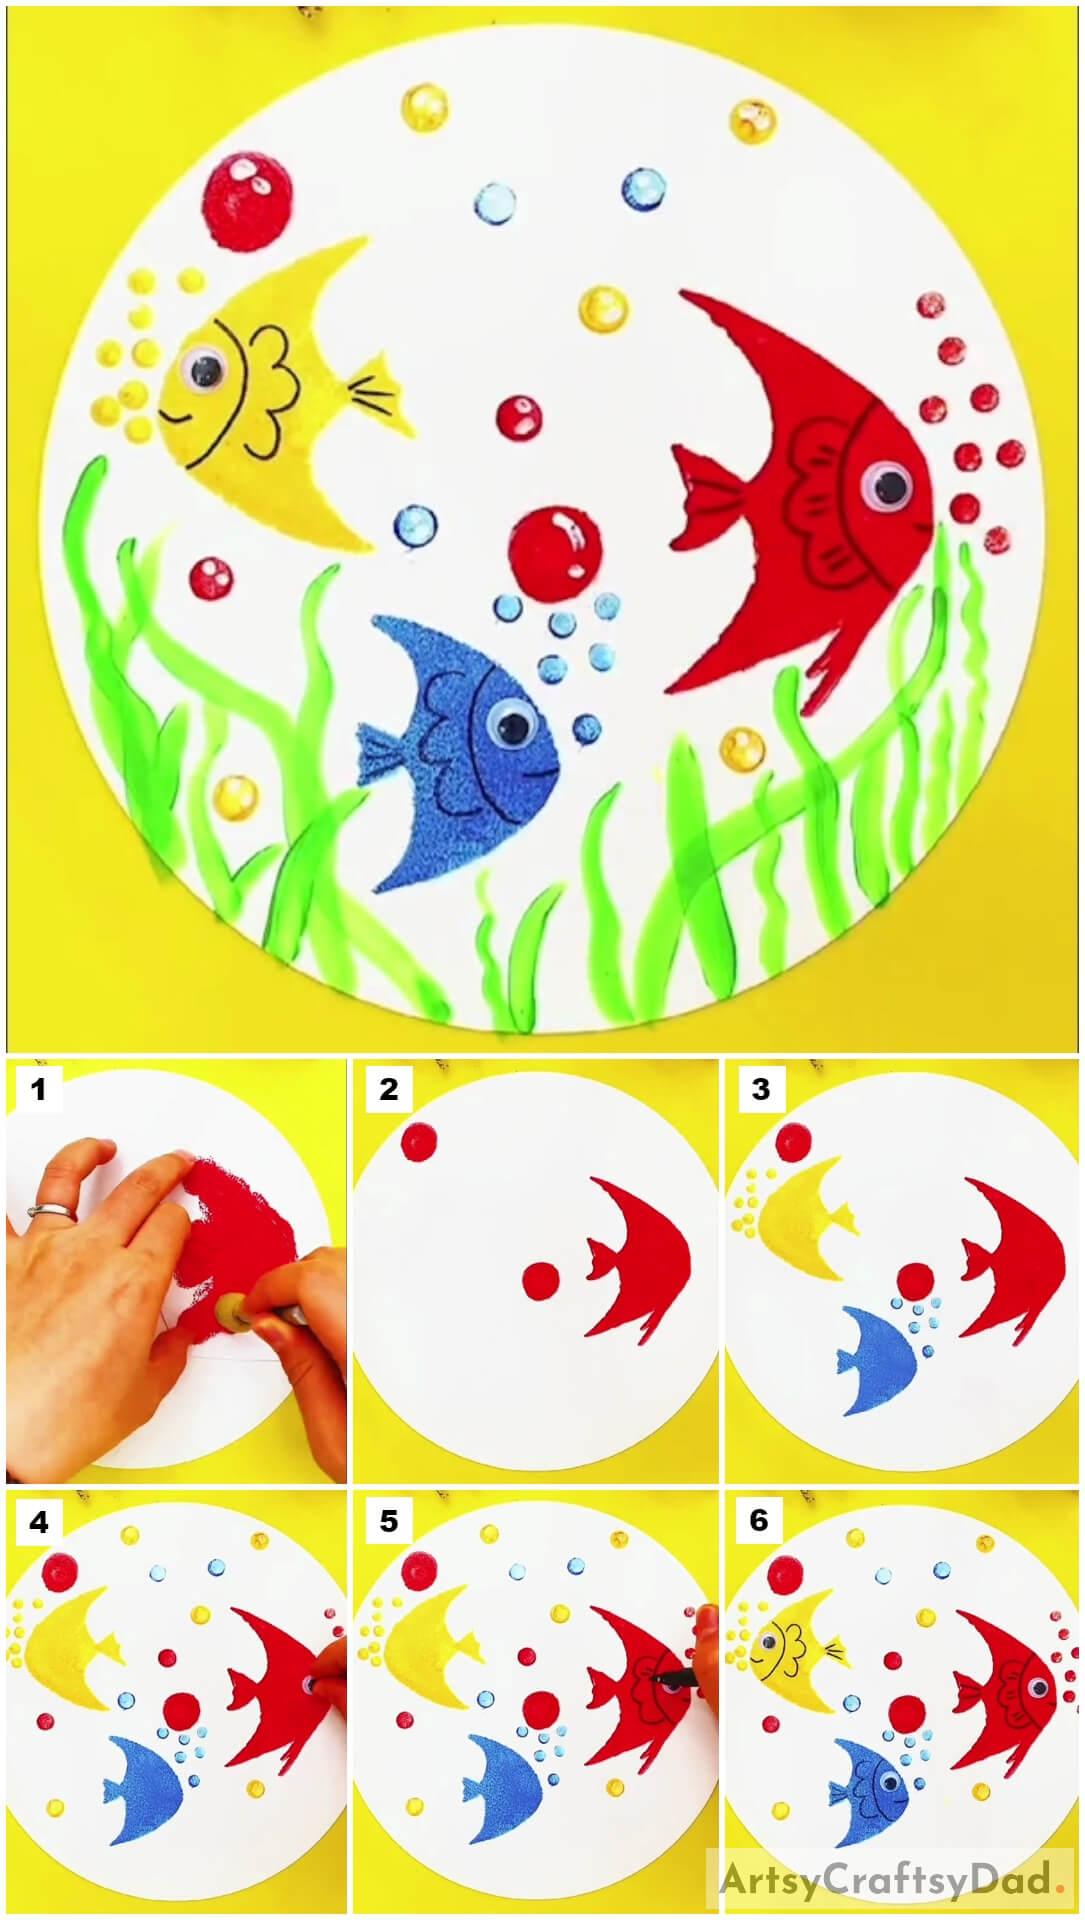
Step #1: Placing Angelfish Paper Stencil Over The Base
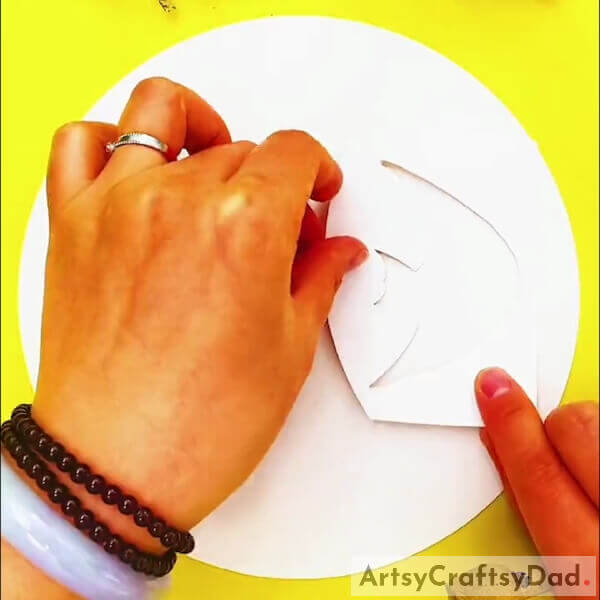
Begin this painting by taking a white circular paper sheet as the base for the artwork and an angelfish stencil. You can either draw an angelfish and cut it out using scissors to make the stencil or get it directly from the market. Place the angelfish paper stencil over the base on the right side.
Step #2: Stamping Red Paint
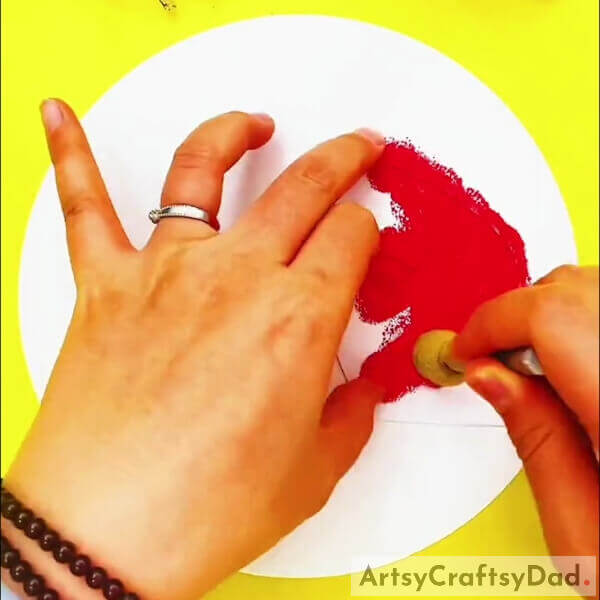
Take a small circle stamp and dip it into red paint. Dab the red-painted stamp over the base inside the stencil to get a painting of an angelfish.
Step #3: Stamping Red Circles

Dab the red-painted stamp over the base, one behind the fish on the left and one at the top left of the base to make circles.
Step #4: Making Bubbles In Water

These stamped circles will represent the bubbles in the water.
Step #5: Making More Angelfish
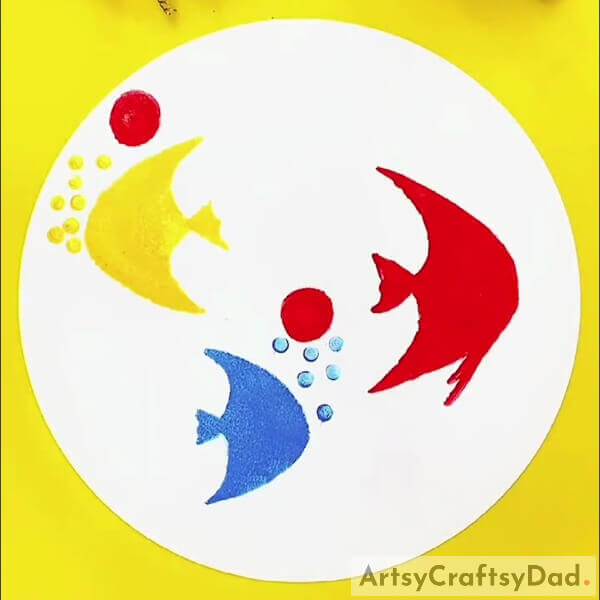
Using another shaped and sized angelfish paper stencil, make a yellow angelfish over the base on the left side and face to the left by dabbing the yellow-painted circle stamp on the stencil. Also, make a relatively smaller blue angelfish between the yellow and red ones but a little below, in the same way.
Now, using a small circle stamp, make yellow and blue bubbles over the base look like coming out of the mouth of a yellow and blue fish. Make a group of these bubbles above the fish.
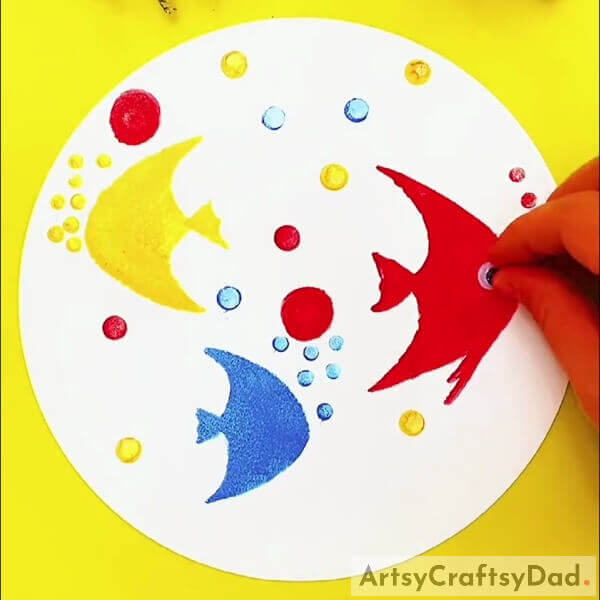
Step #6: Making More Bubbles

Make small circle stamp bubbles to the red angelfish too as you made of the yellow and blue ones. Also, using a medium circle stamp, randomly make 2-3 bubbles on the base of each color i.e. yellow, red, and blue. See the image for reference.
Step #7: Making The Eye Of Red Fish
Paste a googly eye over the front of the red angelfish using glue. See the image for reference.
Step #8: Making Gills Of Red Angelfish
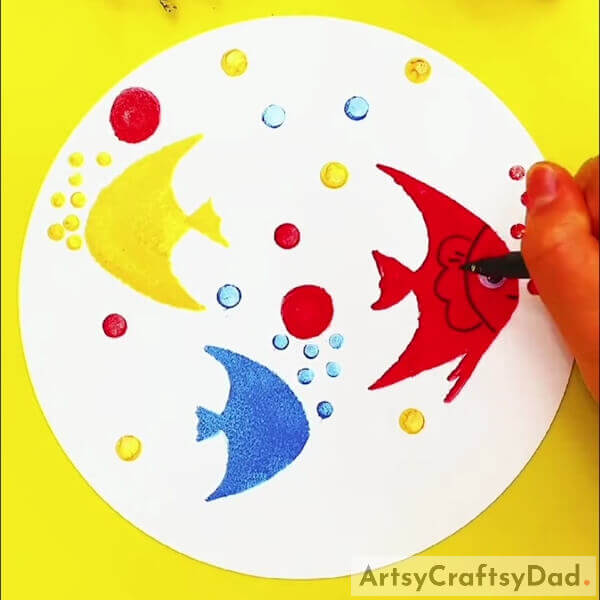
Using the black sketch pen, draw the curvy line beside the eye of the red angelfish to divide the face and the body. Now, make its gills by making bumpy lines behind the division.
Step #9: Detailing All The Fish

Stick a googly eye over both the yellow and blue angelfish as well using glue. Also, using the black sketch pen, make the curvy line over them to divide the face and their body. Make the bumpy-lined gills behind the division. Make lined strokes on the tail of the fish to detail them too. See the image for reference.
Step #10: Making The Water Plants

Dip a paintbrush into green paint and make the wavy water plants at the bottom of the base randomly.
This Is The Final Look Of Your Angelfish Underwater Painting!
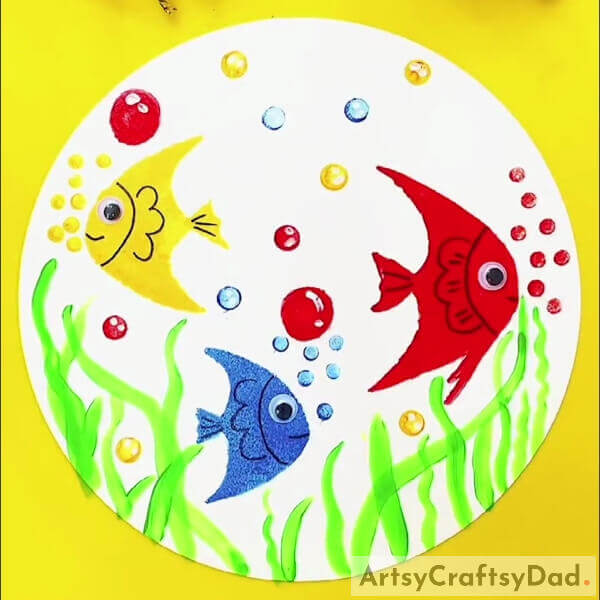
For the last step, dip the paintbrush into white paint and make curvy strokes near the boundary of the big and medium bubbles on them to make them look like shiny.
Whoa! You have successfully created your amazing angelfish, calmly swimming underwater!
These angelfish definitely excited your kid and they got to learn about a new fish found in the waters! This painting is now ready to be showcased to your friends and family! You can also customize the appearance of your angelfish by making textures over them, giving shade to them, or anything you can think of! Make it as unique as you are by applying your imagination and creativity!
We are hoping you liked the article! Drop your feedback and painting journey experience in the comments section below! We would love to hear from you!
You May Also Like
- Red Vector Flowers Stamp Painting Art Tutorial For Kids
- Peacock Stamp Painting With Hacks Tutorial
- Leaf Fish Swimming Underwater Craft Tutorial
- Cabbage Stamp Roses Painting Tutorial
- Wistera Finger Painting Artwork Tutorial For Kids


