If you are a Mario fan then you must love those mushrooms! So, this tutorial will guide you to make Mario mushrooms in a garden painting!
Hey young artist! Today, we brought a painting step-by-step tutorial for you on making a mushroom garden as a stamp painting! This painting is perfect for a Mario fan! The cute mushrooms in the Mario world in the inspiration for this artwork! Kiddos will love to make this painting and will have fun too! Painting is a fun learning activity as it drives your motor skills as well! So, grab the listed materials and read th procedure to begin your painting!
Beautiful Mushroom Garden Painting For Kids
Must Read: Bubble Wrap Snowman Painting Craft Tutorial For Kids
Supplies & Tools
- White Circular Paper Sheet
- Paint Colors (Pink And Dark Pink, Yellow, White, Brown, And Green)
- Cottom Earbud
- Circle Stamp
- Toothbrush
Mushroom Garden Craft Instructions
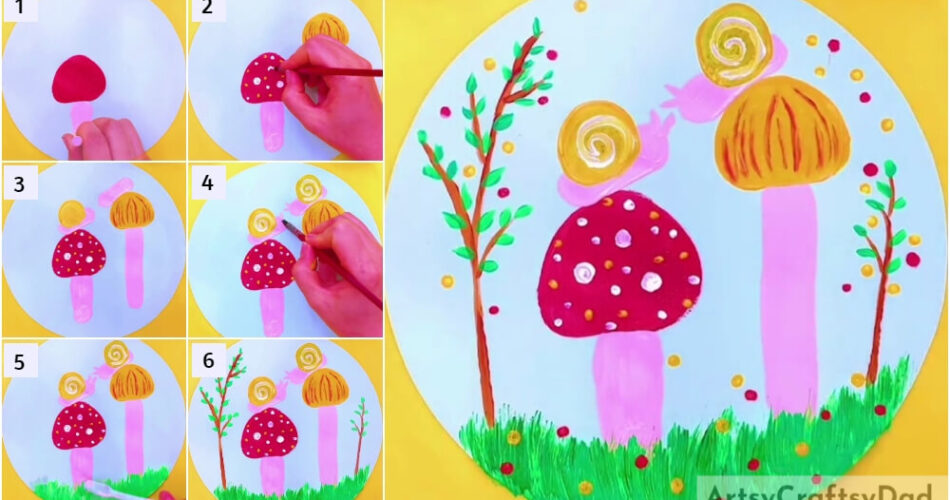
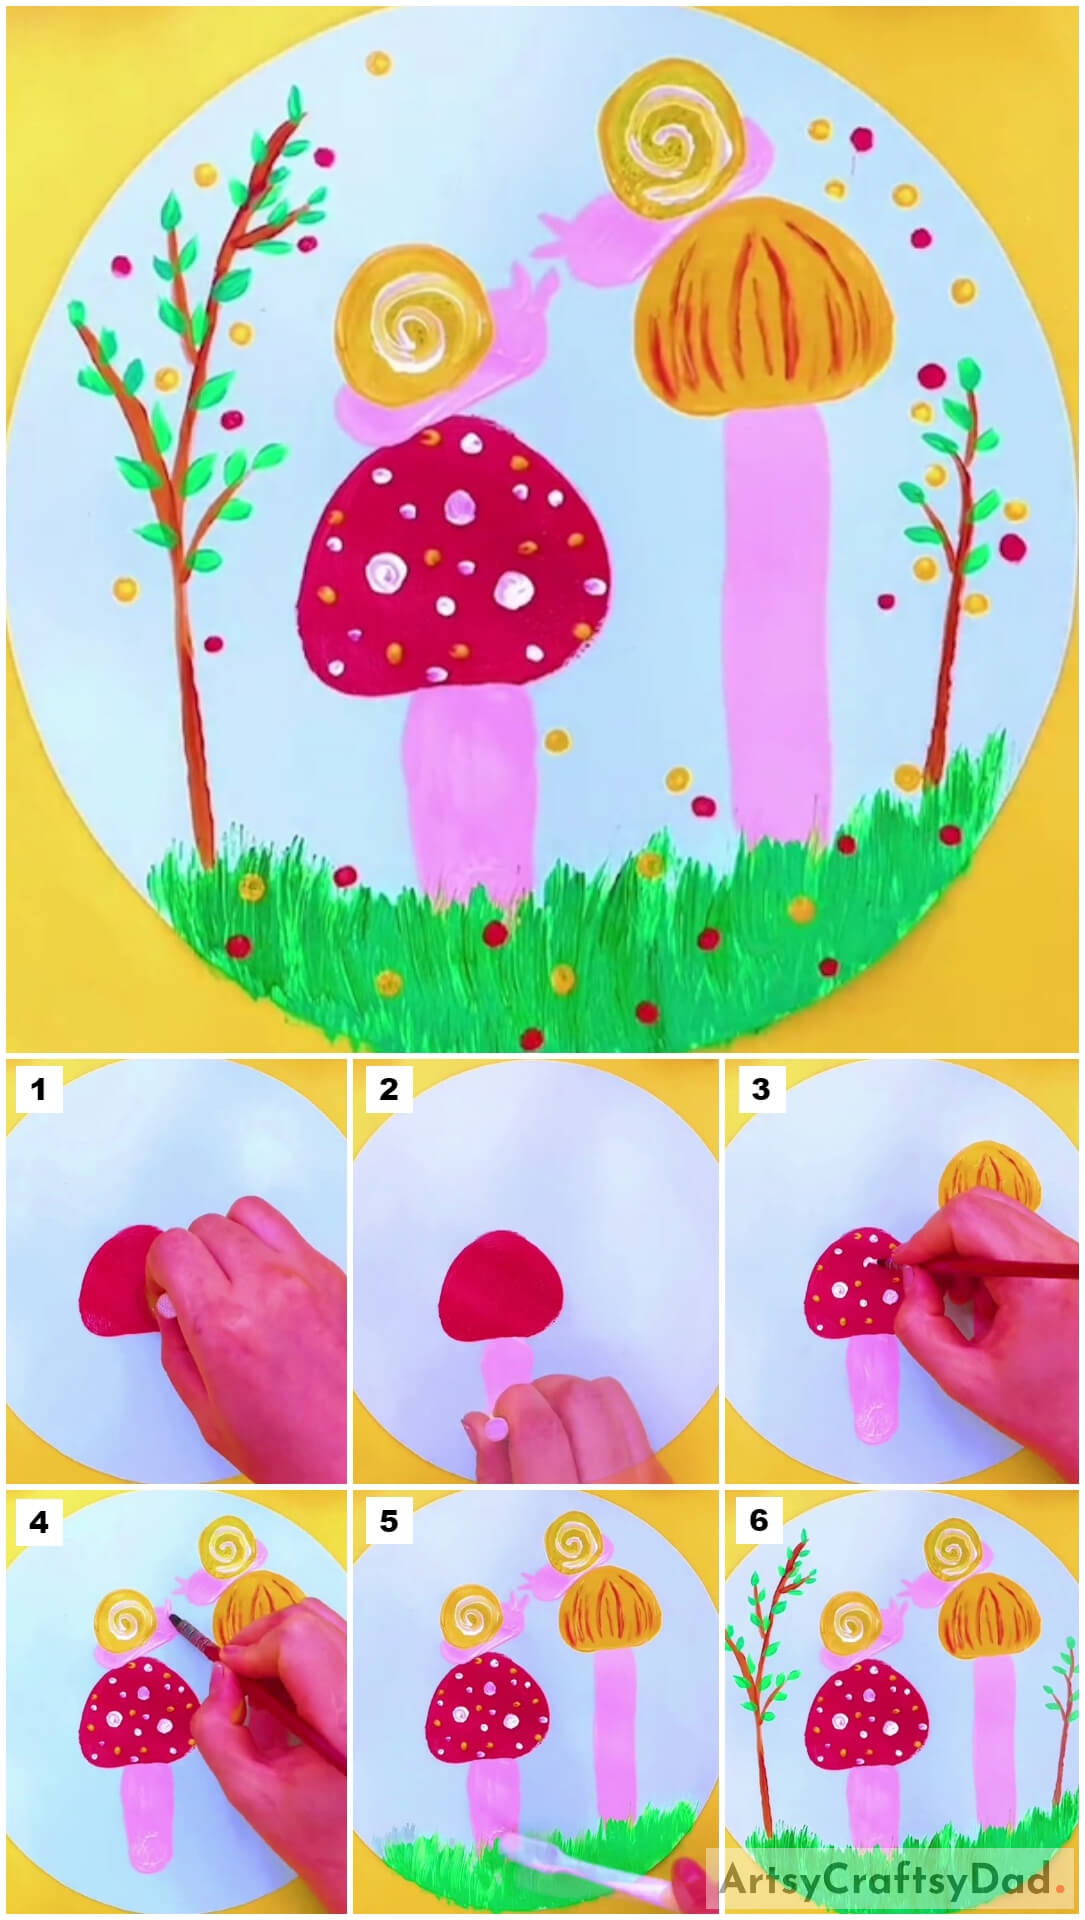
Step #1: Making Mushroom Cap
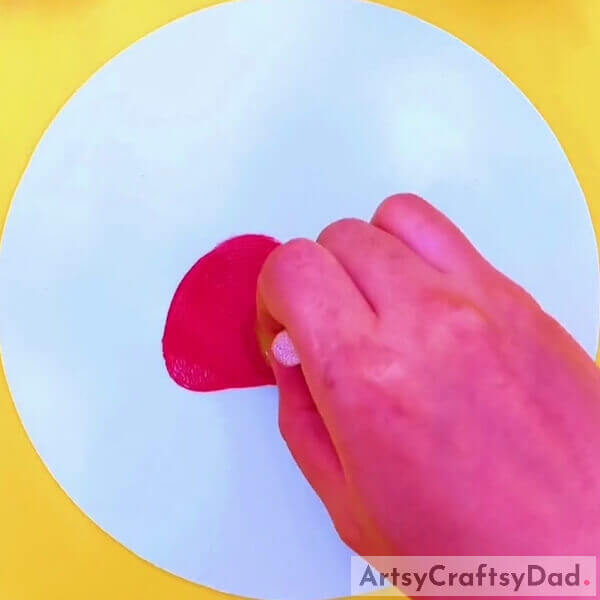
Begin this painting by taking a white circular paper sheet as the base for this painting and a circle stamp. Dip the stamp into dark pink paint and make a rounded triangular cap of a mushroom in the middle and slightly left of the base. See the image for reference.
Step #2: Making The Stalk Of The Mushroom
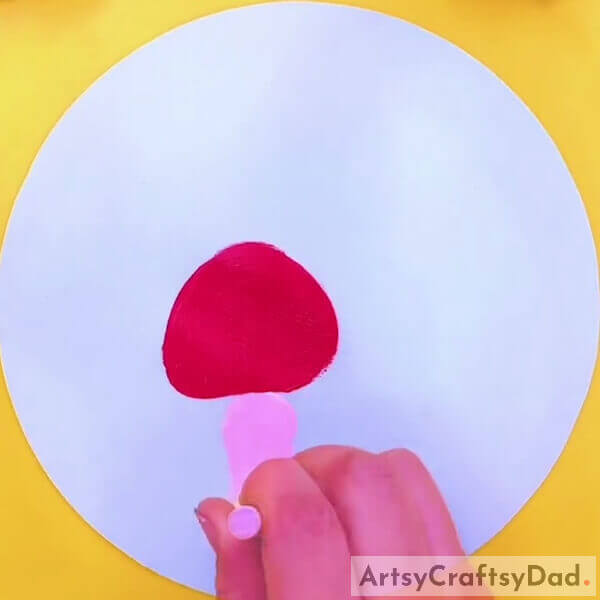
Beneath the cap of the mushroom, you will make the stalk of it. Dip the circle stamp into pink paint put it right below and in between the cap of the mushroom and drag it to the bottom of the base leaving some gaps from the end to make it.
Step #3: Making Another Mushroom And Detailing Them

Dip the circle stamp into yellow paint and make the cap of another mushroom on the right side of the base above the already-made one. Also, make the stalk of it using the pink paint and the circle stamp. Make the stalk of the yellow mushroom a little longer than the pink one.
Now, dip a paintbrush into red paint and make a curvy stroke over the cap of the yellow mushroom along the boundary of it to detail it. And, make the dots over the cap of the pink mushroom from yellow and white paint to detail it. See the image for reference.
Step #4: Completing Deatiling The Pink Mushroom
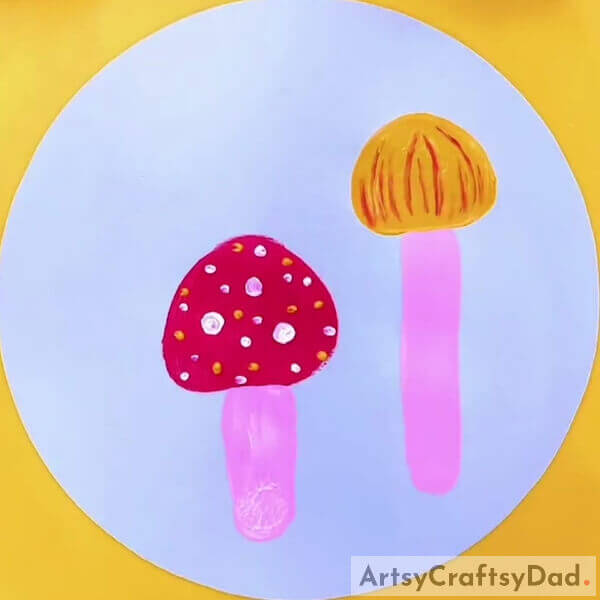
Make some polka dots over the cap of the pink mushroom with white paint to detail it.
Step #5: Making Snails’ Bodies
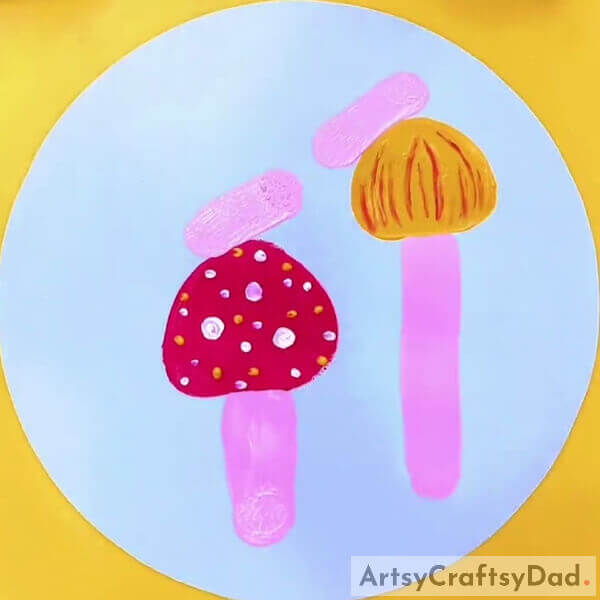
Dip yor circle stamp into pink paint and make small slanting lines above the mushrooms as shown in the image to make the bodies of the snails over them.
Step #6: Making The Shells Of The Snails
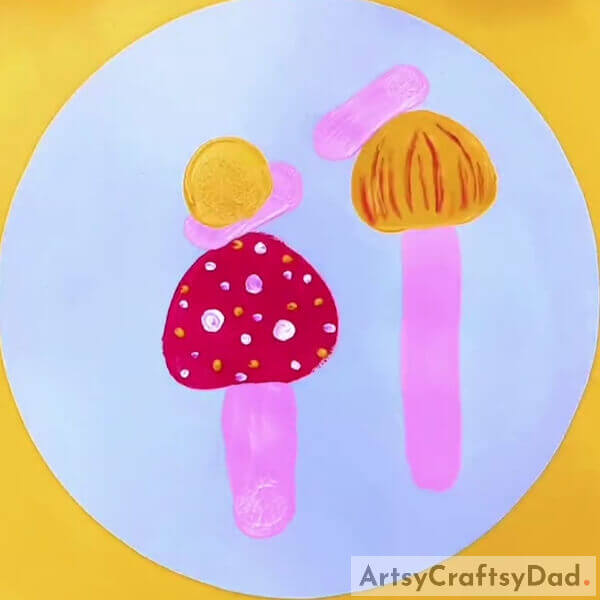
Dip the circle stamp into yellow paint and dab it over the bodies to make the round shells of the snails.
Step #7: Detailing The Snails

Dip the paintbrush into white paint and make spirals over the shells to detail the shells of the snails. Now, dip the paintbrush into pink paint and make the 2 tiny lines ahead and above the bodies of the snails. See the image for reference.
Step #8: Making Grass Ground
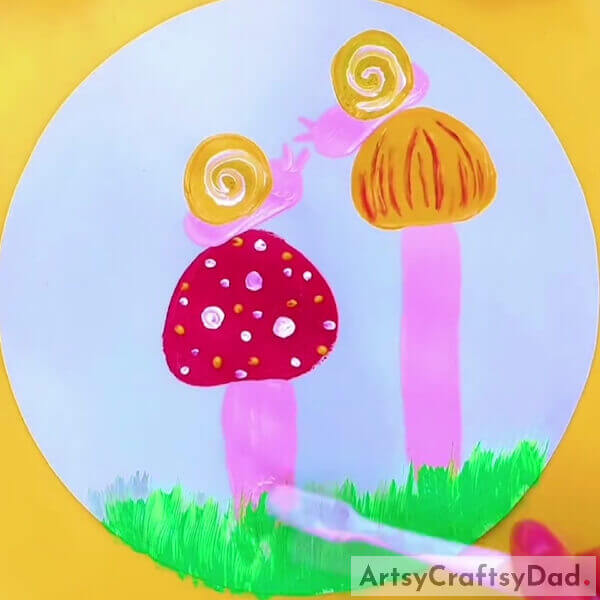
Dip a toothbrush into green paint and make strokes at the bottom of the base to make the grassy ground beneath the mushrooms.
Step #9: Making A Plant

Dip the paintbrush into brown paint and make a plant on the left side of the base above the ground with branches. See the image for reference.
Step #10: Making Leaves On The Plant
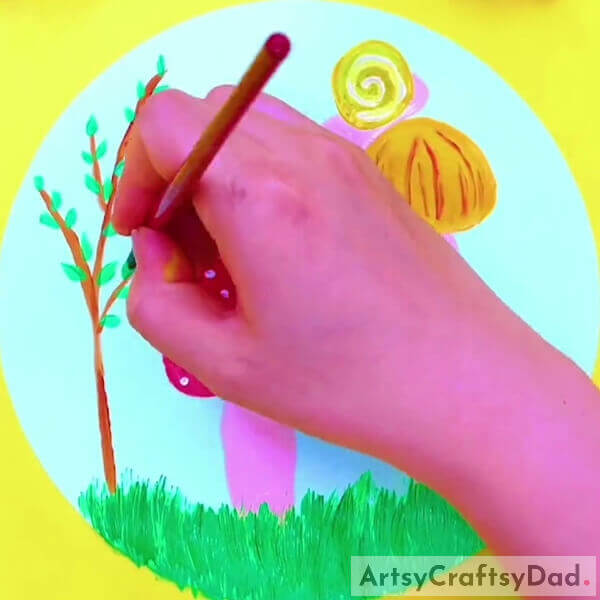
Using the paintbrush, make green tiny leaves on the plant branches. See the image for reference.
Step #11: Making Another Plant
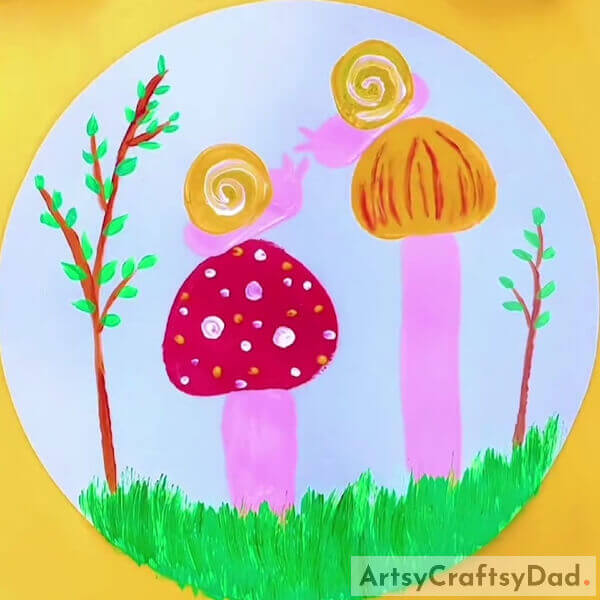
In the same way, make another plant on the right side of the base, above the ground. Make this plant a little smaller than the previously-made one as shown in the image.
Step #12: Making Dotted Flowers
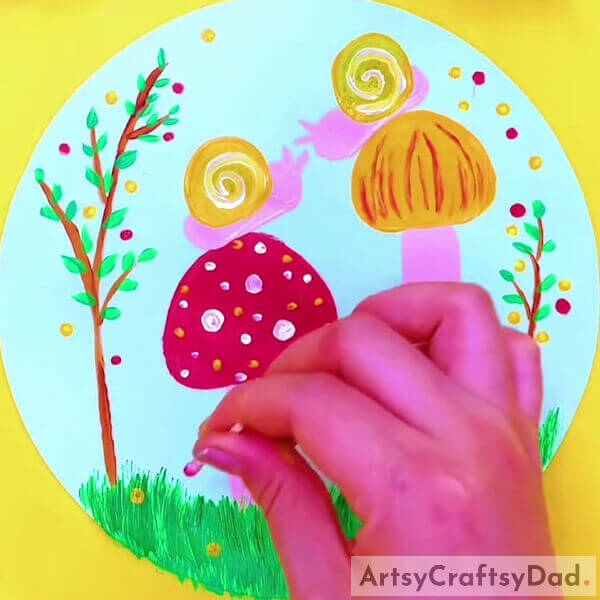
Dip your cotton earbud into dark pink paint and make dots over the base randomly on the plant branches, and on the grassy ground to make the dotted flowers. Also, make yellow dotted flowers in the same places you made the pink ones. See the image for reference.
This Is The Final Look Of Your Mushroom Garden Painting!
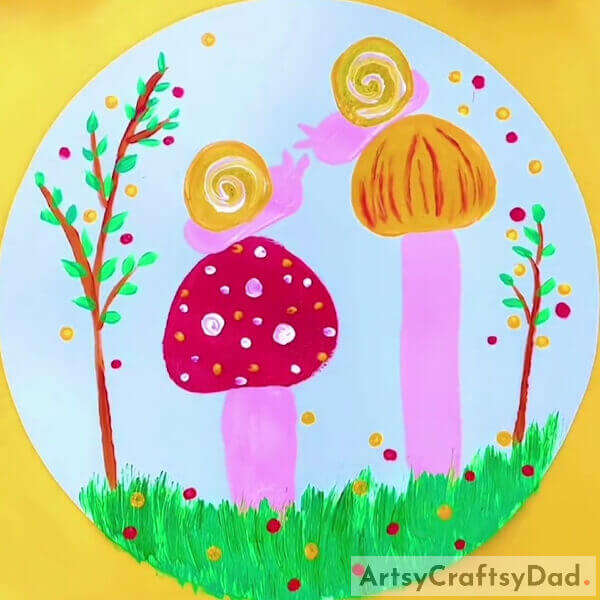
Wow! You have successfully created your amazing mushrooms in the garden painting!
You may have learned many tips and tricks to paint through this art-making! This painting is now ready to be displayed or add it to your painting collection! You can also use this painting as your school art project. It will definitely thrive everywhere! You can also, customize this painting by, changing the background, different colored mushrooms, or adding facial features to them, anything! Your imagination and creativity are the limit!
Hope you loved the article and the painting! If so, give it a like and share it with your friends! Also, tell us your feedback in the comments section below to keep us motivated to keep bringing such artwork for you!
You May Also Like
- Red Vector Flowers Stamp Painting Art Tutorial For Kids
- Rose Bouquet: Stamp Painting Tutorial For Kids
- Peacock Stamp Painting With Hacks Tutorial
- Colorful Lavender Garden Night Painting
- Wistera Finger Painting Artwork Tutorial For Kids


