Looking for a fun and creative art project for your kids? Check out our Pine Cone Flamingo Art & Craft tutorial! This step-by-step guide will teach your little ones how to transform pine cones into adorable flamingo masterpieces.
Are you looking for a fun and creative craft project for your kids? Look no further than the Pine Cone Flamingo Art & Craft Tutorial! This tutorial will guide your children through the step-by-step process of transforming a simple pine cone into a vibrant and unique flamingo. Not only will they have a blast making their little flamingo friend, but they will also develop their fine motor skills and creativity along the way. So collect all the stuff that will be used in our pine cone flamingo craft and let’s get crafting!
Lovely Flamingo Art & Craft Using Pine Cone
Must Read: Paper & Clay Ice-Cream Cone Craft Tutorial For Kids
Supplies & Tools
- 2 Pine Cones
- Glue
- Pink Water Colour
- PaintBrush
- Marker (Green, Sky-Blue, Black, Pink)
- White Drawing Sheet
Pine Cone Flamingo Instructions
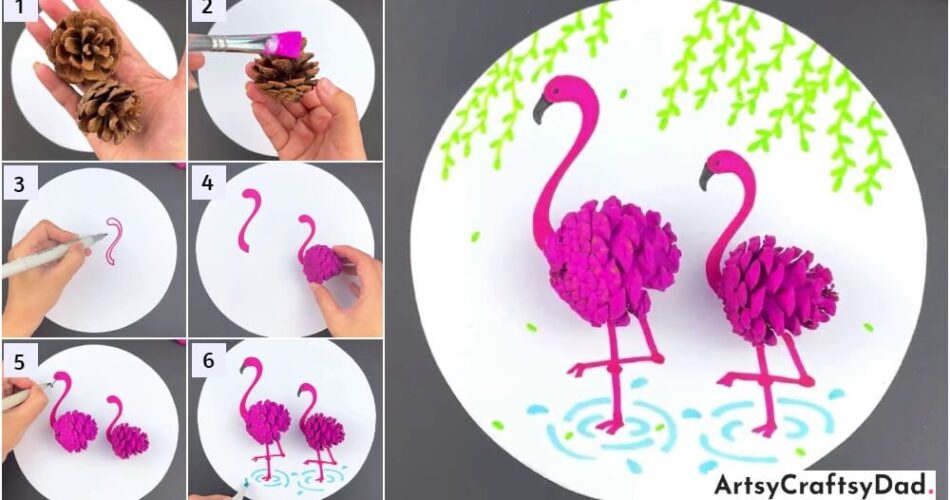
Step #1: Working With Pine Cones
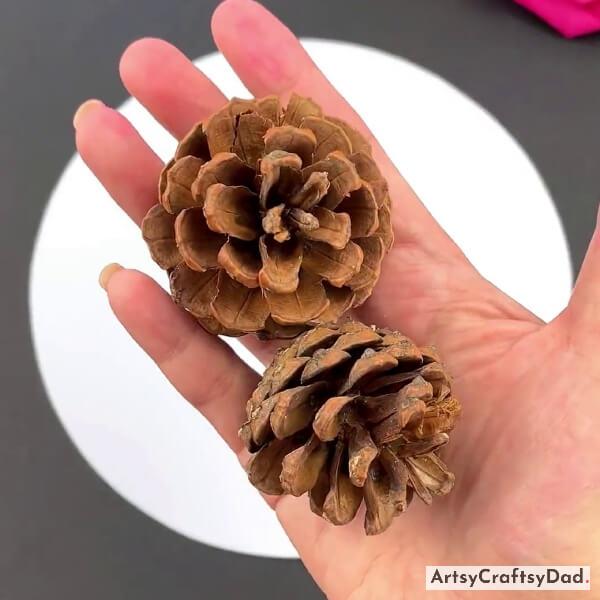
Take a white drawing sheet & cut it into a circle & use it as a craft base. Take two pine cones and clean them.
Step #2: Coloring The Cones
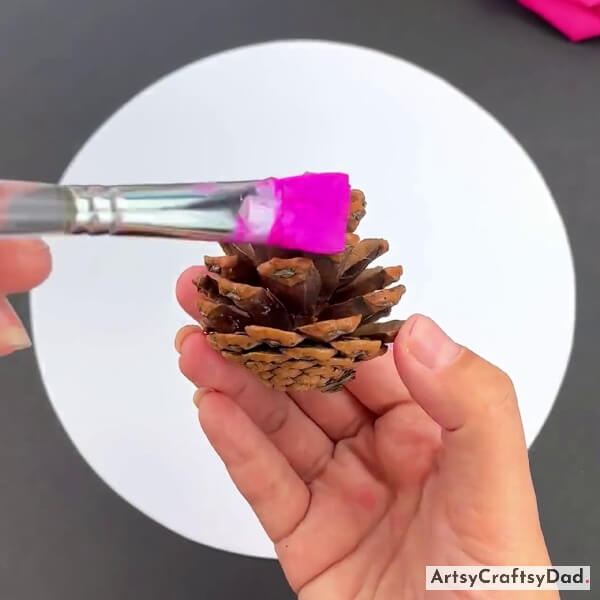
Now, take pink watercolor & dip a paintbrush into it & color the pine cone with the paintbrush.
Step #3: Complete Coloring The Entire Cone
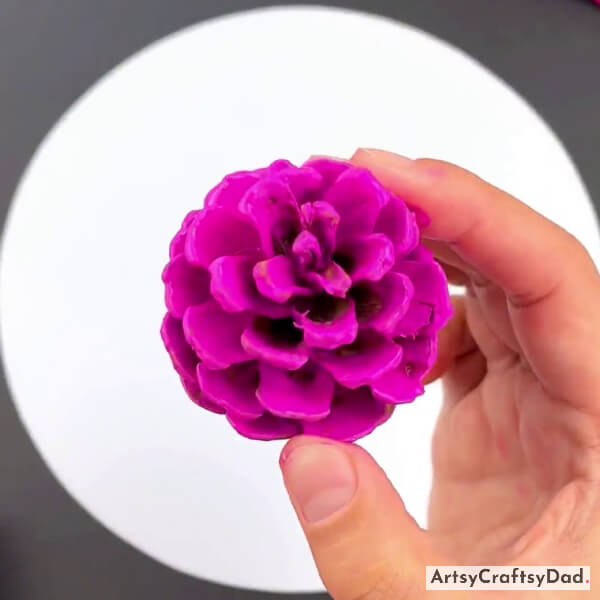
Color the complete cone and let it dry.
Step #4: Drawing Flamingo
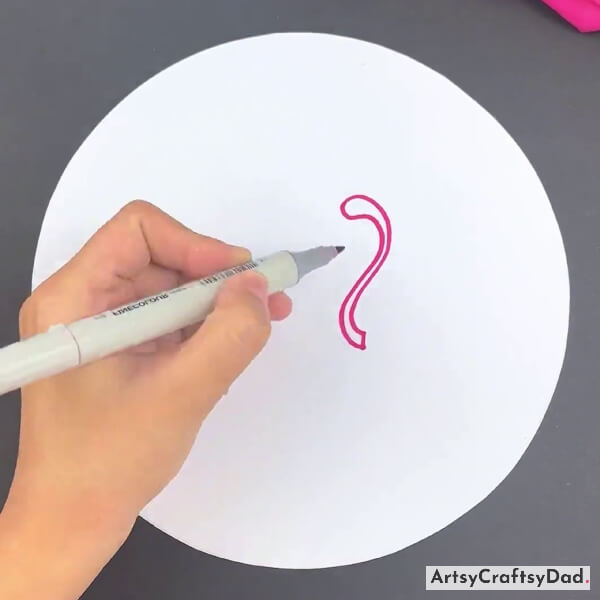
Take a pink color marker and start drawing the face & neck of the flamingo on the white drawing sheet.
Step #5: Applying Glue
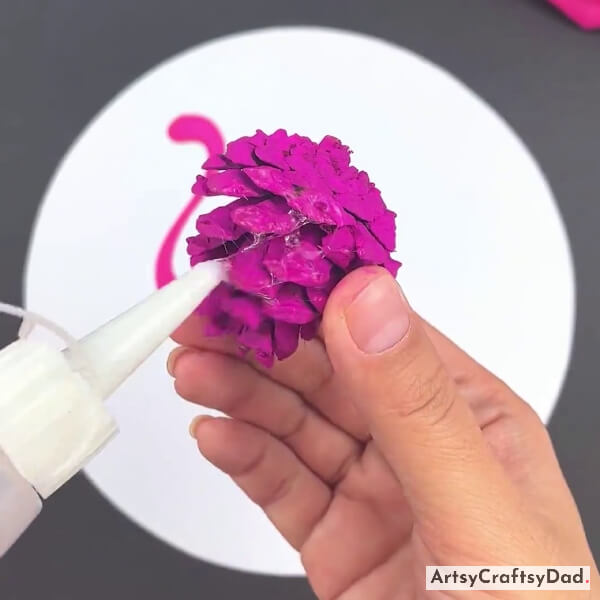
Now, color the flamingo face & neck with pink marker & draw one more flamingo face & neck just in the front but on the upper side of the previous one & color it by following the same process. Apply glue on the pink-colored pine cone.
Step #6: Pasting Pine Cone
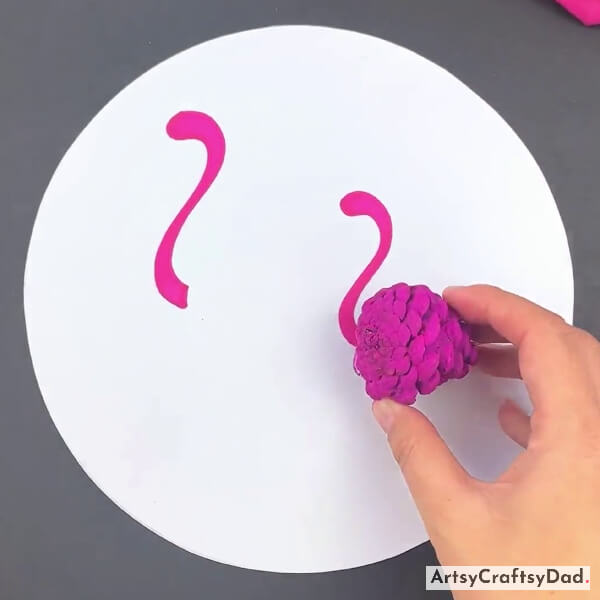
Paste the colored pine cone on the drawing sheet to make the body of the flamingo.
Step #7: Pasting Another Cone

Paste another colored pine cone on the paper by the same process.
Step #8: Drawing Beak

Draw the beak & eye of the flamingo using a black sketch pen.
Step #9: Drawing Legs
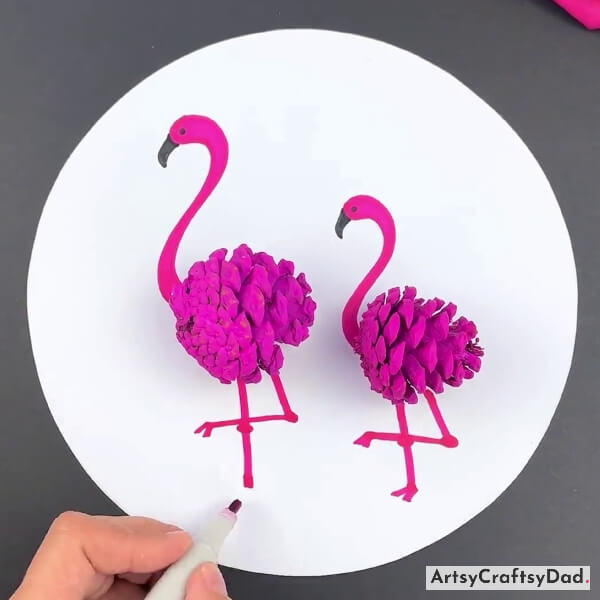
Draw the legs of the flamingo using a pink marker. Now, repeat the process of drawing the beak, eye & legs for the other flamingo.
Step #10: Making Water Splash
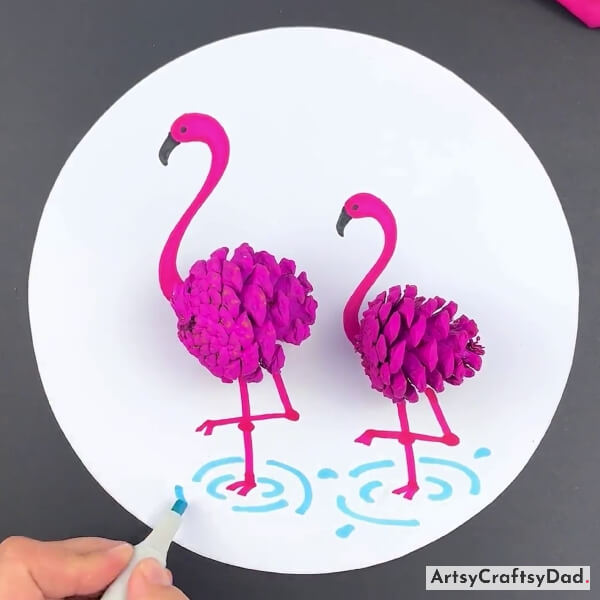
Draw some arc shapes around the legs using a blue marker to make water splashes.
Step #11: Drawing Stems

Draw some green stems on the top right side of the paper using a green marker.
Step #12: Drawing Stems On The Other Side
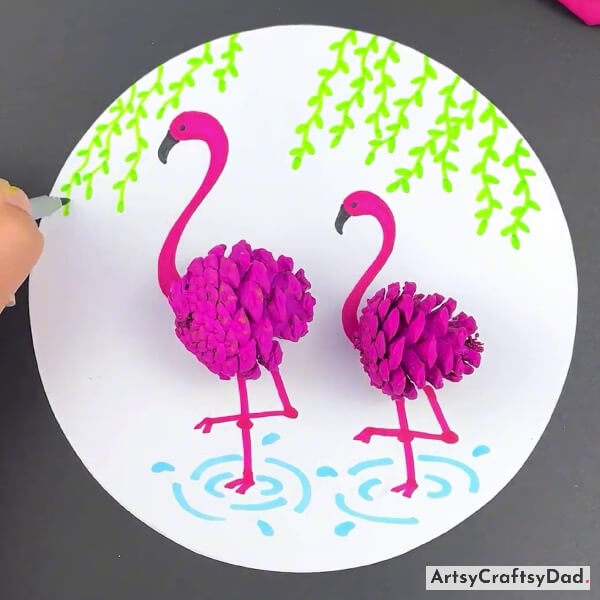
Now, draw leaves on all the stems. Then draw stems & then leaves on the top left side of the paper in the same manner.
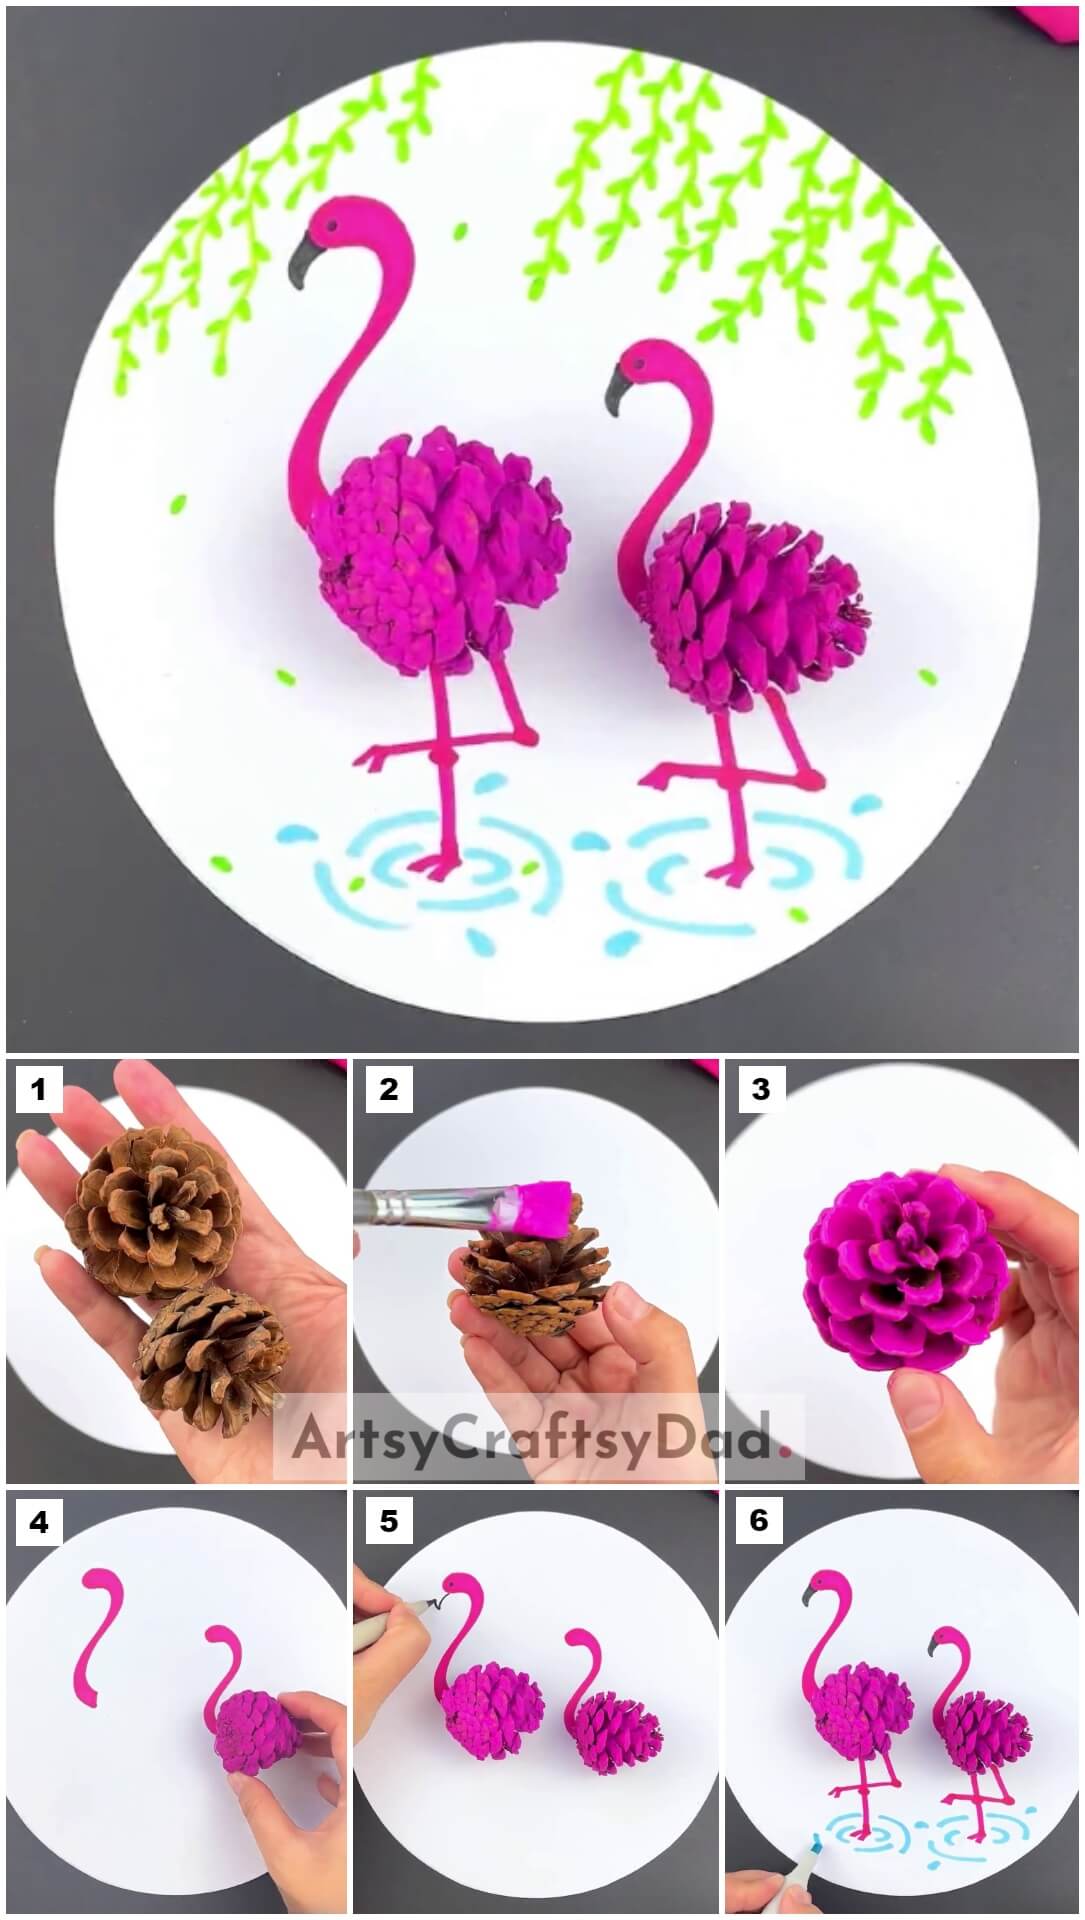
Final Look Of Our Pine Cone Flamingo Craft!
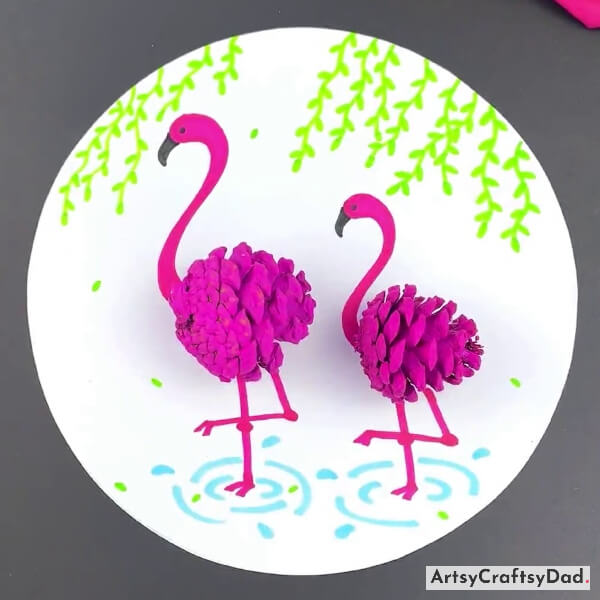
Draw some falling leaves using the green marker to make this craft realistic. Hurrah our pine cone flamingo art and craft is ready!
Here we have completed the pine cone flamingo craft. I hope you have enjoyed the process of making flamingo craft. Not only does it encourage their imagination and artistic skills, but it also teaches them about different materials and how to transform them into something beautiful. You could customize this craft by decorating it according to you. Please share your feedback in the comment section.
Thanks for choosing us!
You Might Also Like This
- Rangoli using Paper Cone | Easy way to put the dots
- Leaf Retro Plane Craft Tutorial For Kids
- Paper Origami Sofa Craft Tutorial For Kids
- Cardboard Alarm Clock Model Craft Tutorial For Kids
- Clay Flower Pot Model Craft Tutorial For Kids


