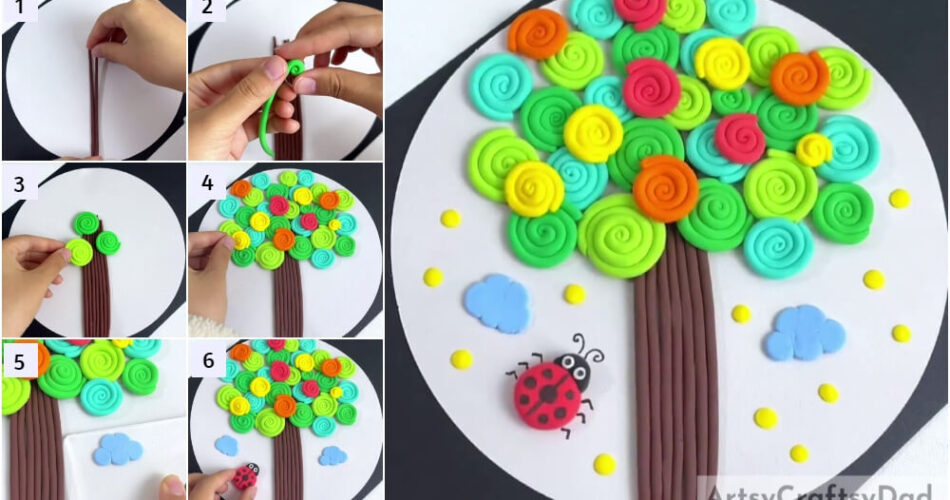
Want to make something unique and colorful craft using clay? This tutorial has got you covered! You will be making a Kandinsky circles tree!
Seriously! You have to make this one! This is a clay tree craft inspired by the Kandinsky circle composition! But we made it with a twist, making spirals! Spirals has a circle shape we just added some creativity to it! The lines and partitions of the spirals and other parts will definitely make this craft look unique and eye-catching! This craft is a whole lot of fun as well, you will love to dough and mold the clay as we guide! This step-by-step tutorial has got you covered on every step! Let’s begin!
Beautiful Kandinsky Circles Tree Clay Craft Tutorial
Must Read: Simple Paper Tearing Flowers Craft Tutorial
Supplies & Tools
- White Circular Paper Sheet
- Colored Clay
- Black Marker
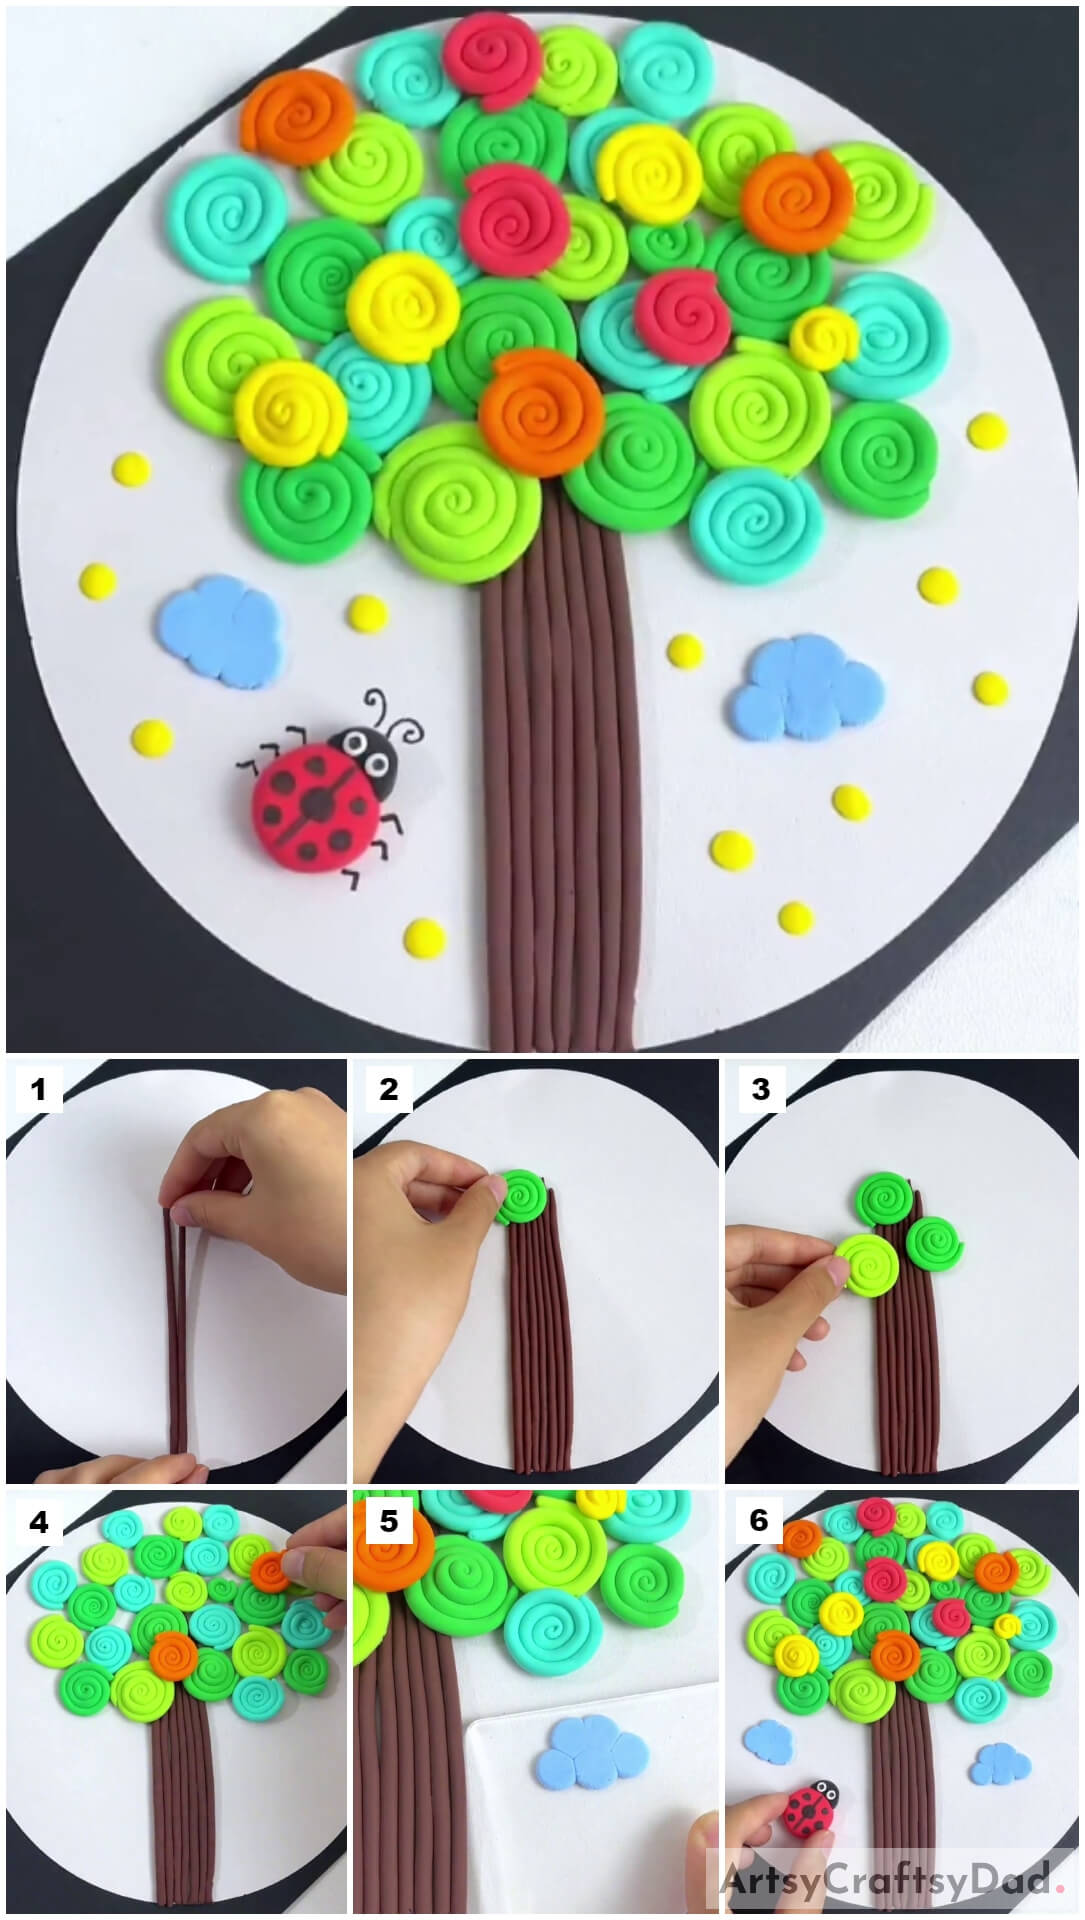
Kandinsky Tree Instructions
Step #1: Taking Some Brown Clay
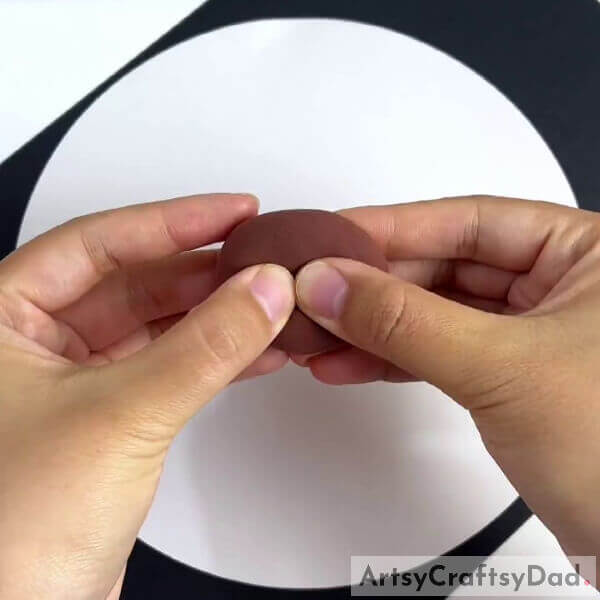
Begin this craft by taking a white circular paper sheet as the base for the craft and brown clay. Stretch and pluck out a piece of brown clay from the whole.
Step #2: Sticking Thin Clay Rolls
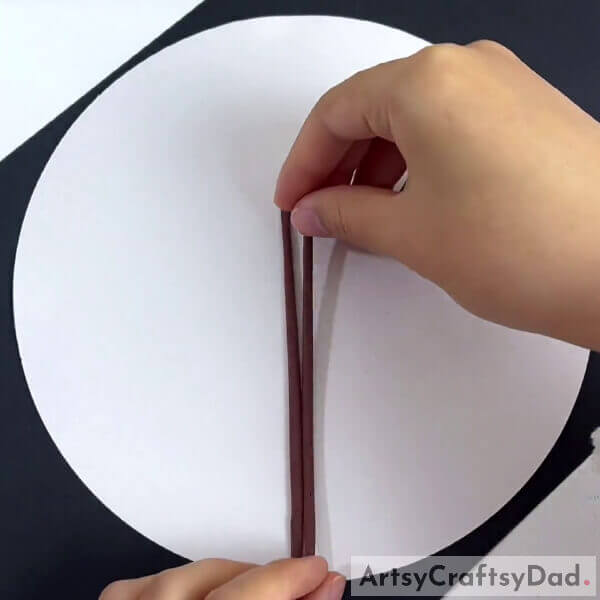
Dough the brown clay into a very thin and long clay roll and stick it onto the base vertically in the bottom center. Stick 7 of these rolls on the base one beside the other to form a thick tree trunk.
Step #3: Making A Green Spiral

Take green clay and make a thing roll of it again. Roll over this green clay roll to make a spiral of it.
Step #4: Sticking The Spiral Over The Trunk
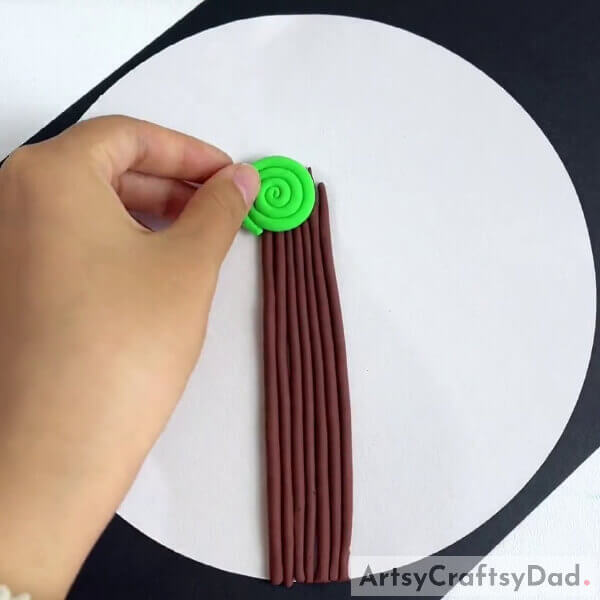
Stick the green clay spiral over the tree trunk’s top left as shown in the image. This will represent the leaf of the tree.
Step #5: Making More Green Tree Leaves
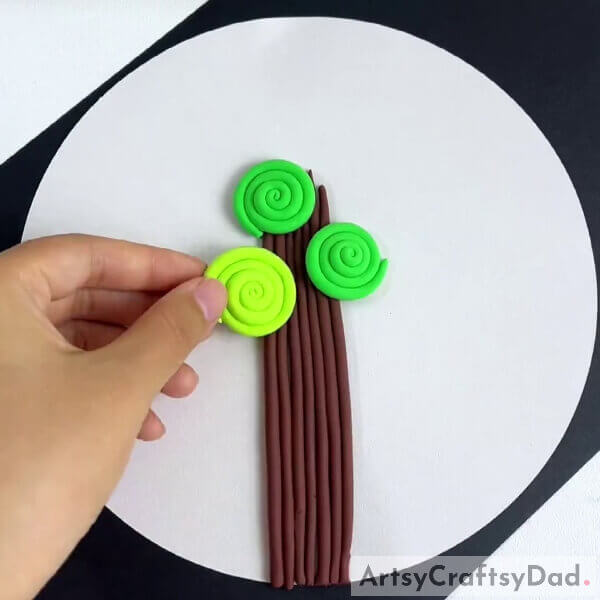
As you made the green leaf previously, make 2 more, one of the same green clay, and the other one of lime green colored clay. Stick the green on the right of the trunk a little below the already stuck one. Stick the lime green-colored clay spiral leaf on the tree trunk on the left below the green one.
Step #6: Making Different Colored Leaves Of The Tree
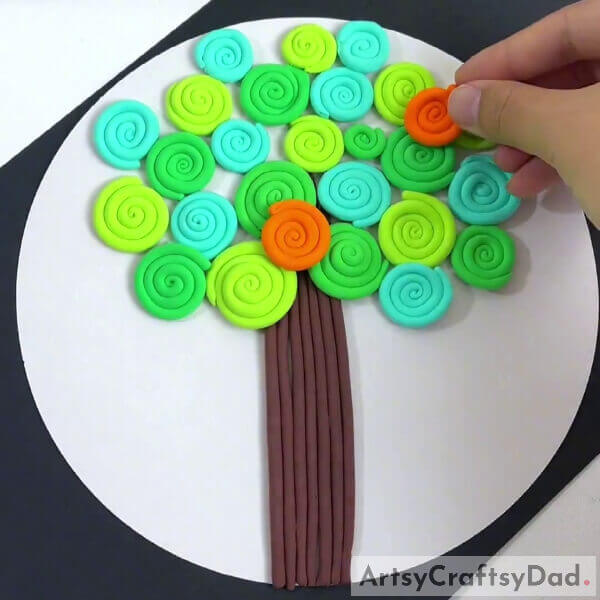
Make more leaf spirals from green, lime, green, blue, and orange colored clay and stick them onto the base making a whole bunch of leaves of the tree. See the image for reference.
Step #7: Competing Making The Leaves Of The Tree
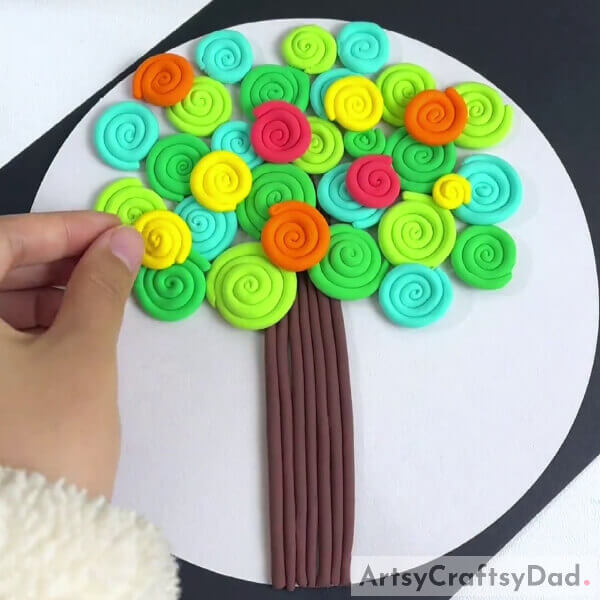
Make some more spiral leaves from orange, yellow, and red colored clay
Step #8: Making Clouds On The Base
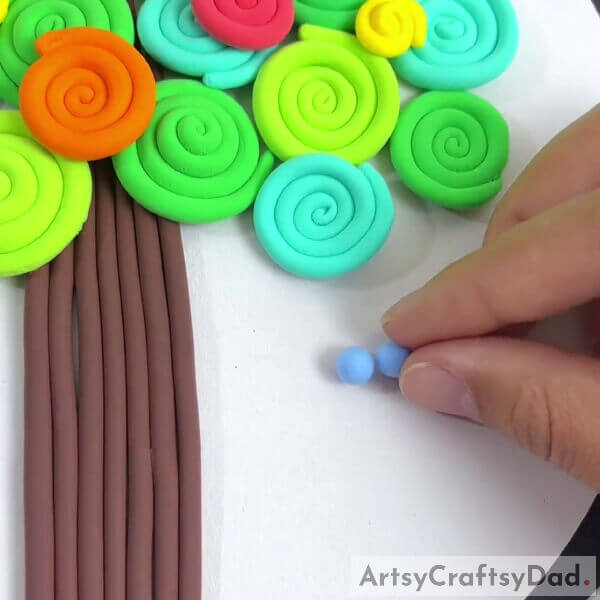
Make small clay balls from blue clay and arrange them closely on the base below the leaves of the tree on both sides to make the clouds.
Step #9: Shaping The Clouds
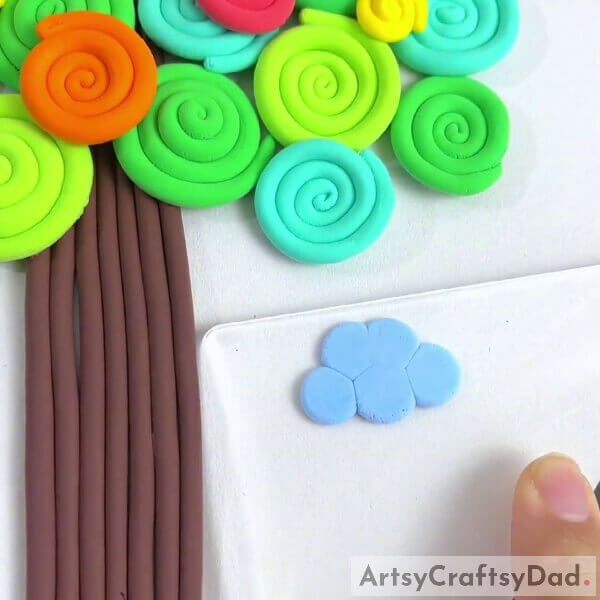
Using a polymer clay pressing tool, press the clay balls of the cloud to flatten them and shape the clouds on the base.
Step #10: Making A Ladybug
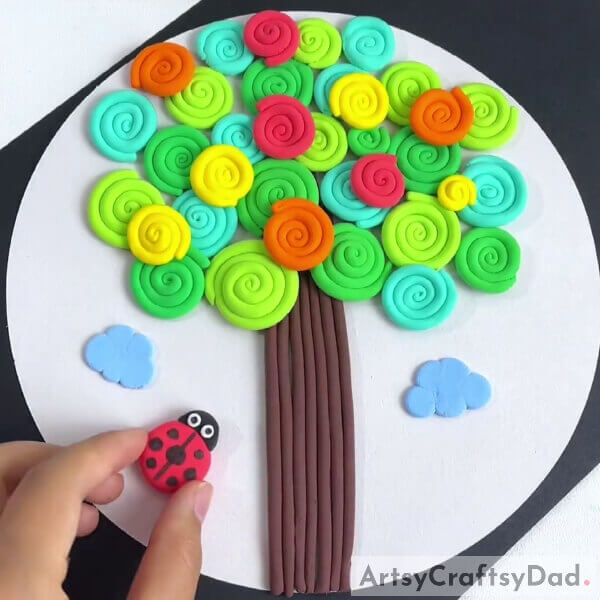
Now, make a clay ball of red clay and a smaller one of black clay. Lightly press the red clay ball to flatten it a little and using a black marker, make a line over the red clay circle to divide it in half. Now, draw 3-3 circles on the sides of the line along the boundary of the clay circle and a big circle over the line in the middle to make the body of the ladybug.
For the face of the ladybug, press the black clay circle a little as you did of the red one. Now, cut out half of the black circle by a curvy line and stick the crescent shape to the body of the ladybug. Dough 2 tiny circles and stick them over the face side by side to make the eyes and using the black marker, make dots in them to make the eyeballs.
Stick the ladybug tilted on the left side of the base below the leaves of the tree as shown in the image.
This is The Final Look Of Your Kandinsky Circle Tree Clay Craft!
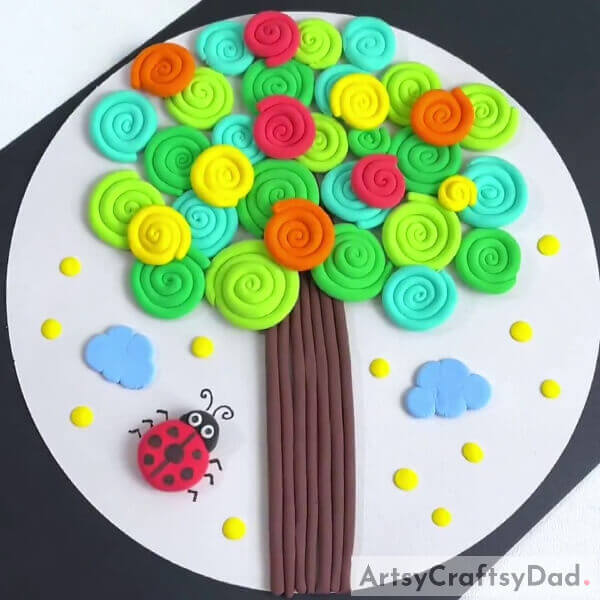
For the last step, dough tiny yellow clay balls from yellow clay and stick them onto the base randomly. Press these balls to flatten them.
Whoa! Did you just have the same reaction as I did? If yes then, say with me, ‘Hurray! We made our clay spiral Kandinsky circle tree craft’!
The craft is definitely a piece to showcase, so what are you waiting for? Hang it over in your room or display it anywhere in your home where this can be visible! See for yourself, everyone admiring your creation and gazing at it! Seriously, the partitions and line on the spirals and the tree trunk are catching my eye and I can’t take them off it! You can also use this craft as your school craft project, and flaunt it off in front of everyone! Every classmate will be envious of you for making such an amazing craft!
Hope you had fun making the craft and loved the results! Give this article a like and also, leave your feedback in the comments section below! We would love to hear from you!
You May Also Like
- Clay Snails On Leaves Craft Tutorial For Kids
- Clay Heart Leaf Tree Craft Tutorial For Kids
- Clay-Paper Sunflower Garden Craft Tutorial
- Clay Chicks In Garden Craft Tutorial
- Christmas tree decoration craft (Tutorial)


